
Introduction
While Windows 365 Cloud PCs deploy robust perimeter defences—encrypted transmission channels and multi-factor authentication that thwart network-level attacks—a critical vulnerability persists at the endpoint itself. Malicious software operating on local devices, particularly keystroke capture tools, can intercept sensitive information before it ever reaches the cloud environment. These endpoint-resident threats create regulatory exposure and potential financial damage that traditional cloud security measures cannot address.
Windows Cloud IO Protection closes this gap by introducing a kernel-level driver and system-level encryption that sends keystrokes directly to the Cloud PC, bypassing OS layers vulnerable to malware. When enabled on a Cloud PC it enforces a strict trust model:
- Only verified physical endpoints can connect.
- Endpoints must have the Windows Cloud IO Protect MSI installed.
- If the MSI is missing, the session is blocked and an error is displayed.
This ensures a secure, uncompromised input channel between the Windows client and the Cloud PC.
In this blog post myself and fellow MVP buddy Niall Brady overview this new feature and show you how you can set this up for Windows 365 Cloud PCs.
Requirements
The following requirements are needed at present. The feature is public preview and could change as this becomes Generally Available:
- Host physical Windows 11 devices
- Devices must have TPM 2.0
- Host devices must have the Windows Cloud IO Protect agent installed
- Download the Windows x64 release
- Download the Windows ARM 64 release
- Windows App running 2.0.704.0 or later
The following is not currently supported:
- macOS
- iOS
- Android
- Windows 365 Link
- Using the Web client
Setting it up
When it comes to setting up the Windows Cloud Keyboard Input Protection feature, Microsoft has an interesting approach in that its documentation currently only supports using group policy to achieve this. The setting Windows Components > Remote Desktop Services > Remote Desktop Session Host > Azure Virtual Desktop > Enable Keyboard Input Protection needs to be enabled.
During our testing phase, we were fortunate enough to be part of the private preview release, we had to set the following registry keys for Windows 365 devices, with just the former key being required for AVD devices:
HKEY_LOCAL_MACHINE\SOFTWARE\Policies\Microsoft\Windows NT\Terminal Services\
DWORD - fWCIOKeyboardInputProtection
Value - 1

HKLM\SYSTEM\CurrentControlSet\Control\Terminal Server\RdpCloudStackSettings
DWORD - SecureInputProtection.KeyboardProtection.IsEnabled
Value - 1
To assist with this on your Entra only Cloud PCs, we have created an Intune proactive remediation script to set the values, if they are not present on your Windows 365 devices. These scripts need to be targeted to the Cloud PCs, and not the host devices.
You can download the detection and remediation scripts from GitHub.
Adding the Proactive Remediation script for Keyboard Protection
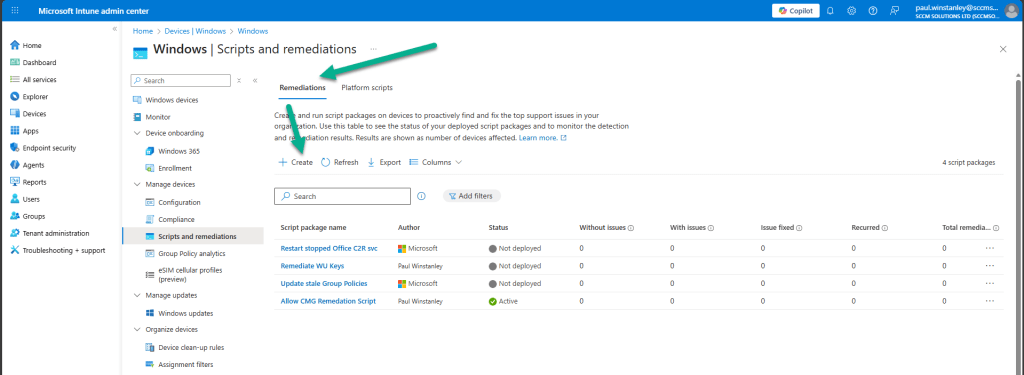
In the Intune admin center, navigate to Devices | By platform | Windows | Manage devices | Scripts and remediations.
Ensure you are in the Remediation view and click Create.
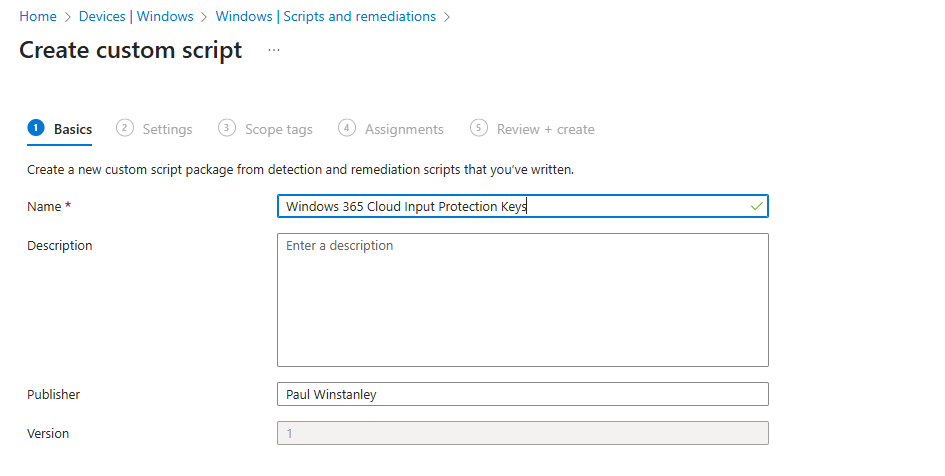
Enter a Name for the custom script and add an optional Description. Click Next when done.
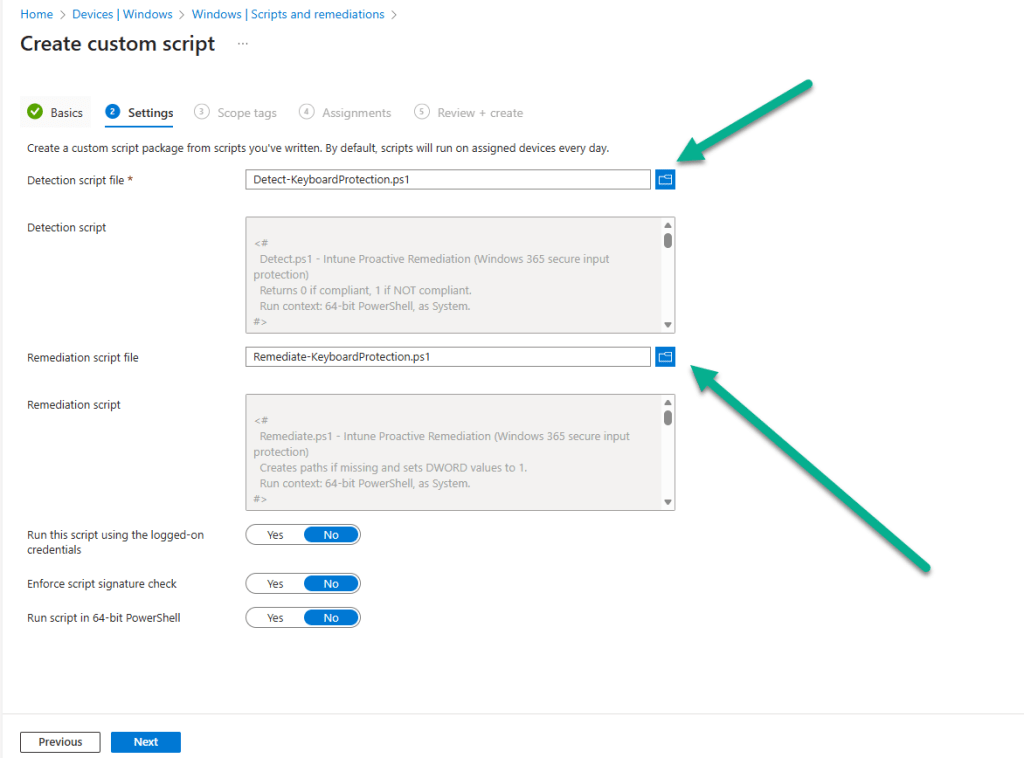
Click the browse icon for the Detection script file and upload the Detect-KeyboardProtection.ps1 downloaded from GitHub. Repeat the process for the Remediation script file by uploading the Remediate-KeyboardProtection.ps1 script. Leave all other options as default and click Next.
At the Assignments section, choose the group of devices that you wish to targeted. You can adjust the schedule for the execution of the remediation by clicking the Daily link under Schedule.

For example, for our testing we have set the remediation to run Hourly. Click Apply when you have made your adjustment.

The new schedule will be reflected accordingly in the Intune console.

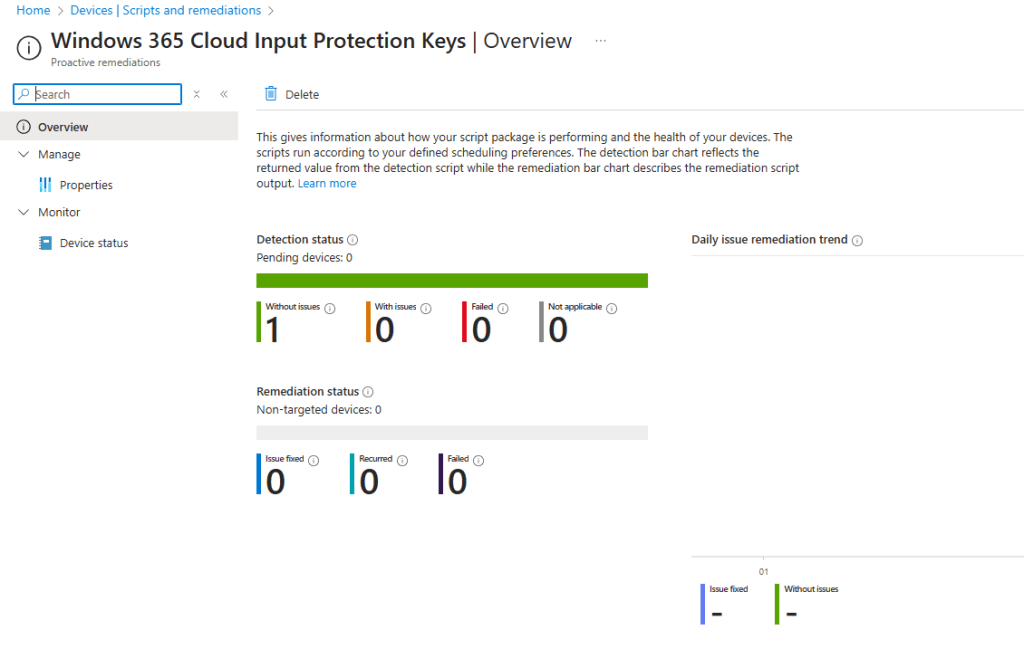
When you have completed the proactive remediation wizard, you will see the new remediation listed and with a Status of Active.

When the script has executed against devices, the Detection status will be reported back to Intune with statuses of Without issues, With issues, Failed or Not applicable. Any Remediation status data will also be reported where applicable.
Installing the Windows Cloud Input Protect MSI Agent
Referring back to the Microsoft documentation, the MSI install is documented using a manual method of installation the application, and this would require local admin rights to achieve this. Instead, we can push the Windows Cloud Input Protect MSI via Microsoft Intune to an Intune managed host device.
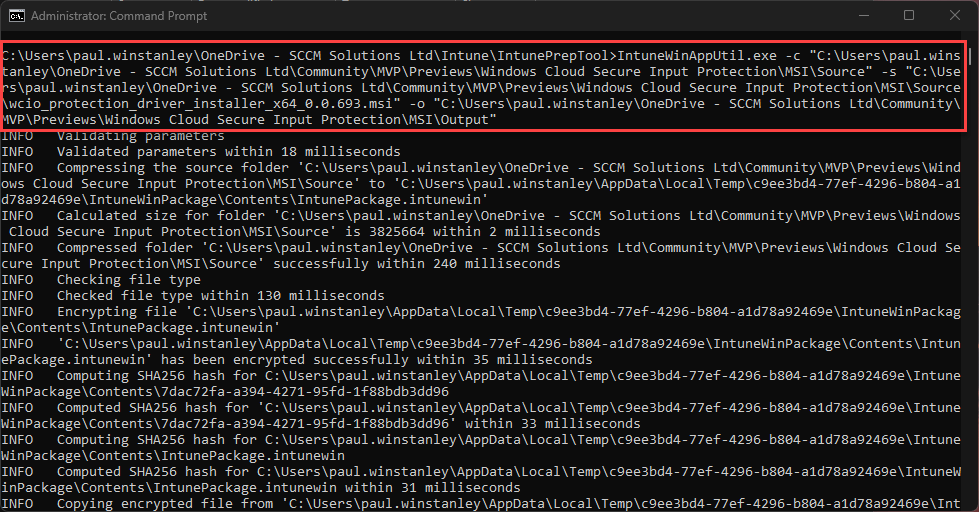
We can configure the application as a Win32 app and, therefore, we need to use the Microsoft Win32 Content Prep Tool, which you download from https://github.com/microsoft/Microsoft-Win32-Content-Prep-Tool, to convert the app into the .intunewin format.
Here is a blog written back in 2019 on how to use the Content Prep Tool https://sccmentor.com/2019/02/17/keep-it-simple-with-intune-4-deploying-a-win32-app/
We can package the MSI into the required .intunewin format with three simple switches:
- -c – this points the tool to the source folder containing the binaries
- -s – this points the tool to the setup file used to execute the application
- -o – this tells the tool where to output the .intunewin to
Once the tool is run, it quickly creates the .intunewin file for the Windows Cloud Input Protect MSI.
We can now take this file and import it into Intune when we create the Win32 app.
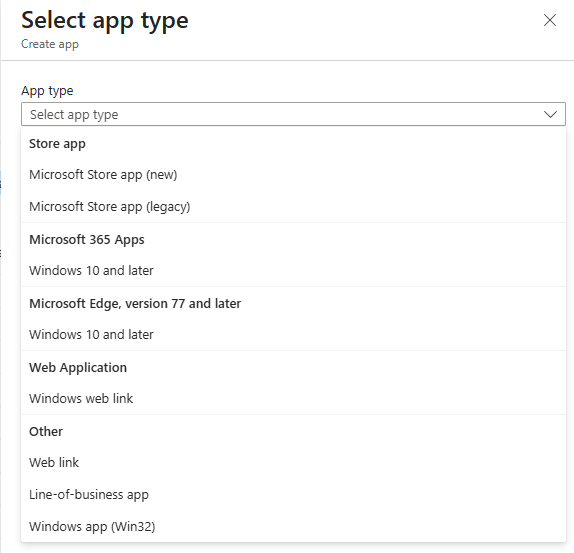
Navigate to Apps | Platform | Windows, in the Intune admin center. Click Create.

From the App type drop-down, select Windows app (Win 32) and then choose Select.
You will now be navigating through the Add App wizard. Start by clicking Select app package file.
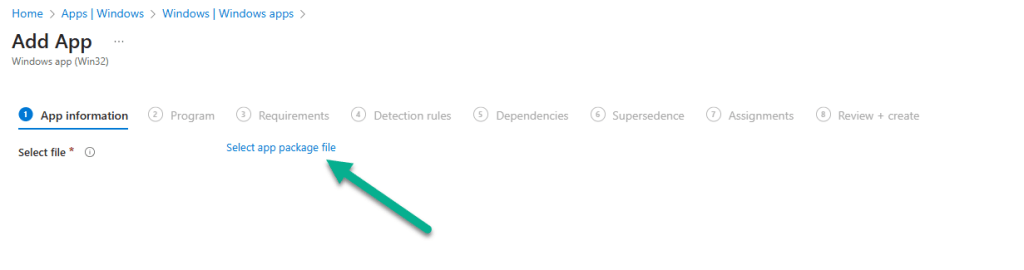
Click the browse icon and locate the .intunewin file that you created. Click OK to upload the file.

Details will be automatically added to the App information fields. The only mandatory field you will need to complete is the Publisher field. Feel free to add any further information you require. Click Next when done.

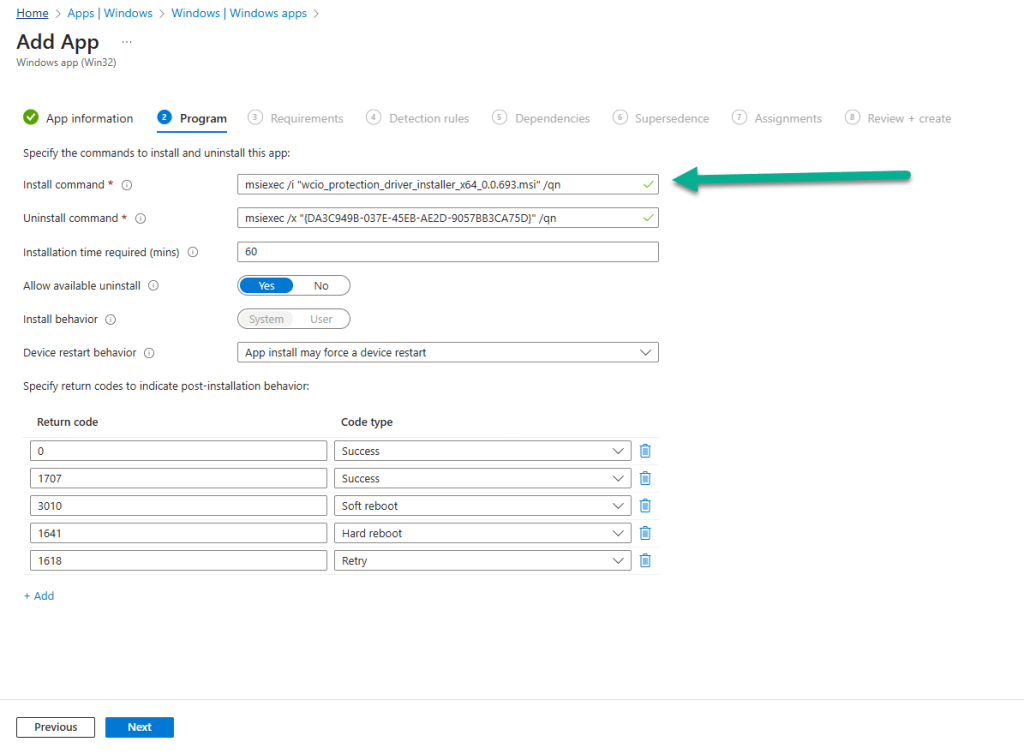
In the Program section of the wizard, further details will be automatically added, such as Install command and Uninstall command. We will use these default values for our application. Click Next to continue.
In the Requirements section, you can be selective on the specific requirements for the installation of the app. We have ensured that Yes. Specify the systems the app can be installed on is selected and we have chosen Install on x64 systems as we downloaded the x64 release of the MSI. You must also select a Minimum operating system level for the install. Click Next when you have completed this section.

For the Detection rules, we have kept this simple and chosen Manually configure detection rules from the Rules format drop-down and chosen the MSI type, which automatically uses the MSI ID for the application.

Finally, a reminder that when targeting the Windows Cloud Input Protect MSI agent, we are targeting Windows 365 host devices and not the Cloud PCs themselves.

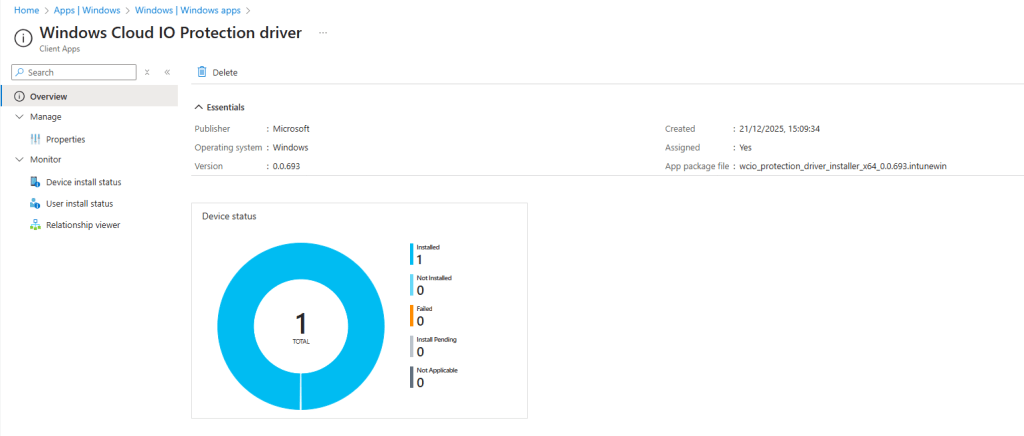
When the Windows Cloud Input Protect MSI agent installs, you will see an entry for the Windows Cloud IO Protection driver in Program and Features on your host device.

and, hopefully, this is reflected in the Intune admin center in the apps Overview section.
Connecting from a host device which is not running the Windows Cloud Input Protect MSI agent
At present, there is no visual indication to let you know if the Cloud PC is running with keyboard protection enabled, and this was one of the feed back areas in the private preview. It is coming and we should expect something fairly soon.
When you attempt to connect from a device which is not running the agent, you will get the following error dialog box.
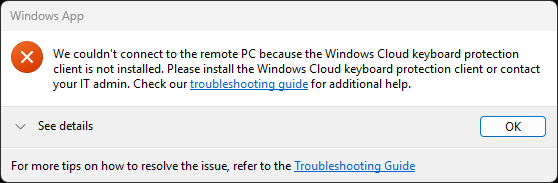
and Windows App will report similar. We expect to see something similar, like the AI-enabled heading on a device which has the AI features enabled. Fingers crossed that this arrives soon.

Connecting from a non supported device platform can produce different error messages that are less intuitive. For example, the screenshot below shows the error when connecting from the Windows App on an Android device. Hopefully, support will be extended to other device platforms over time, and error messages updated to reflect the connection issue.

Read more
- Keyboard Input Protection for Windows 365 and Azure Virtual Desktop now in preview – https://techcommunity.microsoft.com/blog/windows-itpro-blog/keyboard-input-protection-for-windows-365-and-azure-virtual-desktop-now-in-previ/4468102
- Windows Cloud IO Protection – https://learn.microsoft.com/en-us/windows-365/enterprise/windows-cloud-input-protection
Summary
Windows Cloud IO Protection is a powerful security feature that ensures keystrokes are encrypted and sent directly to the Cloud PC, bypassing OS layers vulnerable to malware. By requiring trusted endpoints with the protection agent installed, it creates a secure, uncompromised input channel that blocks keyloggers and prevents data leaks.
Microsoft is taking into the account the feedback it received during the private preview and we should see some feature changes happening very shortly to improve the end user experience.
Beyond this, we hope that support is adopted for all device platforms, so that this security feature becomes OS agnostic.
We look forward to seeing how this new feature matures and develops before being released to production.
