The latest Tenant Attach feature to drop via the ConfigMgr Technical Preview, is the ability to create and deploy firewall rules to endpoints.
You must have Tenant Attach enabled and uploading your devices into the Endpoint Manager Admin Center for this feature to work. I have details on how you can set this up here. Another things to note is that this works with Windows 10 or later clients.
It’s a two step process, first we need to enable configuration within ConfigMgr itself, before we create the policy in the Endpoint Manager Admin Center.
In the ConfigMgr Console
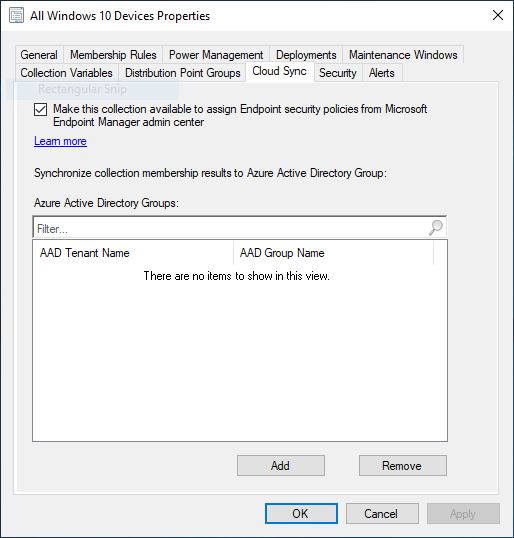
We need to define a collection which will become available in the Admin Center for targeting of the firewall policy and to do this we right click a collection of choice, go to the Cloud Sync tab and enable the Make this collection available to assign Endpoint security policies from Microsoft Endpoint Manager admin center checkbox. Once done click OK.
In the MEM Admin Center
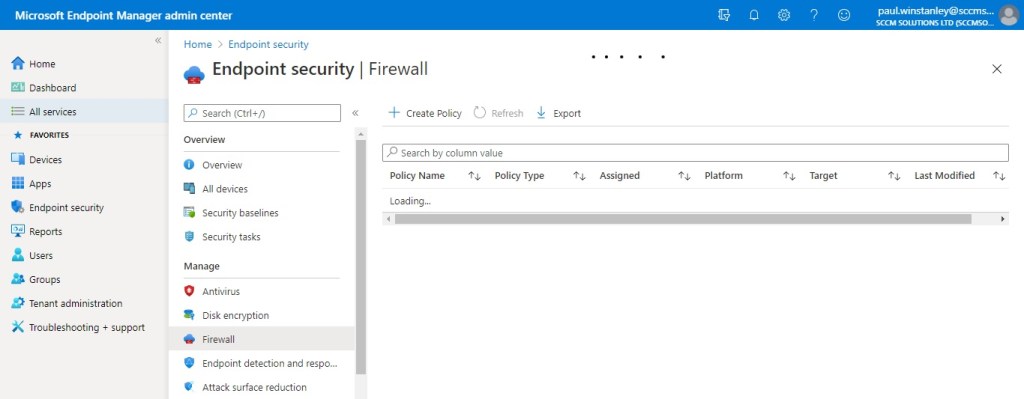
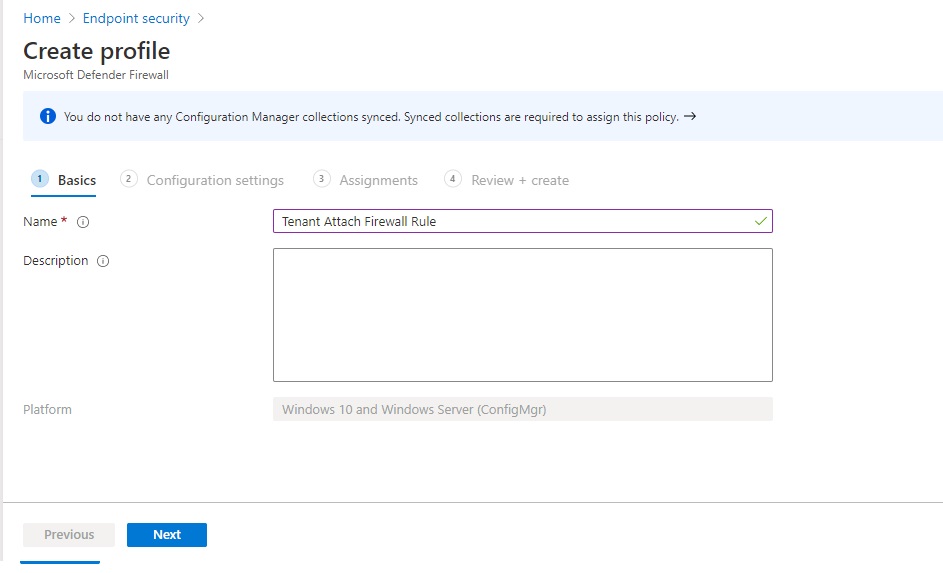
In the MEM admin center, select Endpoint security\Firewall. Click the Create Policy link.
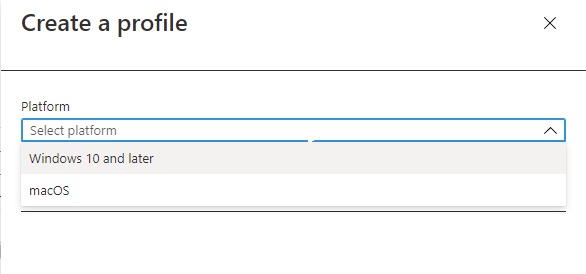
From the Platform drop down choose Windows 10 and later.
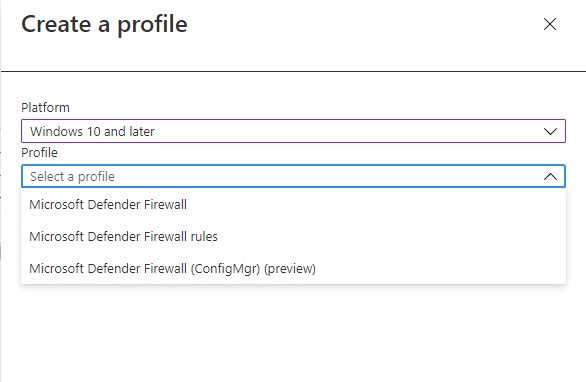
From the Profile drop down, choose the Microsoft Defender Firewall (ConfigMgr) (preview) option. Click the Create button.
Give your policy a Name and, optional, Description.
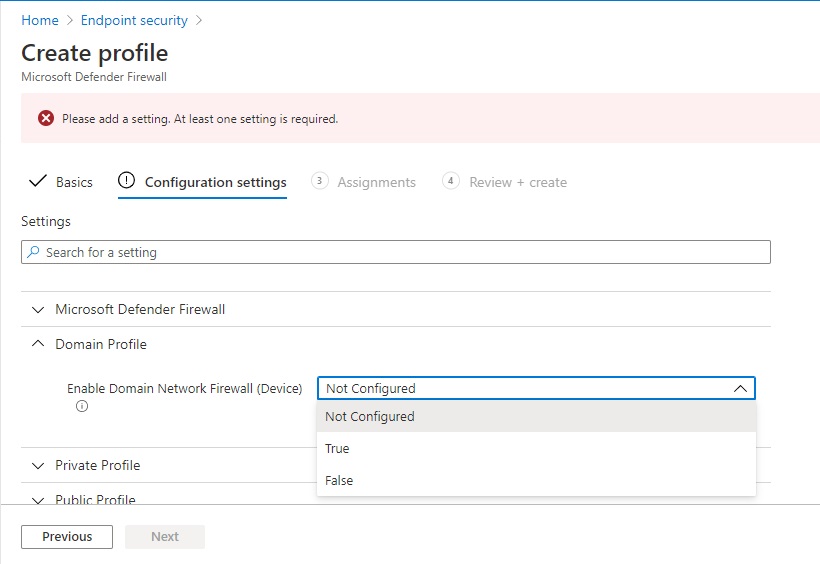
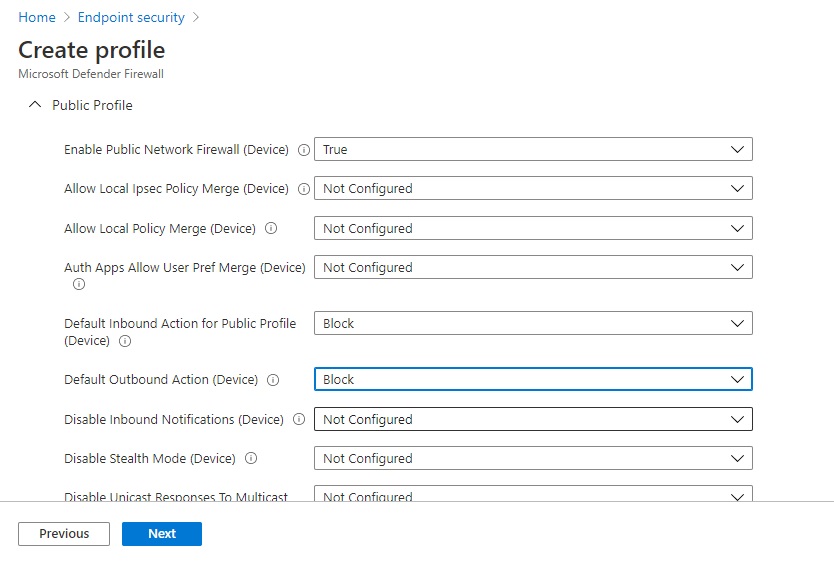
In the Configuration Settings, you have the option to select Microsoft Defender Firewall, Domain Profile, Private Profile and Public Profile settings.
I’m going to select some basic Domain, Private and Public Profile settings which determine inbound and outbound rules based on NCSC guidelines.
To start the process, I need to drill into the Domain Profile and set Enable Domain Network Firewall (Device) to True to turn on the settings for this profile.
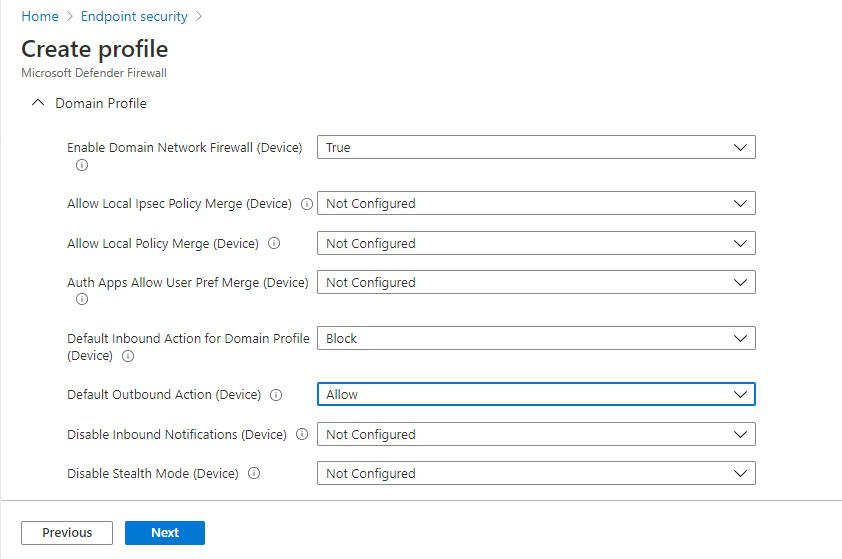
I am then able to configure the individual settings for this profile.
I have set the following in alignment with NCSC guidance:
- Default inbound Action for Domain Profile – Block
- Default Outbound Action (Device) – Allow
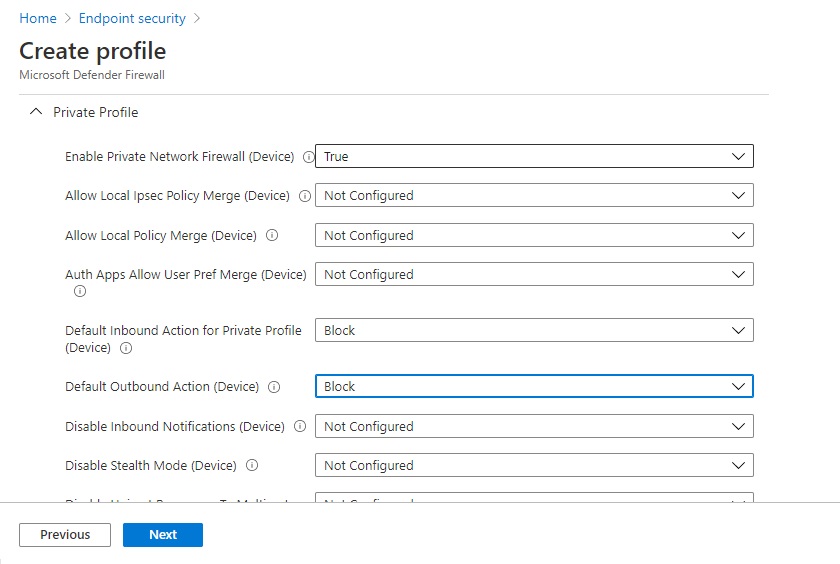
I have repeated the process for Private and Public Profiles based on NCSC guidance. When the configuration is complete, click Next.
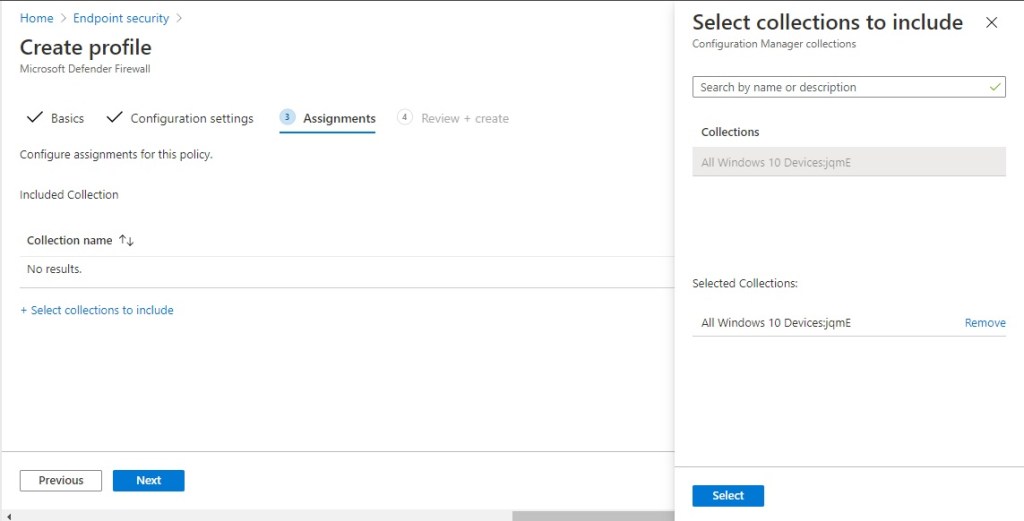
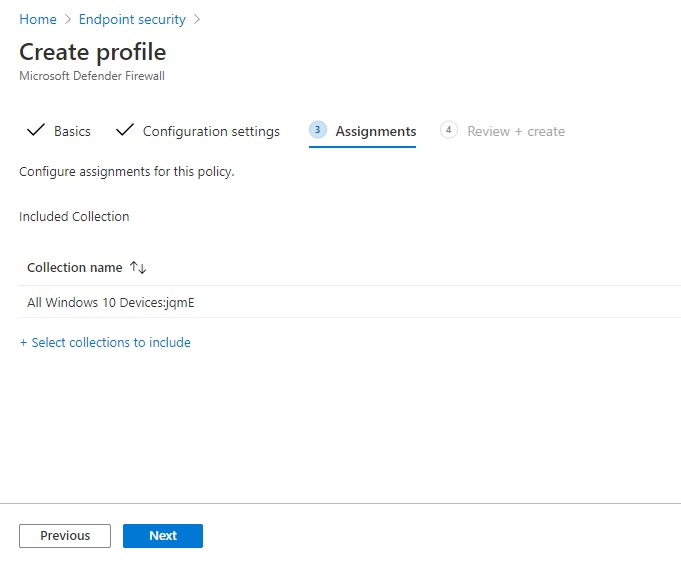
In the Assignments section, we need to choose a collection from ConfigMgr to target the policy at and this is where our configuration in the console earlier kicks in.
Click the Select collections to include link and then choose the collection Cloud Sync was enabled on. Click Select.
Click Next.
Click Create to complete the Firewall Policy wizard.
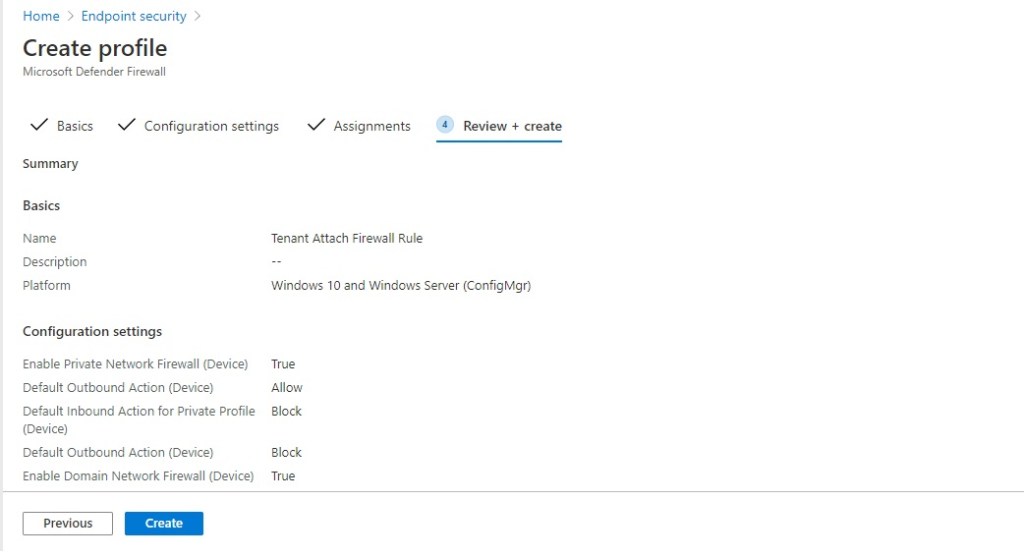
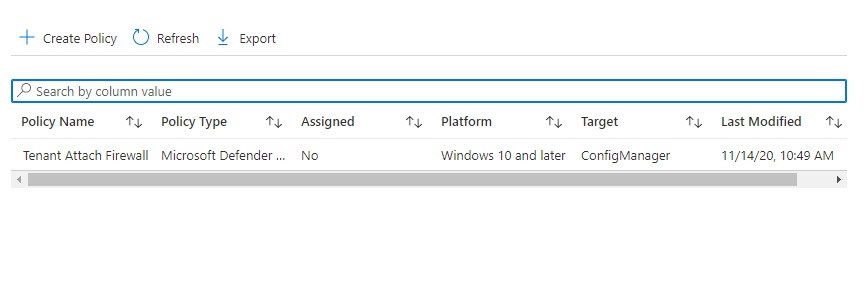
Your new policy will be listed in the Endpoint Manager Admin Center.
On the endpoints
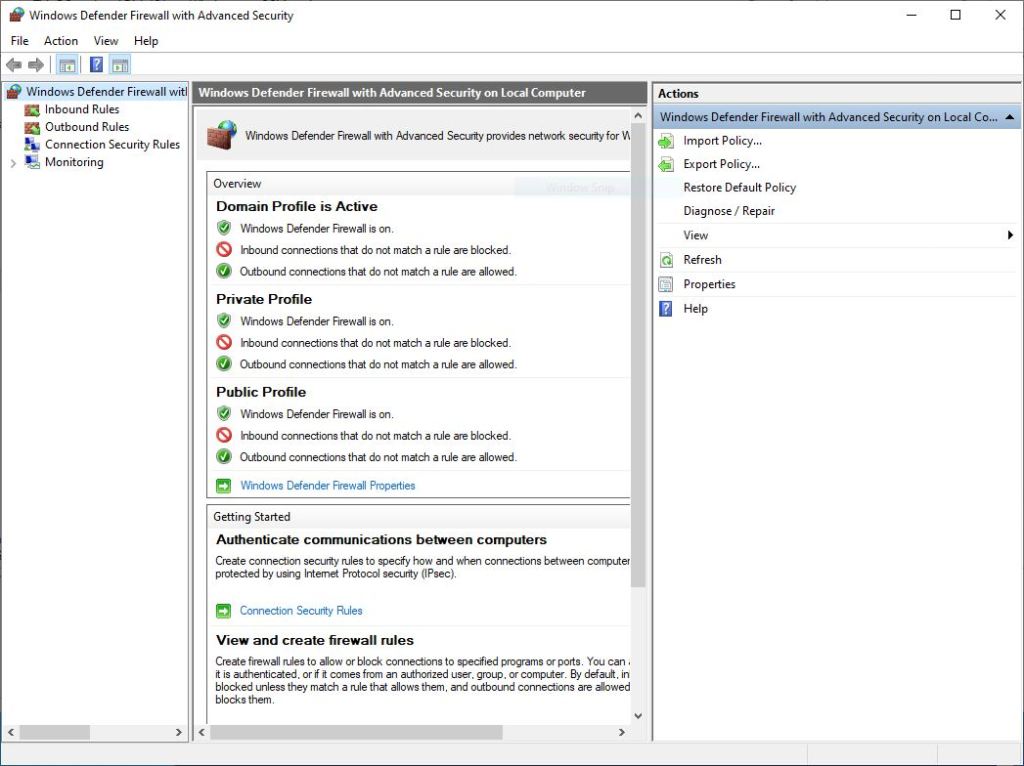
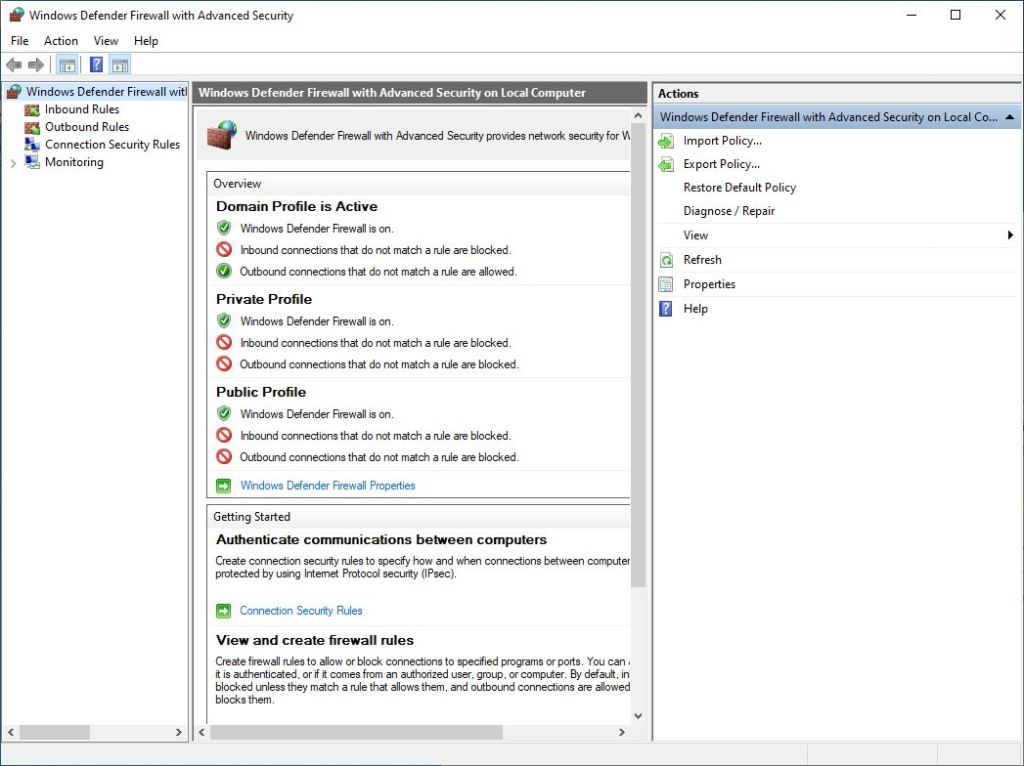
As a reference here’s the existing firewall settings on my Windows 10 device. Pretty much the default.
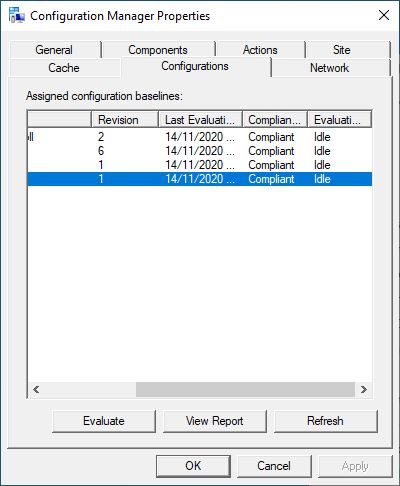
Once the endpoints start to get the policy you can see a compliance item in the Configurations tab of the ConfigMgr applet in control panel.

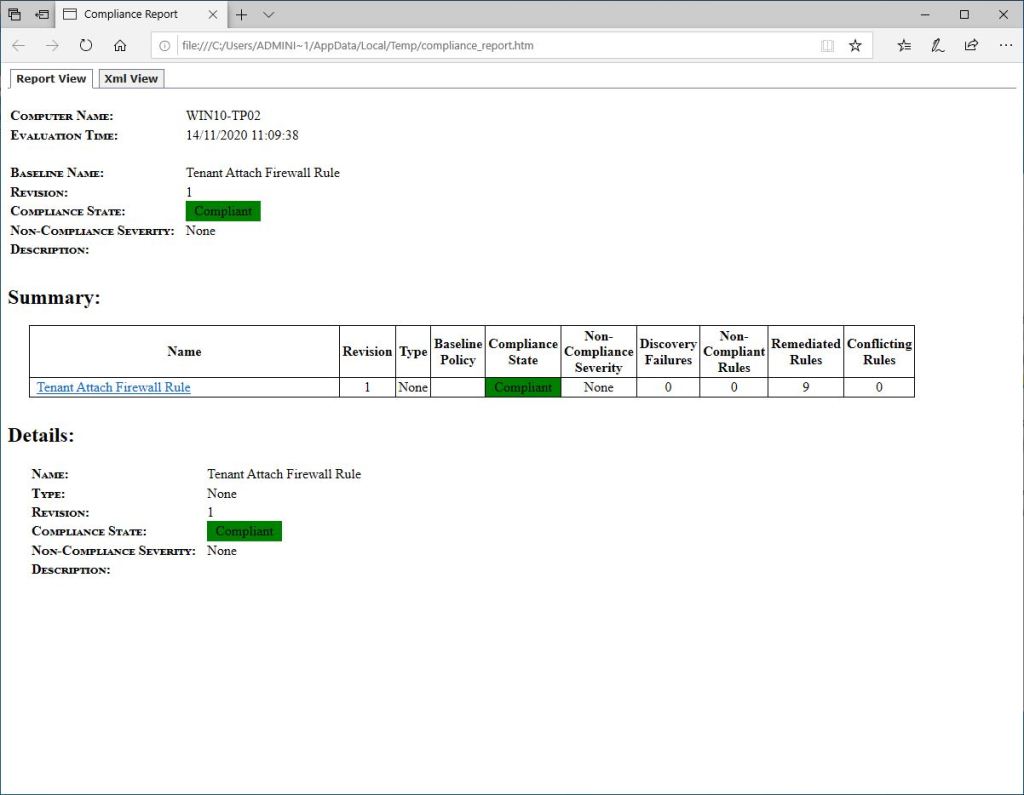
If the policy has applied OK, I hope to be compliant after an evaluation. So I clicked the Evaluate button and sure enough, it reported back as Compliant.
Taking a look at the firewall settings, I can now see that they have set accordingly.
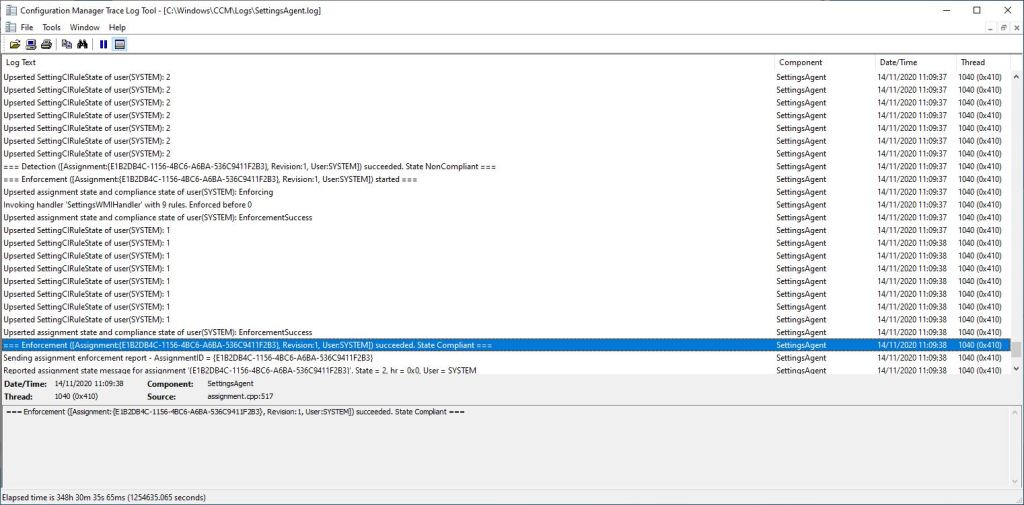
Taking a look under the hood, I can see policy applying in the SettingsAgent.log and the device reporting as compliant.
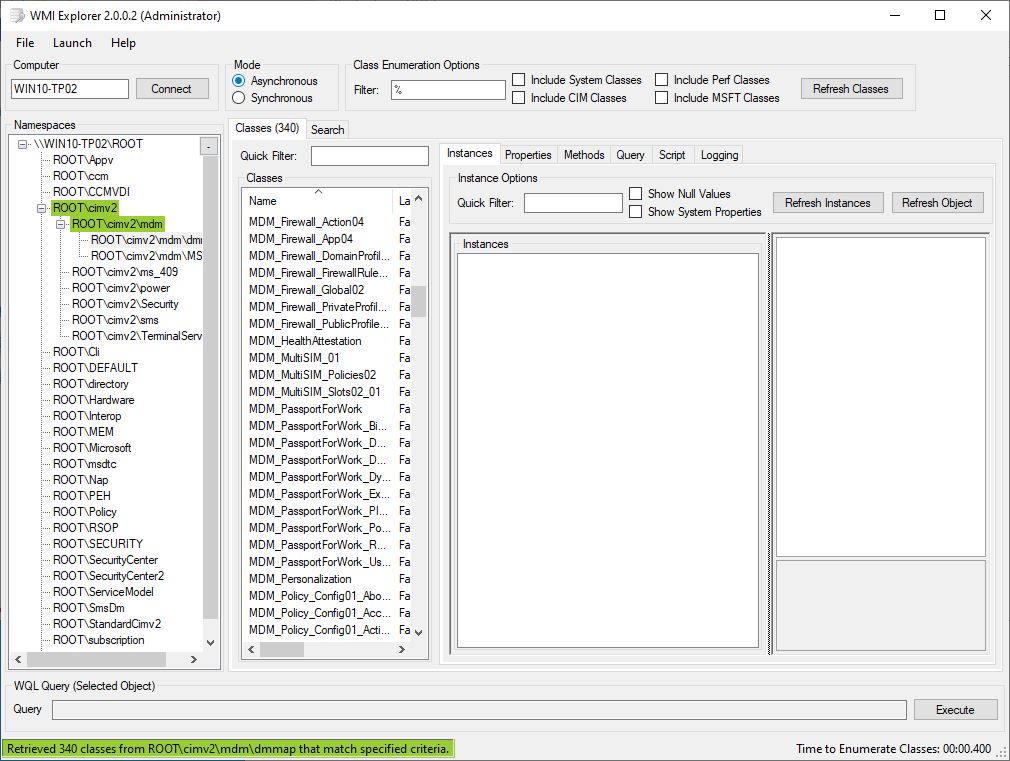
And in WMI, under the ROOT\cimv2\mdm\dmmap WMI namespace, I can see the following instances:
- MDM_Firewall_Action04
- MDM_Firewall_App04
- MDM_Firewall_DomainProfile02
- MDM_Firewall_FirewallRules02_01
- MDM_Firewall_Global02
- MDM_Firewall_PrivateProfile02
- MDM_Firewall_PublicProfile02
Another great addition to the Tenant Attach feature set and I hope to blogging more on Tenant Attach in the coming months.
