
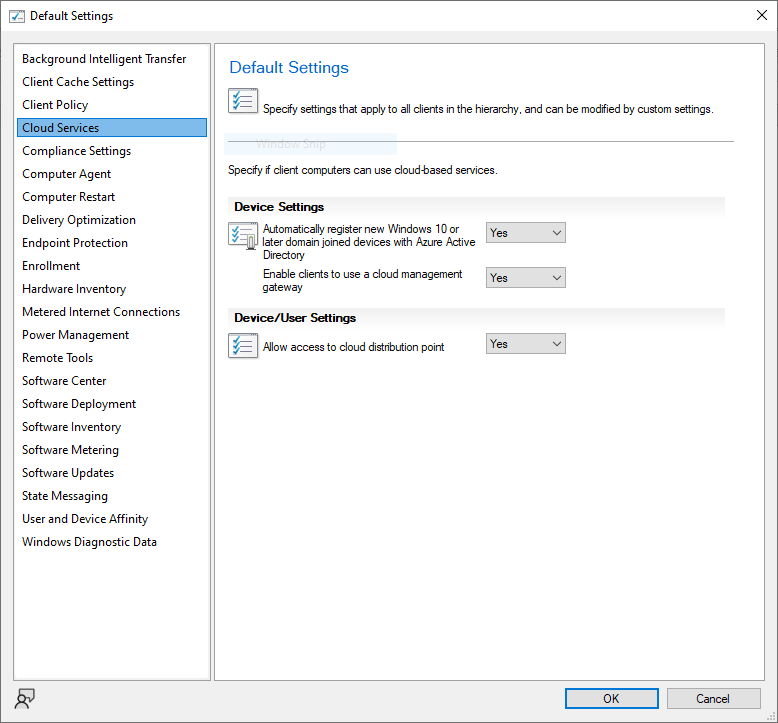
When allowing the usage of the Cloud Management Gateway in ConfigMgr, we assign a client setting for Enable clients to use a cloud management gateway and this can be set in the Client Settings under Administration\Overview\Client Settings in the Cloud Service section. Note we can also Allow access to cloud distribution point so clients can access content from the associated CDP.
Some admins don’t like to modify the default client settings and we tend to advice against this and to copy the default off into a custom settings policy. Also when testing the CMG, admins also like to be granular, rather than applying a change across all devices in the environment. A prudent decision.
When we have devices which are already existing in ConfigMgr, we can create a collection of these devices, and use a custom client setting deployed to our collection which lets them access the CMG. When they next go Internet based, they have the policy and are let loose on the CMG, receiving policy, running software updates scans, and if allowed to the CDP, grabbing content and installing apps etc.
If your device is new to ConfigMgr, and is coming in from an external location, for example it is an Entra ID joined device, then this presents a challenge as we can’t put our device into a collection to receive the Enable clients to use a cloud management gateway client setting and so we would have to fall back to enabling the setting in the default client setting. However there is a way which is easily achieved via Microsoft Intune (or any external device so long as you can modify the registry on that device and create a collection based that the device will become a member of!).
What happens when we are not allowed the CMG
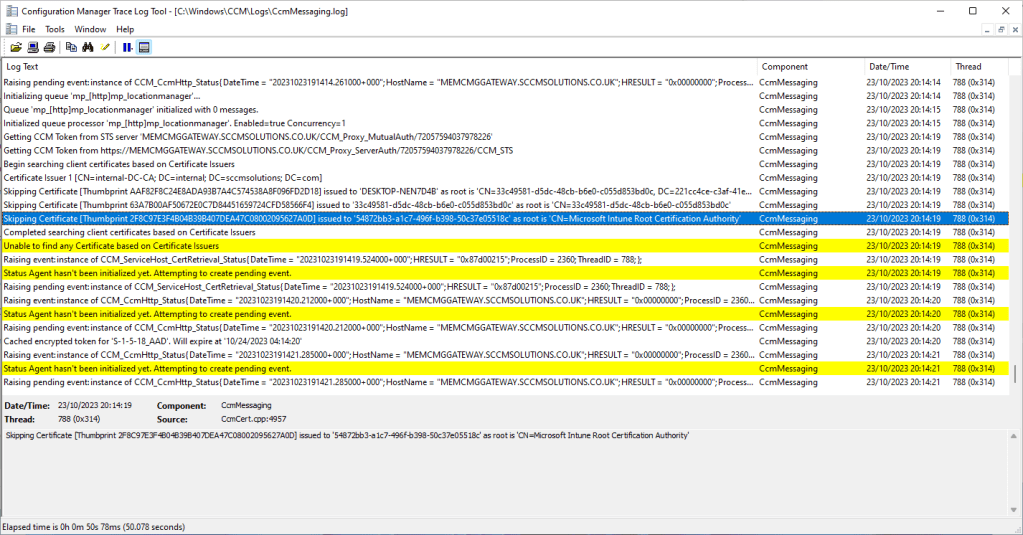
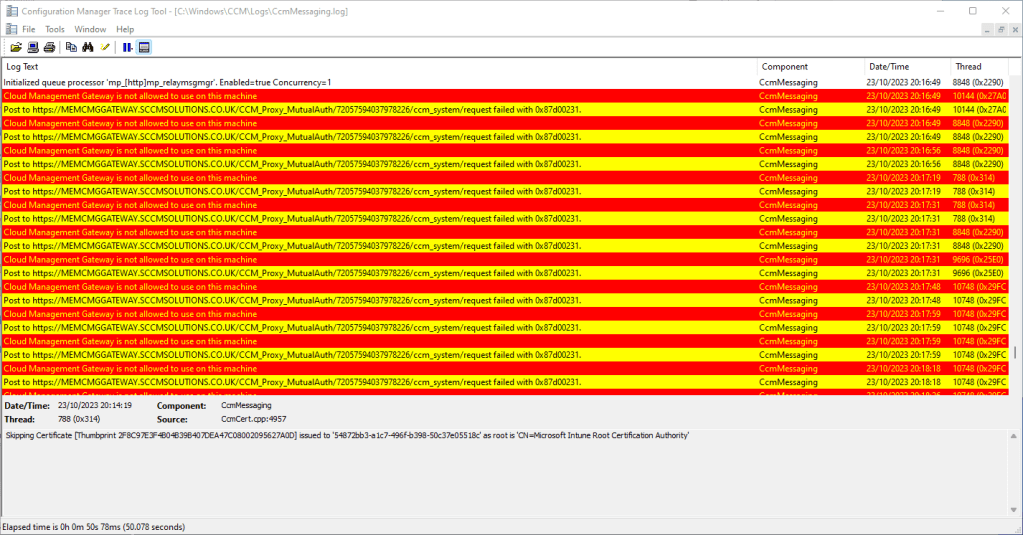
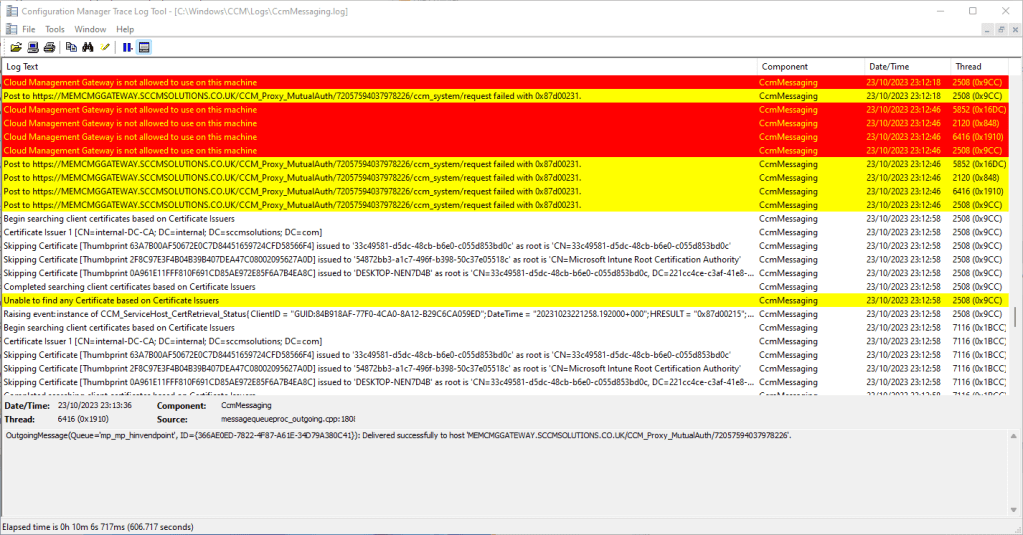
When installing the client via the CMG and the ccmsetup has completed, we can see that the client is allowed to talk to the CMG. All clients are initially allowed to communicate with the CMG, it is just policy which then dictates whether further comms can continue, as we will see. We can see the device is chatting away nicely in the CcmMessaging.log.
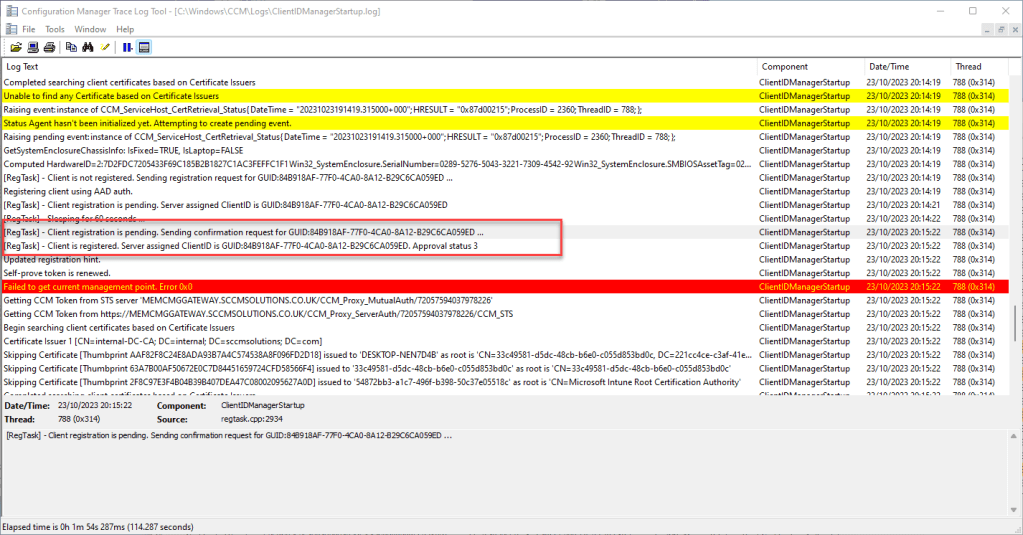
We get to the point of the the client registering with the site, which can be checked in the ClientIDManagerStartup.log file, and the client registers successfully.
Now, the client will receive policy from ConfigMgr. The PolicyAgent.log churns away and show policy is being processed.
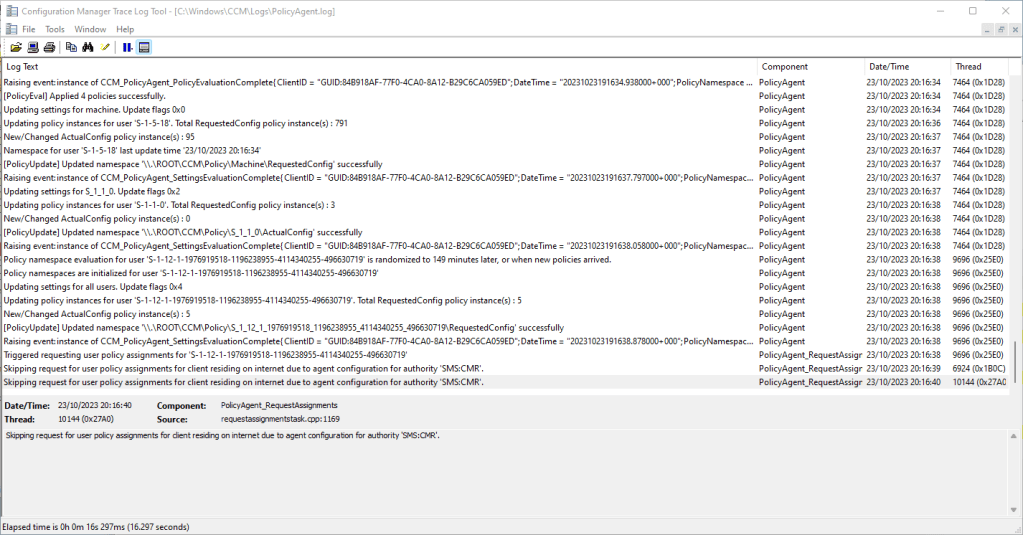
However at this point, the client will have received policy that is is not allowed to use the CMG and therefore will be blocked. If we hop back to the CcmMessaging.log we are instantly presented with a sea of red and told that Cloud Management Gateway is not allowed to use on this machine and Post to the <CMG> request failed with 0x87d00231.
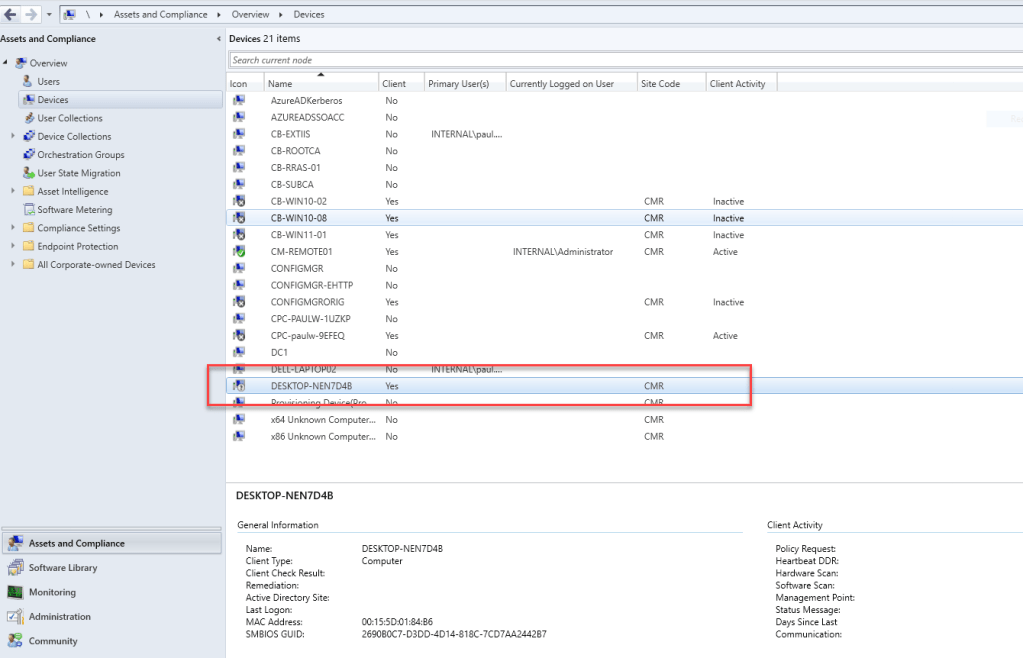
The device does exist in ConfigMgr, as it has registered and the information associated with it is what you would expect from a MP client registration but there is zero time for a device to get populated into another ConfigMgr collection and have an ‘allow CMG’ client setting to be targeted at it.
Targeting the Entra ID device
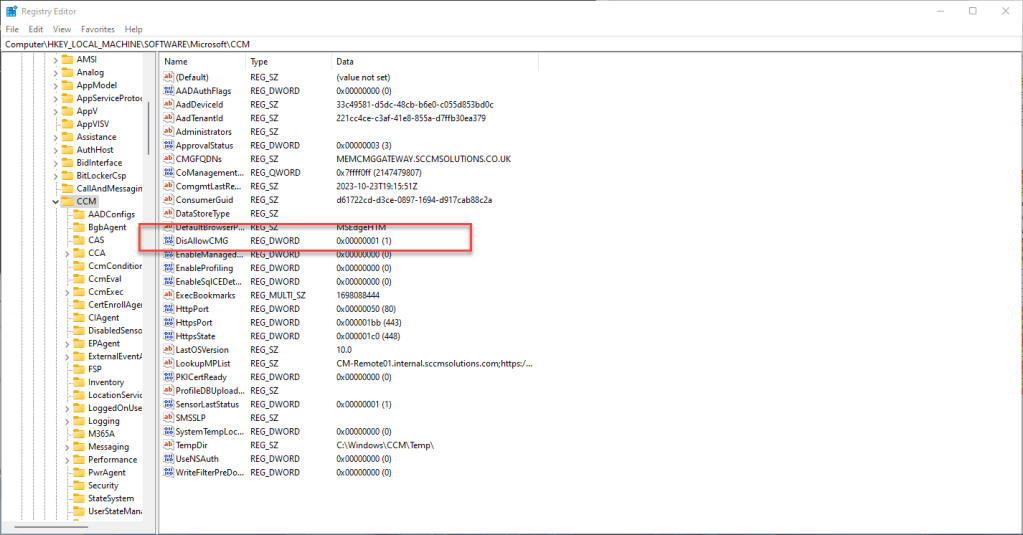
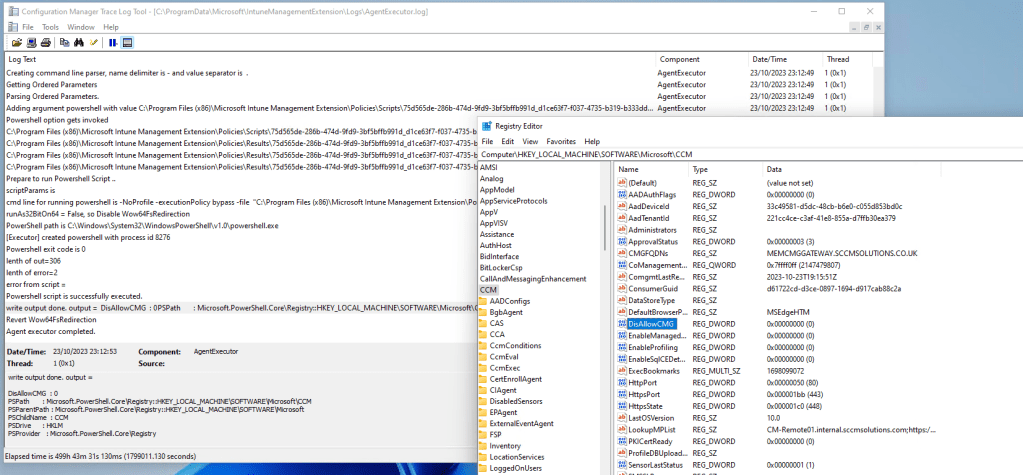
So how can we get around the problem without enabling the Enable clients to use a cloud management gateway setting on the Default Client Setting? Quite simple, we can use a registry key which the client setting is enabling. This is the DisAllowCMG key located at Computer\HKEY_LOCAL_MACHINE\SOFTWARE\Microsoft\CCM.
Taking a look at my denied device I can see this is set to 1, therefore to enable CMG usage I will need to set this to 0.
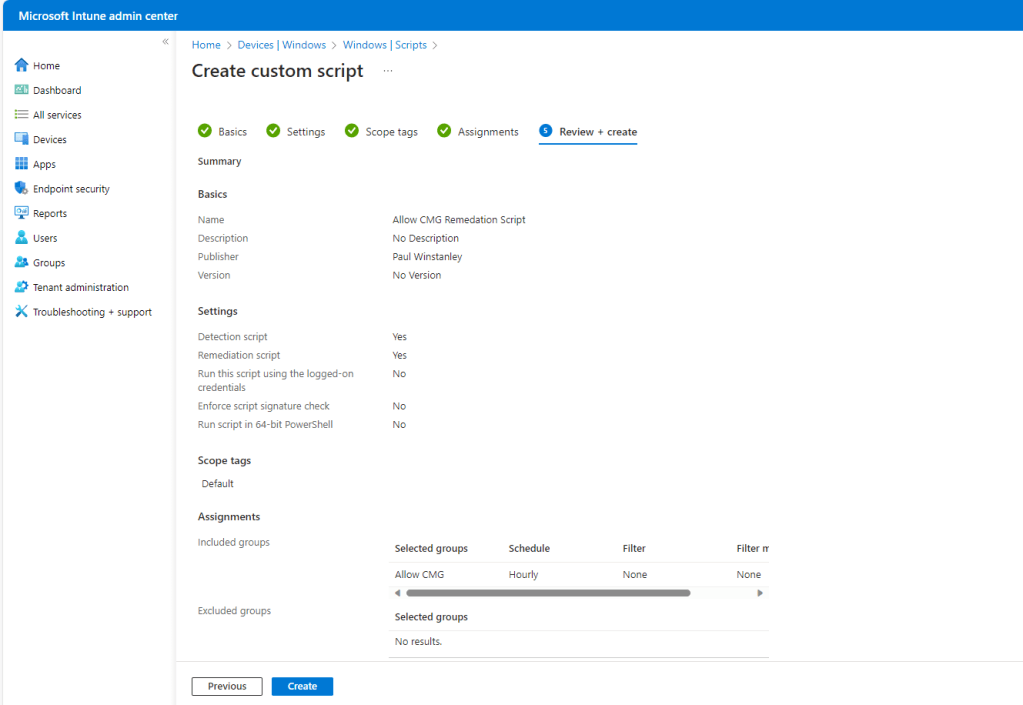
We can deploy this via Intune and I would recommend setting both a PowerShell script and a Remediation. There’s some debate as to whether Remediations apply during the Autopilot process – check Rudy Ooms blog on this. They do, but there can be a delay. So for a new device, built via Autopilot and using the co-management settings profile, we want the setting to hit as soon as possible to keep the flow to the CMG going. Our PowerShell script should fit the bill there. Once a device is up and running we then need to get it into a collection which is targeted for a custom client setting which allows the CMG. Our Remediation is there as a belt and braces, just in case our device is not in the ConfigMgr collection, runs a policy retrieval, gets the policy from the CMG which says it is not allowed to use it and sets the reg key back to 1.
Create the PowerShell script
We can use the following code for our PS script
if((Test-Path -LiteralPath "HKLM:\SOFTWARE\Microsoft\CCM") -ne $true) { New-Item "HKLM:\SOFTWARE\Microsoft\CCM" -force -ea SilentlyContinue };
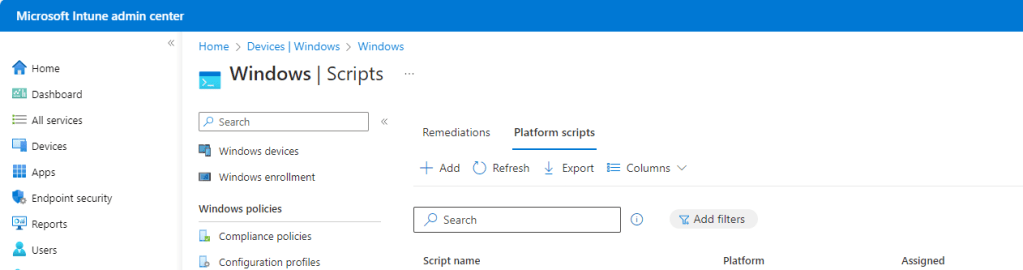
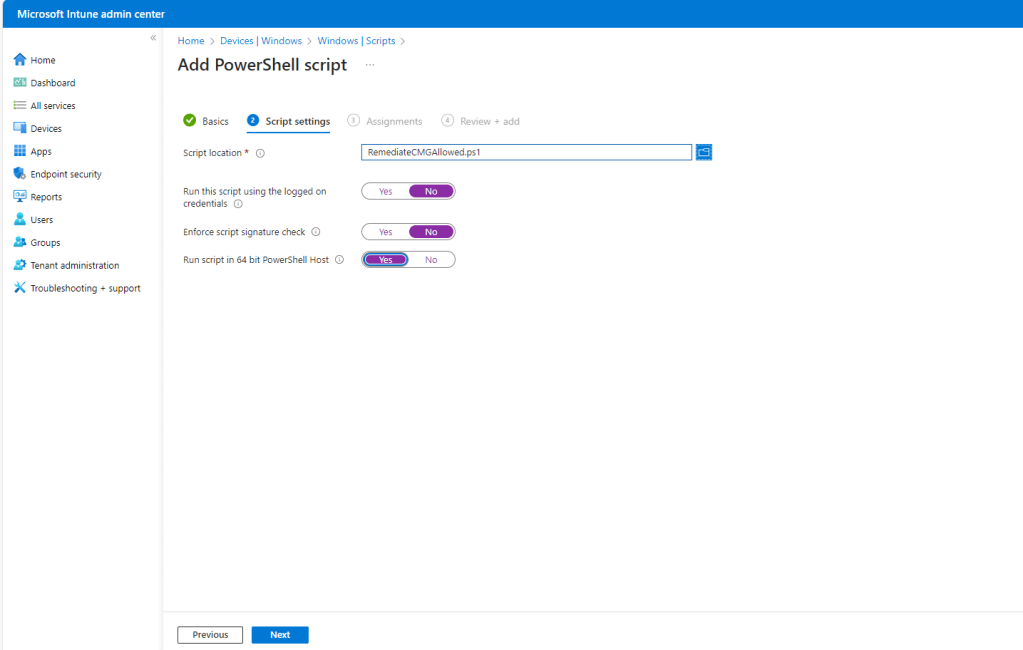
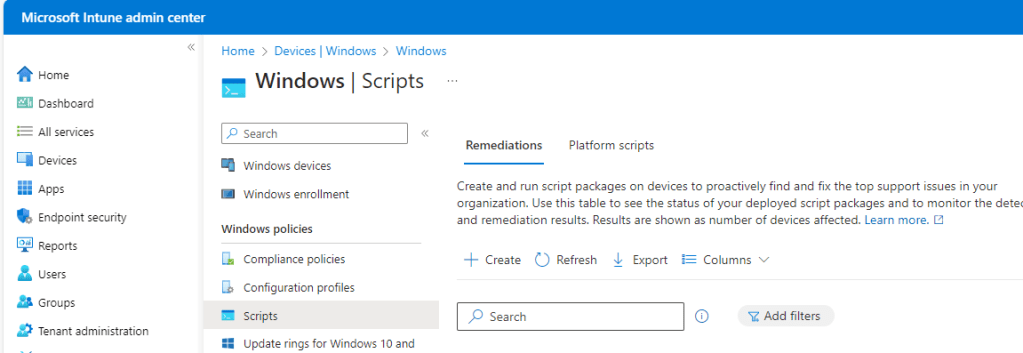
New-ItemProperty -LiteralPath 'HKLM:\SOFTWARE\Microsoft\CCM' -Name 'DisAllowCMG' -Value 0 -PropertyType DWord -Force -ea SilentlyContinue;In the Intune admin center go to Devices\Windows\Scripts and click Platform scripts and then click Add.
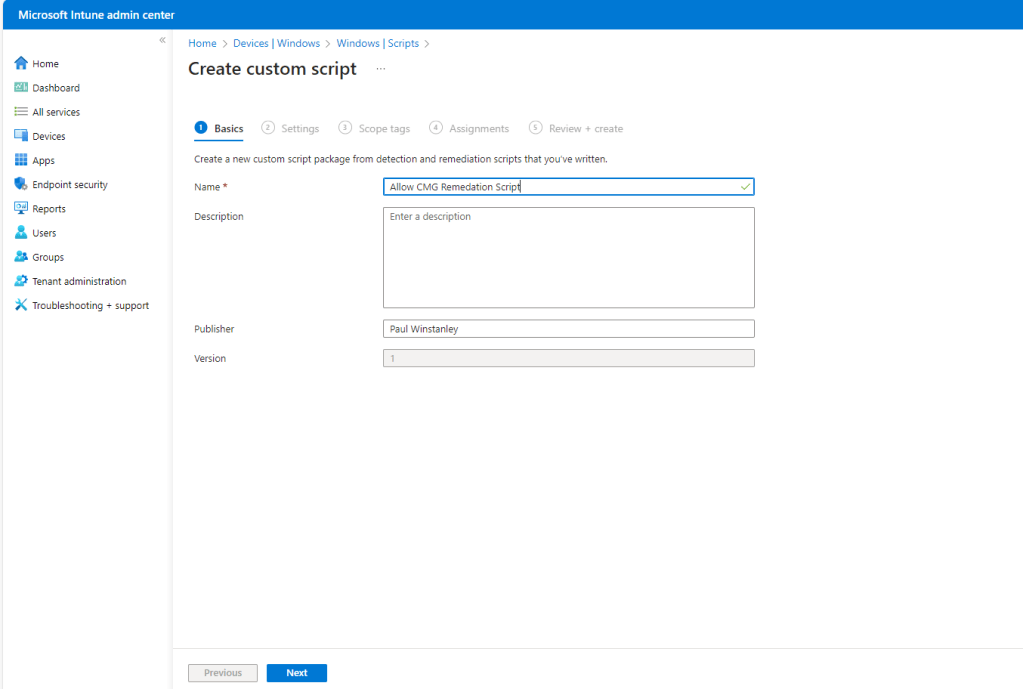
Enter a Name and optional Description and click Next.

Click the folder icon next to Script location and browse to the PowerShell file and click Open. Note the new defaults for PS scripts for Run this script using the logged on credentials and Enforce script signature check these have been set by Microsoft for security purposes.
We want to override this, so set both to No. Make sure that Run script in 64-bit PowerShell is set to Yes. Click Next.
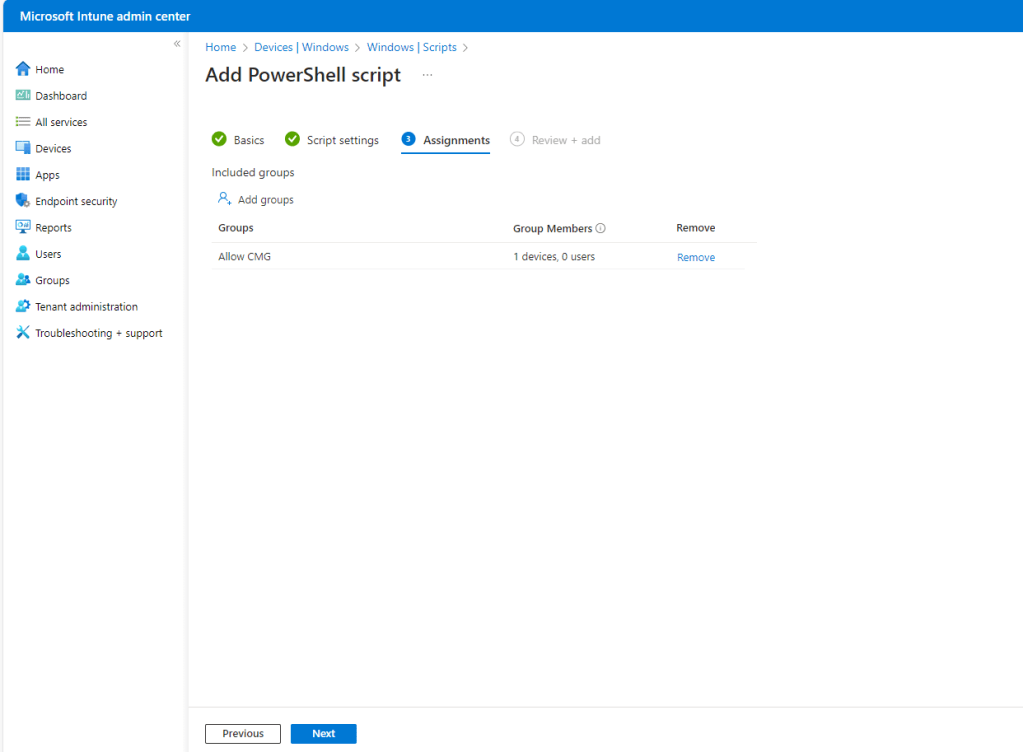
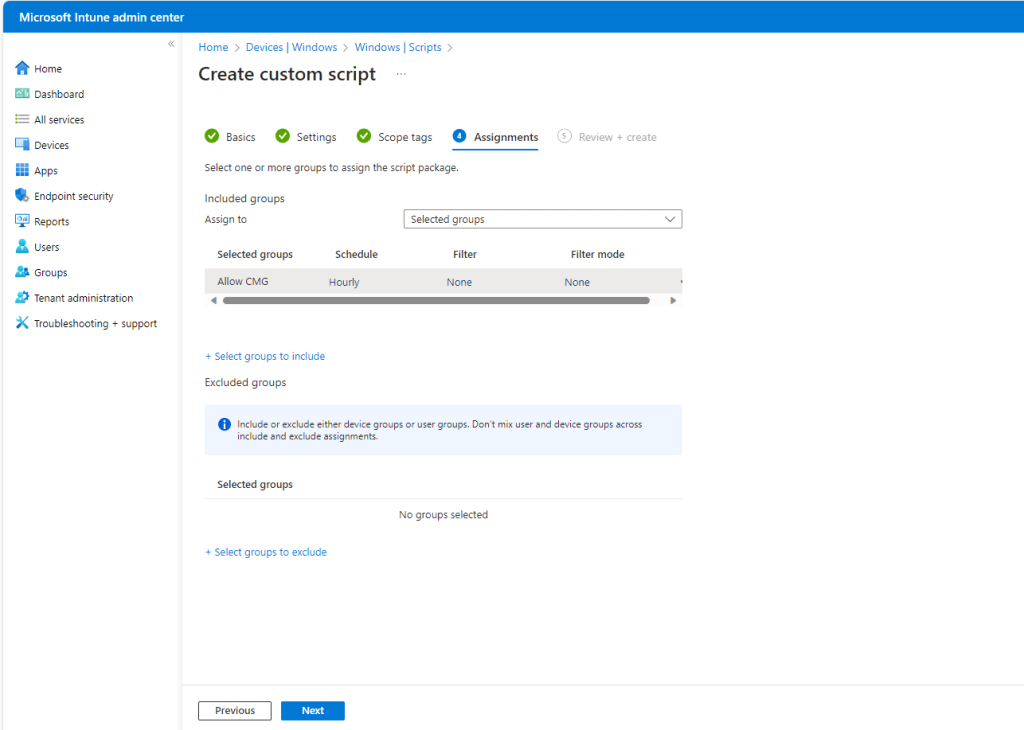
Target your devices accordingly. This could be a dynamic Autopilot group, for example. In this demo I have an assigned group with my endpoint in it. Click Next.
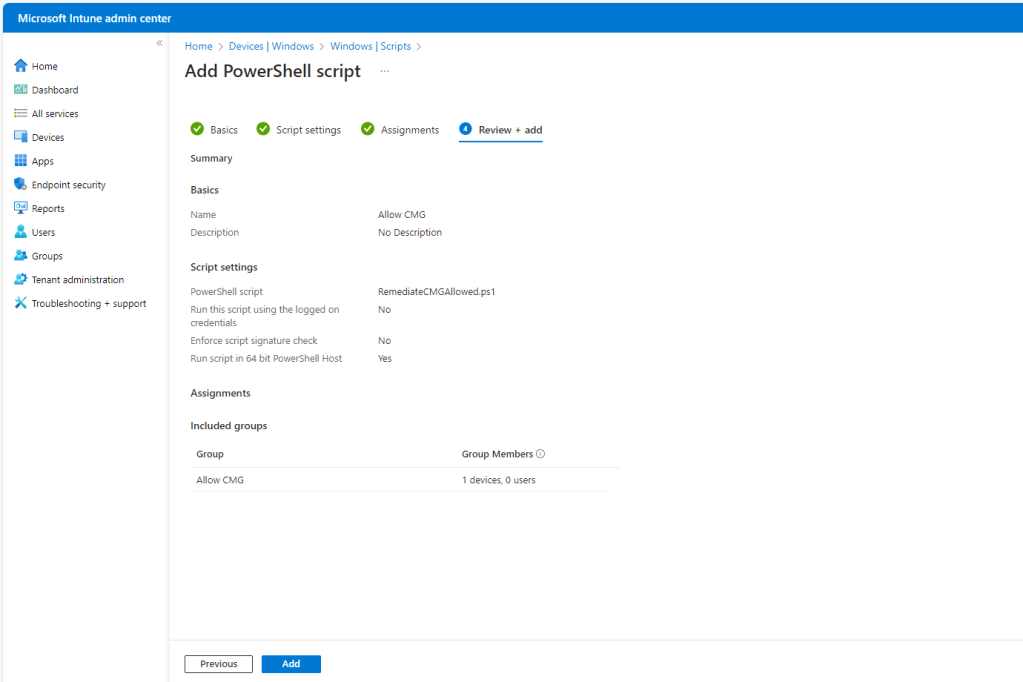
Click Add to complete the PS script profile.
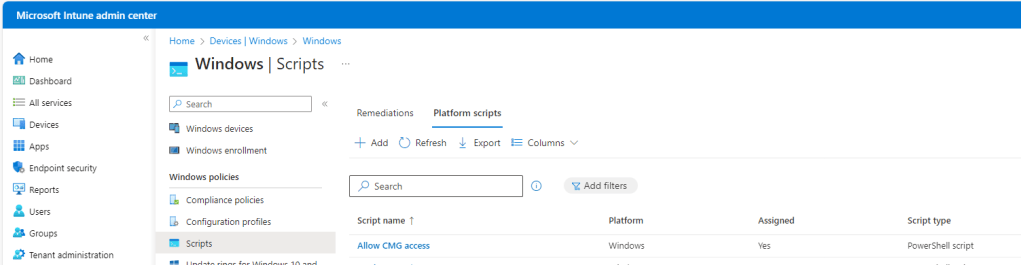
The script will appear in the list of scripts in the console.
Create the Remediation script
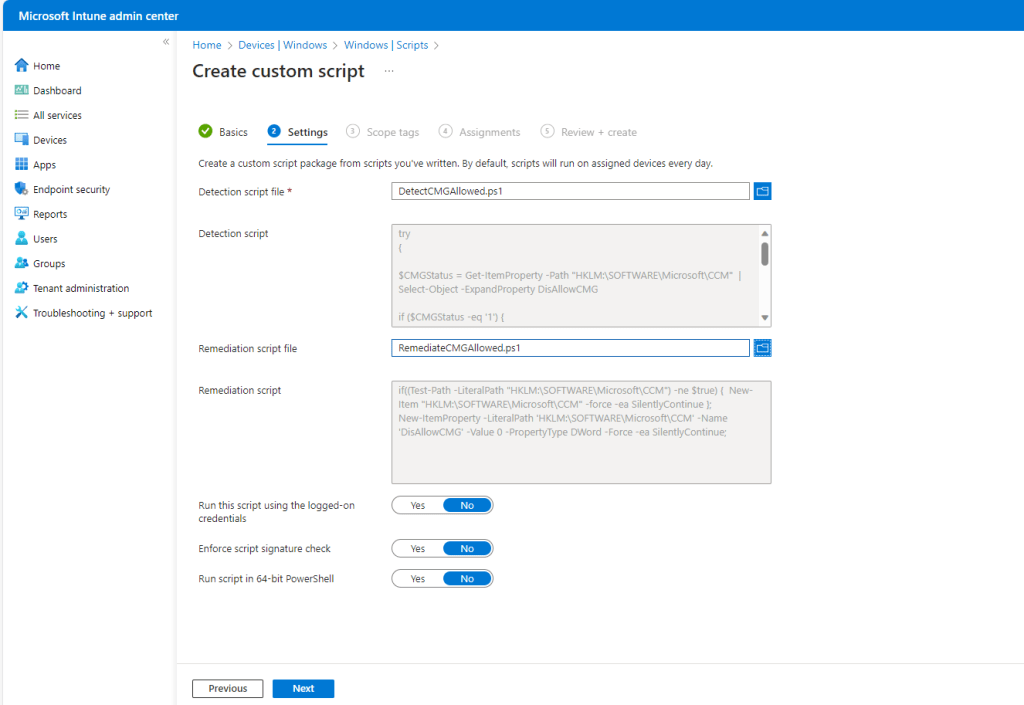
For our Remediation script we need both a detection and remediation script. We can use the previous code for our remediation script.
For the detection script we need to check for the key being set to 1 in the registry and exit with code 1. Any script exiting with code 1 will then run the remediation script to fix.
try
{

$CMGStatus = Get-ItemProperty -Path "HKLM:\SOFTWARE\Microsoft\CCM"  | Select-Object -ExpandProperty DisAllowCMG

if ($CMGStatus -eq '1') {
    Write-Host "CMG is currently blocked - remediation is required"
    exit 1
    }
    else {
        #No remediation required
        Write-Host "CMG is allowed - do nothing"
        exit 0
    }
}
catch {
    $errMsg = $_.Exception.Message
    Write-Error $errMsg
    exit 1
}
To add the Remediation, in the Intune admin center go to Devices\Windows\Scripts\Remediations and then click Create.
Enter a Name plus optional information and click Next.
Select the Detection script file and the Remediation Script file. Note the defaults settings are set to No for all settings here, however we need to set Run script in 64-bit PowerShell to Yes. Click Next.
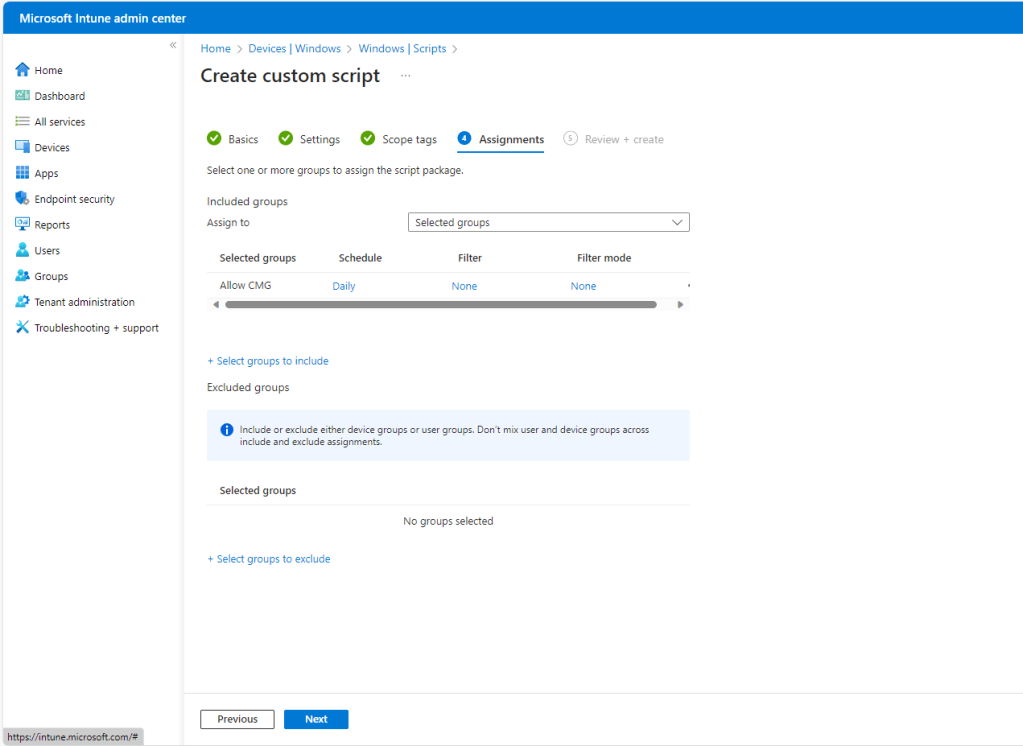
Enter any Scope tags and click Next, then select the groups under Assignments. Note now we need to set a Schedule for the Remediation. The default is Daily.
Click the Daily link and change the Frequency to Hourly, Repeats every 1 hour. Click Apply.
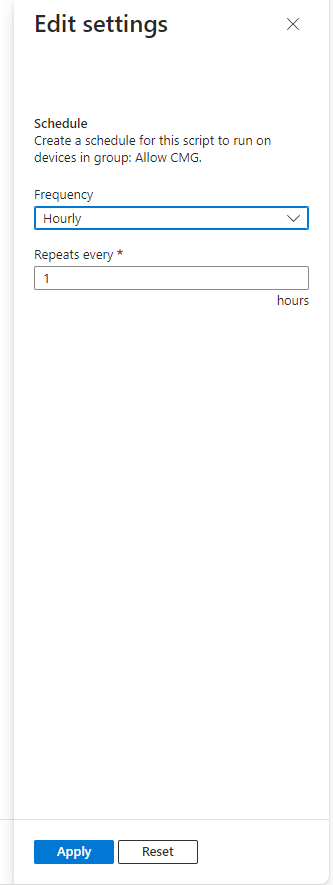
The schedule will update to say Hourly. Click Next.
Click Create to complete the set up of the Remediation.
The Remediation script will appear in the Intune console.

Create the ConfigMgr collection and target the use of the CMG
Now we have our belt and braces approach to setting the DisAllowCMG registry key to allow the use of the CMG we need this to stick in ConfigMgr and not be set back to 1. To achieve this we need to create a collection of applicable devices and target them for enable use of the CMG.
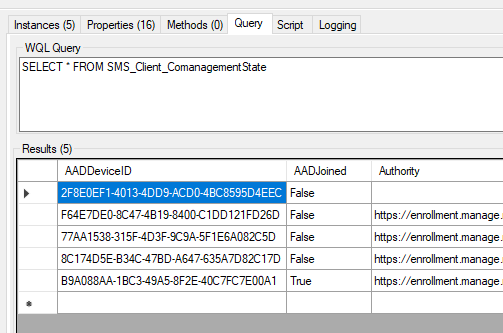
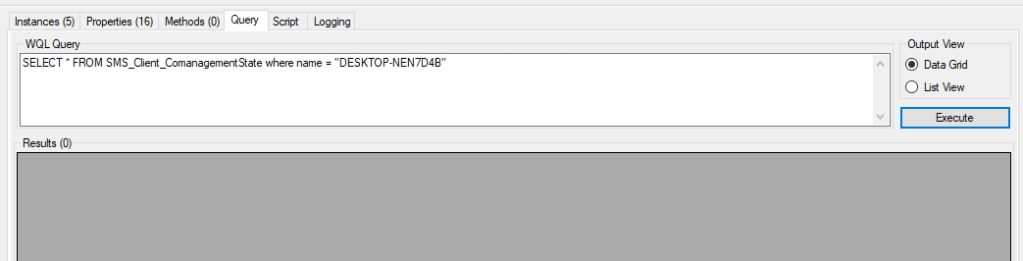
For our Entra ID devices we can use the SMS_Client_ComanagementState WMI class (see the MS documentation on how to monitor co-management).
If you query that class you can see that there is a field for AAD Joined. So we can use that as our anchor for our query collection.
However, when our device communicated with the CMG initially, it didn’t have time to populate that information back to ConfigMgr.
Fear not because our scripts will enable comms with the CMG when they execute on the device and get that information into ConfigMgr.
Note below the PS script has executed and the DisAllowCMG is set to 0.
The CcmMessaging.log shows comms now flowing via the CMG.
Shortly after, we can re-run our WMI query and the device is now showing up and reporting it is AAD joined.
SELECT * FROM SMS_Client_ComanagementState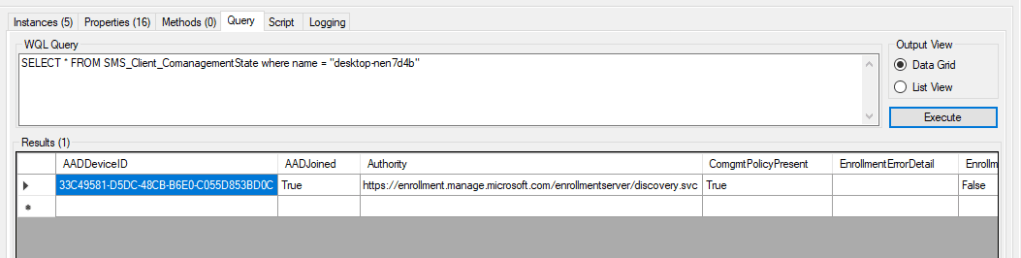
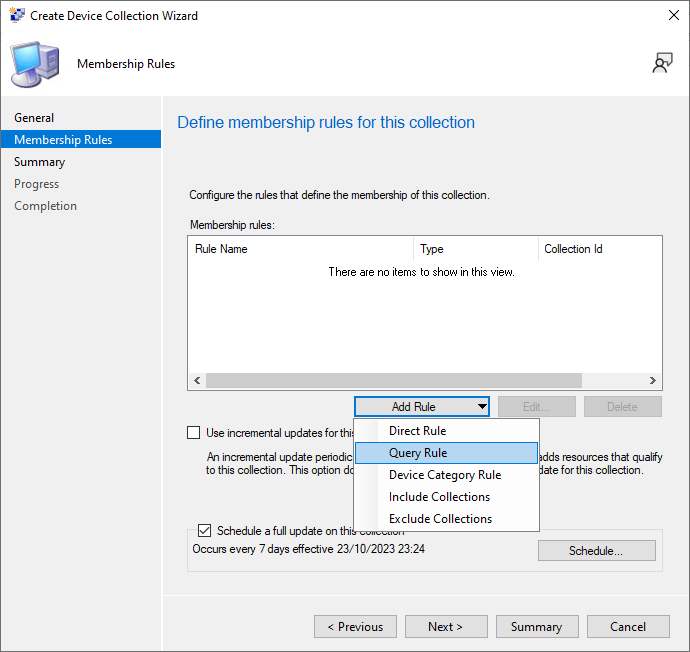
The next step is to create our query collection. We want the device to hit this collection as quickly as possible so we will limit to All Systems and set it to Incremental.
In ConfigMgr under \Assets and Compliance\Overview\Device Collections right-click and Create Device Collection.
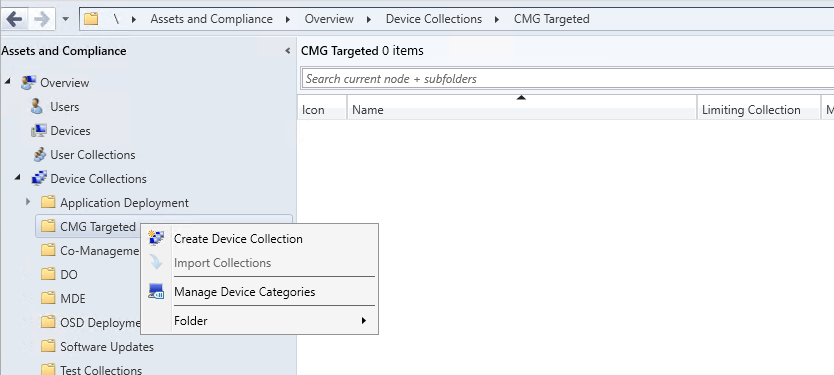
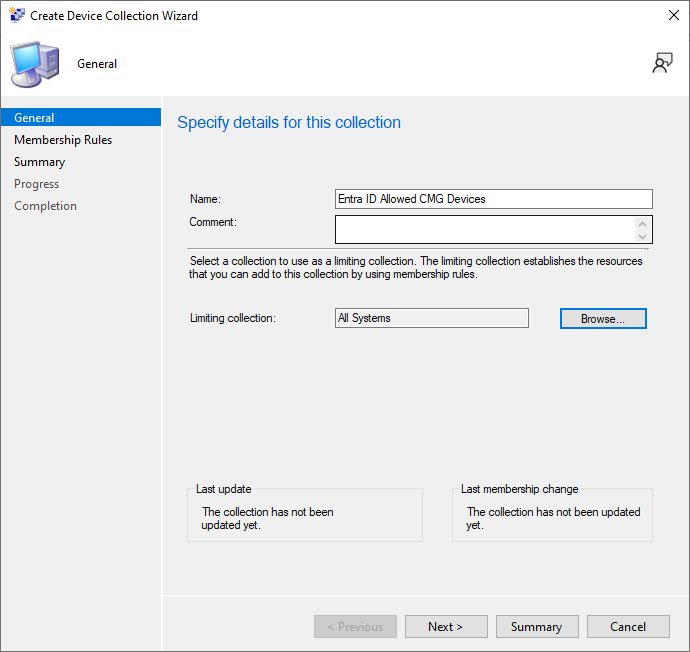
Enter a Name and set the Limiting collection to All Systems. Click Next.
From the Add Rule drop down select Query Rule.
Enter a Name and click Edit Query Statement.
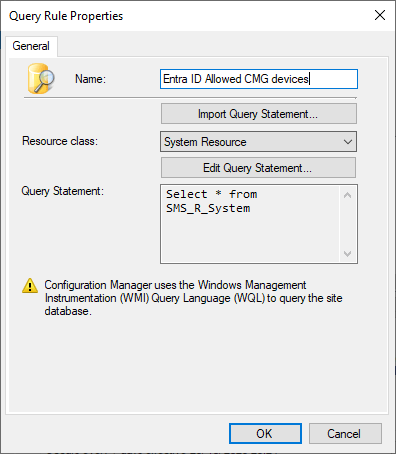
Click Show Query Language.
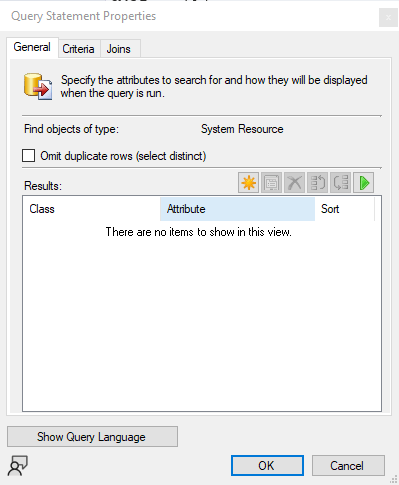
Enter the following query and click OK twice.
select * from SMS_R_System inner join SMS_Client_ComanagementState on SMS_Client_ComanagementState.ResourceId = SMS_R_System.ResourceId where SMS_Client_ComanagementState.AADJoined = 1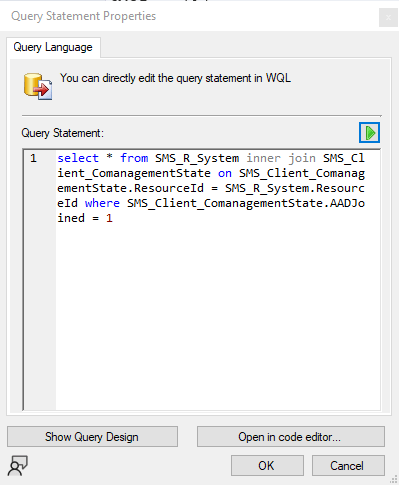
Set Use incremental updates for this collection and click Next. Click through the wizard to completion.
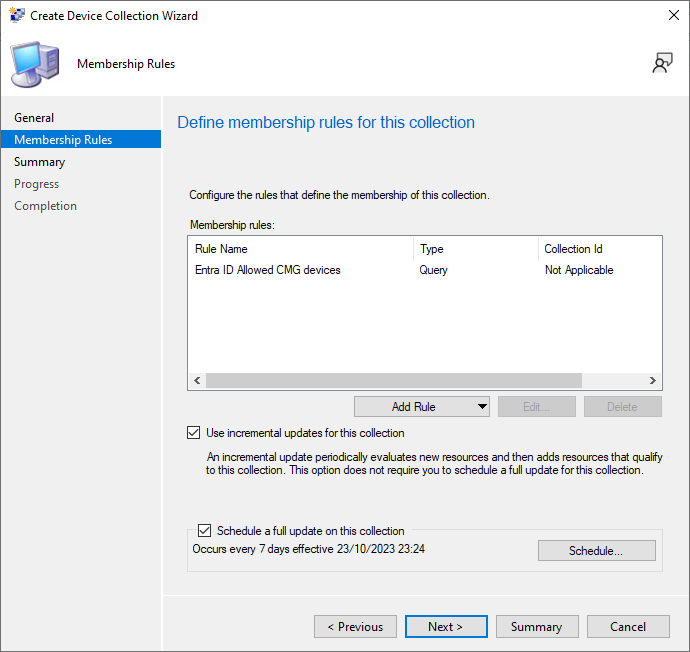
Now we can see the device is in the collection once evaluation is complete.

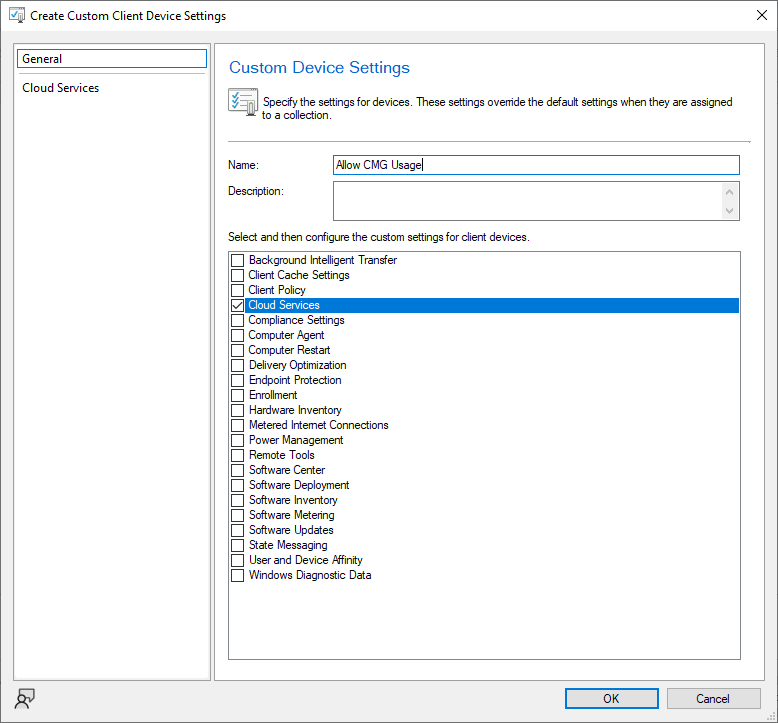
Finally we must target the client setting to the collection. Navigate to \Administration\Overview\Client Settings and right-click and select Create Custom Client Device Settings.
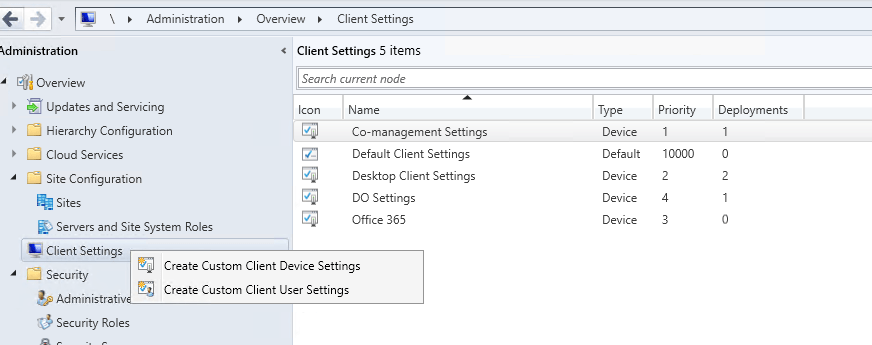
Enter a Name and click Cloud Services, then click Cloud Services under General.
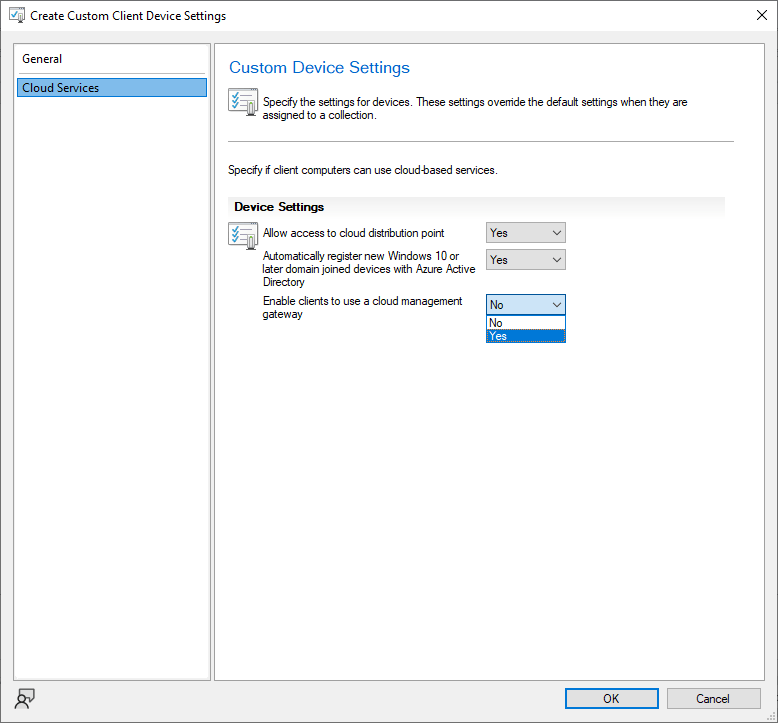
Click the Enable clients to use a cloud management gateway drop down and select Yes and, if you’re allowing access to the CDP, do the same for the Allow access to cloud distribution point drop down. Click OK.
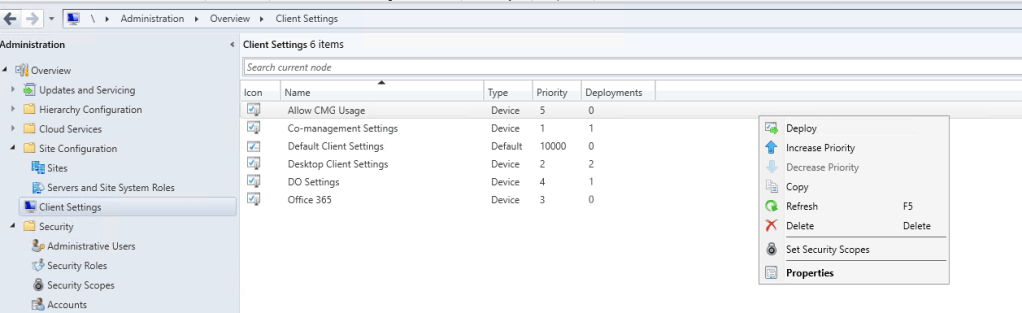
Just check you have the correct priority for the client setting, then right-click and Deploy.
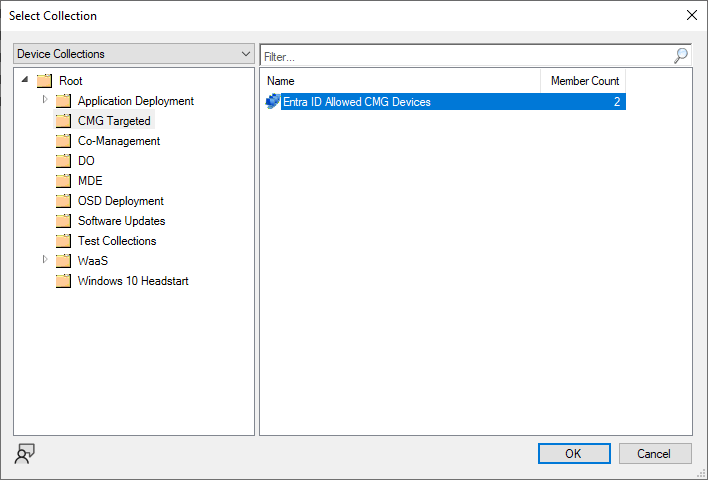
Target the collection created previously and click OK. This will ensure that on the next policy retrieval the device will be allowed access to the CMG in a targeted way in ConfigMgr.
Hope this blog post helps you in anyway with targeted devices for the CMG.
