The following blog post runs through the steps to integrate Microsoft Intune into ConfigMgr 2012 R2. This integration has taken place in a lab environment.
This is part 1 of a two part series. In this part I will be configuring the Intune portal, synching AAD with a local domain and setting up my Intune subscription and connector in ConfigMgr 2012.
Pre-Requisites
- An external domain name
- ConfigMgr 2012 R2 site server
- Domain Controller
- Trial subscription to Intune at https://www.microsoft.com/en-us/server-cloud/products/microsoft-intune
Getting Started
Log in to the Intune portal at the address https://account.manage.microsoft.com
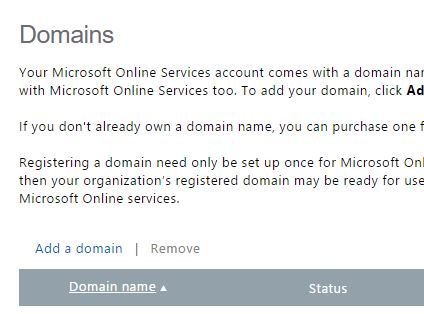
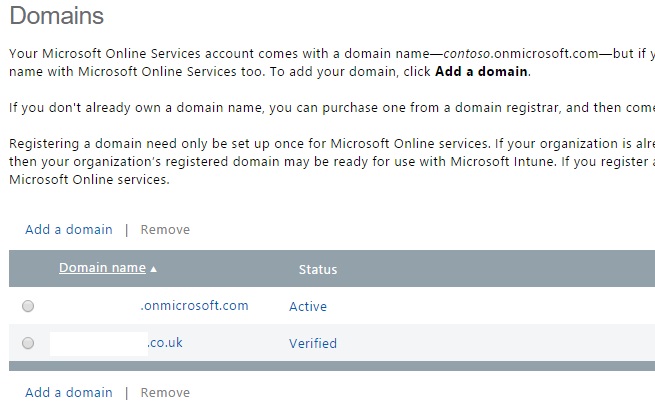
Once logged in click the Domains link in the left hand menu and then click Add Domain
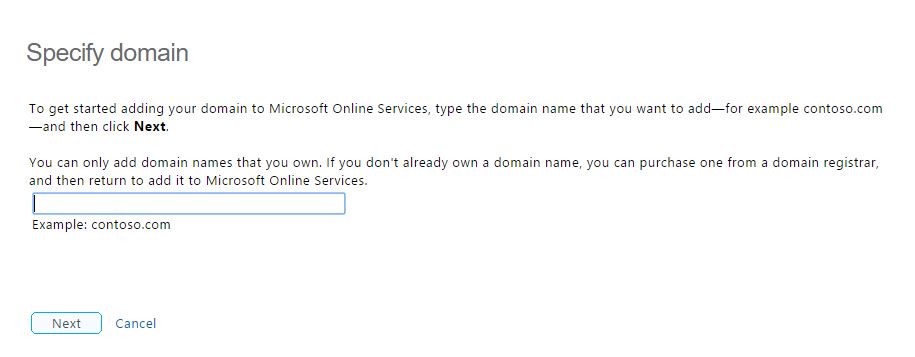
At this stage you will need to enter the external domain name that you have control of. Click Next when entered.
Now you will be prompted to enter a TXT or MX record to verify ownership of your domain.
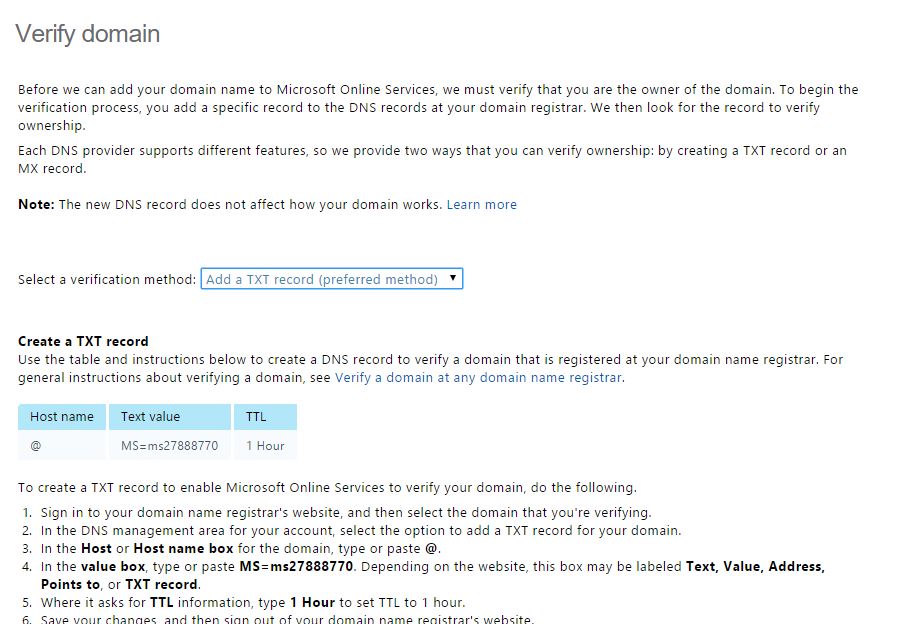
To do this follow the instructions presented and register a TXT record with your domain provider. Take note of the statement on the portal site ‘Note: Typically it takes about 15 minutes for your changes to take effect. But it can take up to 72 hours for the DNS record that you created to propagate through the DNS system.’
In my case however I was able to sign out and back into the portal and verify immediately.
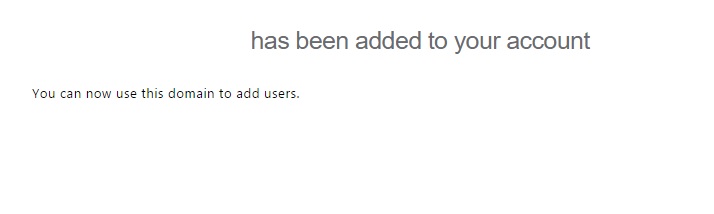
…and the domain is verified successfully.
Configure Users for Intune
Once the domain is verified it’s time to switch to the lab environment and fire up Active Directory Domains & Trusts on the Domain Controller. A UPN needs to be added with the same domain name as your external domain name.
Right click Active Directory Domains & Trusts and choose Properties.
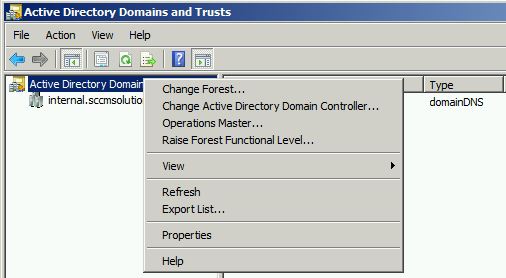
Enter the domain name and click Ok.
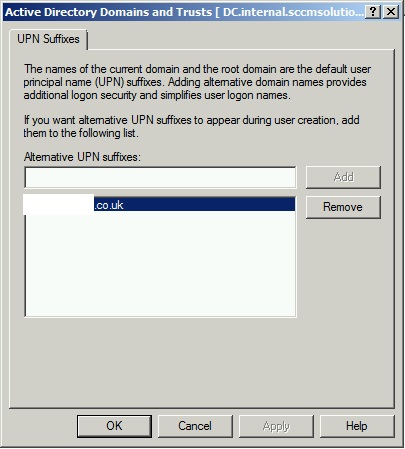
The UPN should now be selected for all users in Active Directory that require Intune. This can be achieved with a script, there are many scripts out there to do this here is one example http://community.spiceworks.com/scripts/show/1457-mass-change-upn-suffix
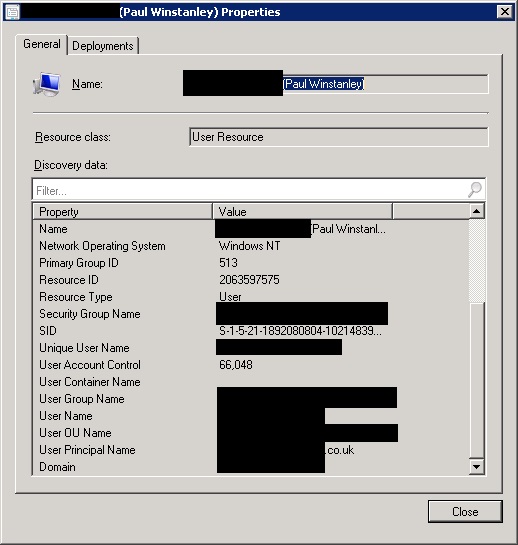
In ConfigMgr 2012 run an AD User Discovery to bring the user account into the system if not already.
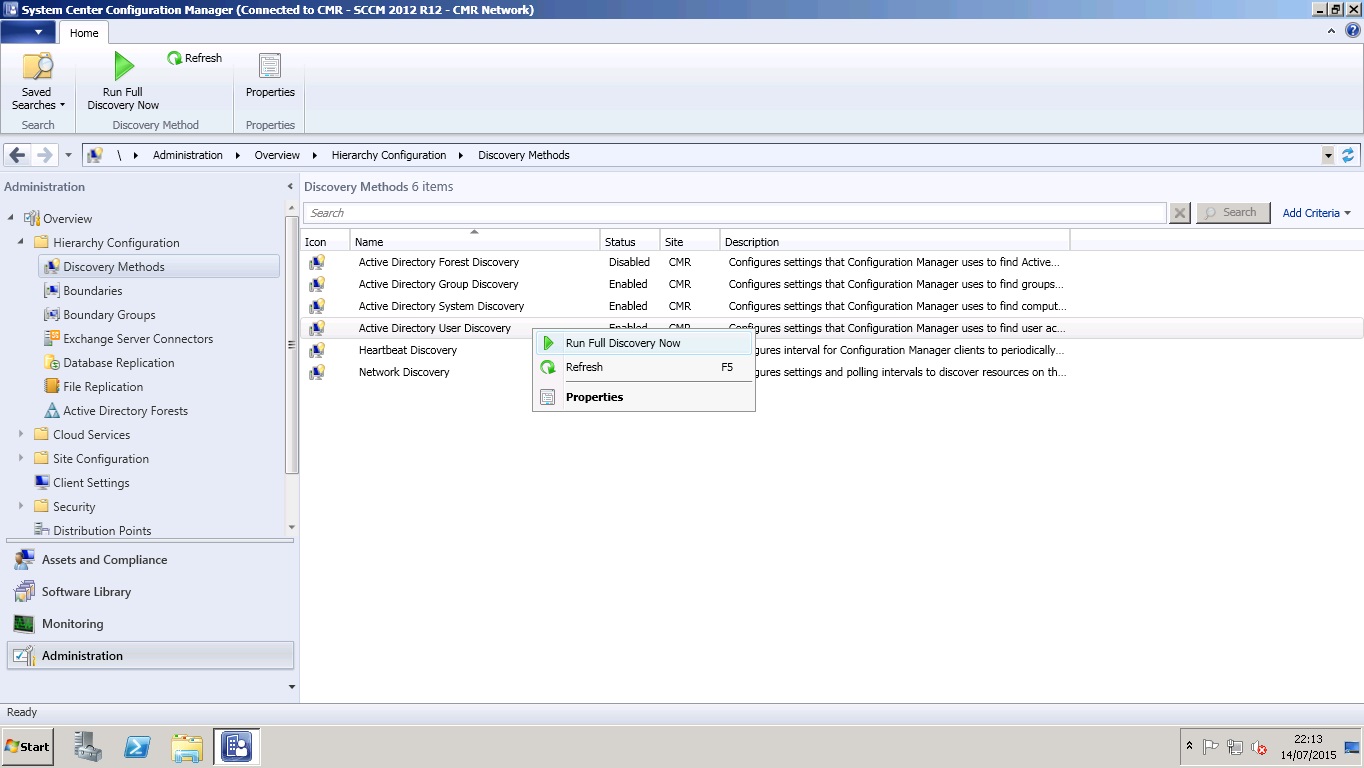
Once the discovery is complete then the user/s will appear in the Assets and Compliance>Users node and with the UPN reported back.
Create a User Collection in ConfigMgr and add in all the users required for Intune.

Set up Synchronisation of Users with Intune Portal and local domains
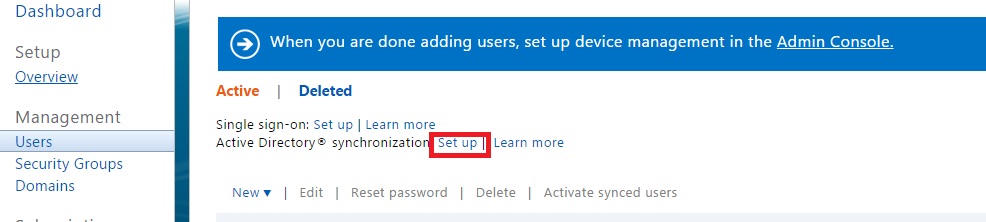
Return to the Intune Portal and from the main menu click Users then click ‘Set up’ next to Active Directory synchronization.
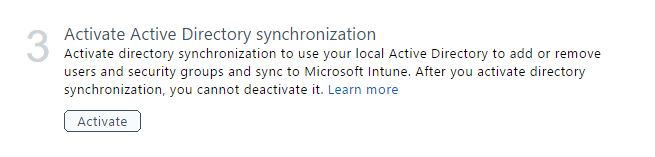
Click Activate under ‘Activate Active Directory synchronization’.
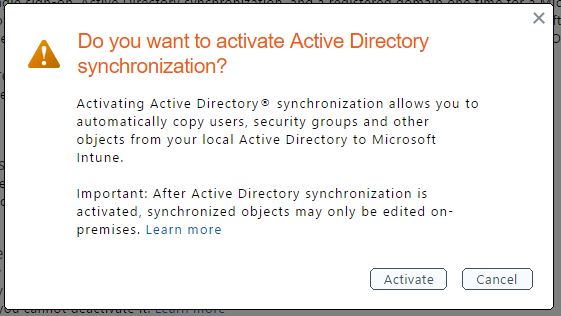
Click Activate again to confirm.
Synchronisation will report back as activated.

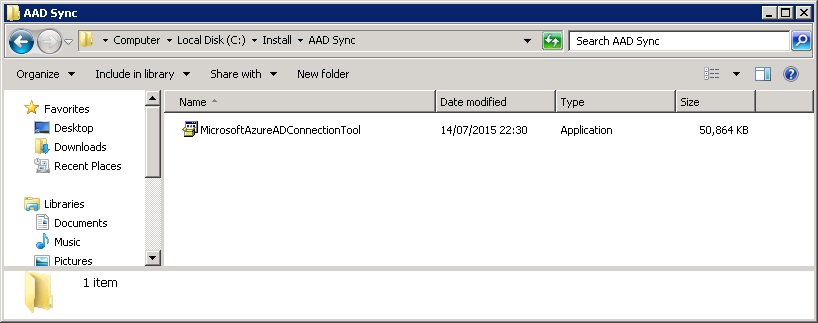
The next step is to synchronise users with Azure Active Directory. To do this download AAD Sync from http://www.microsoft.com/en-ie/download/details.aspx?id=44225.
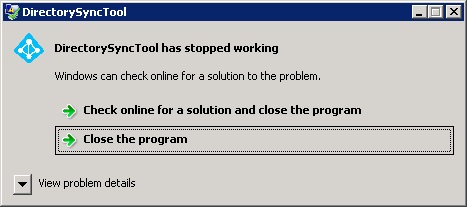
I am installing AAD Sync on a domain controller. The pre-requisites for this are a server with .Net 4.5 and PowerShell 3.0 + installed.
If the pre-requisites are not met you will get the following error message when launching.
Run the MicrosoftAzureADConnectionTool.exe file.
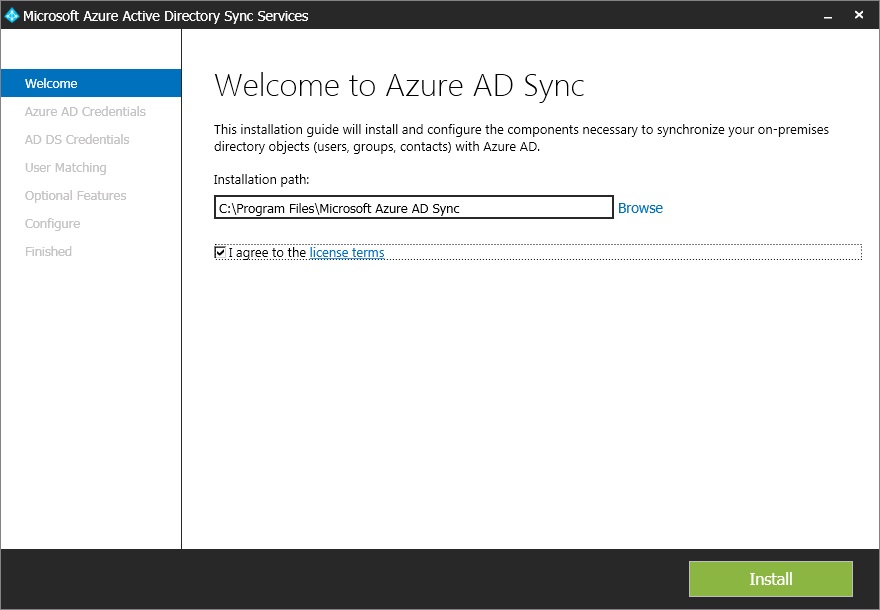
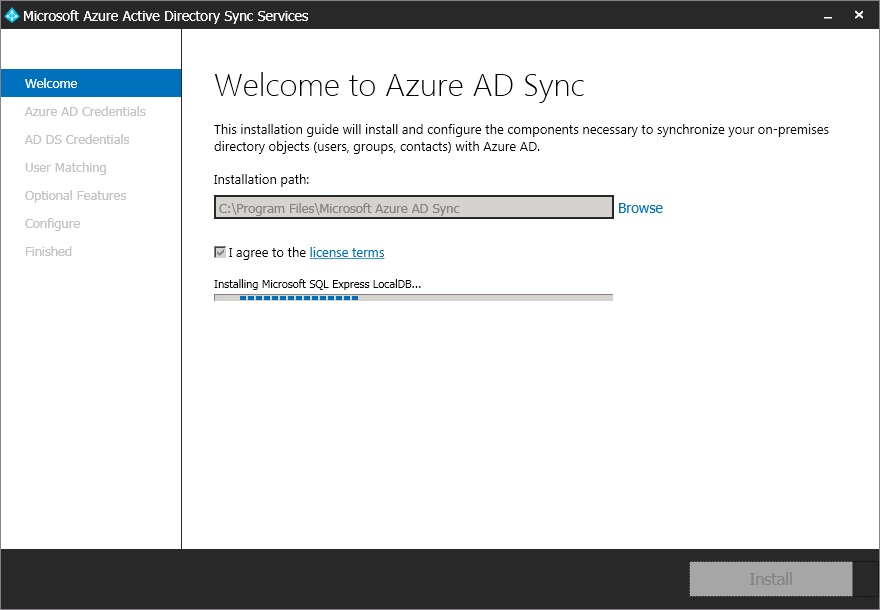
Accept the licence agreement and click Install.
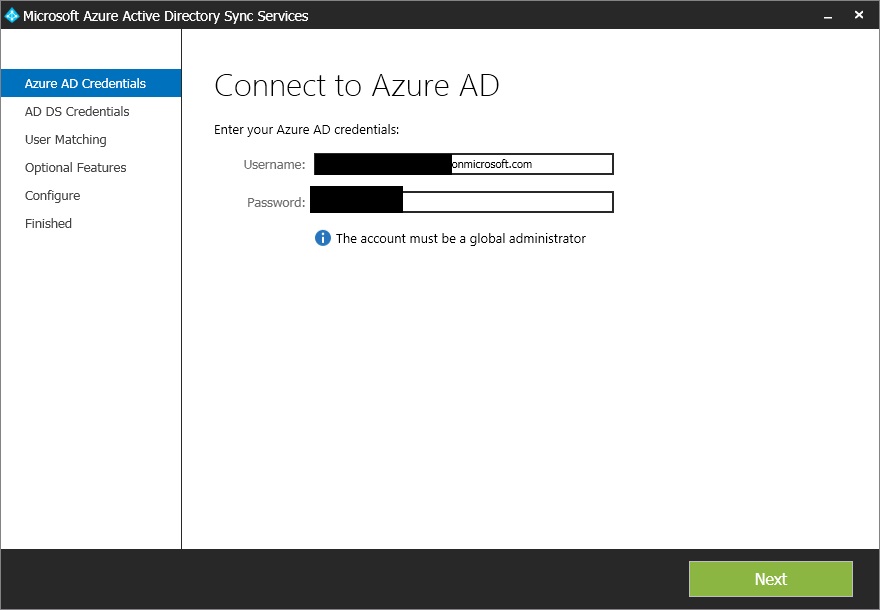
When prompted enter your Intune admin portal username and password as the global administrator.
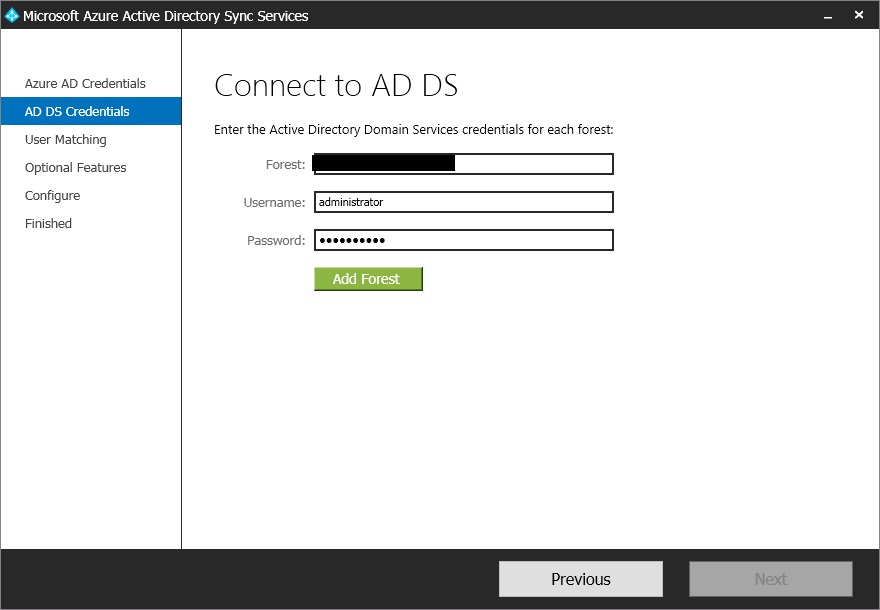
Add in a local domain details and click Add Forest (Note for the username user the format domain\username). Once all forests are added click Next.
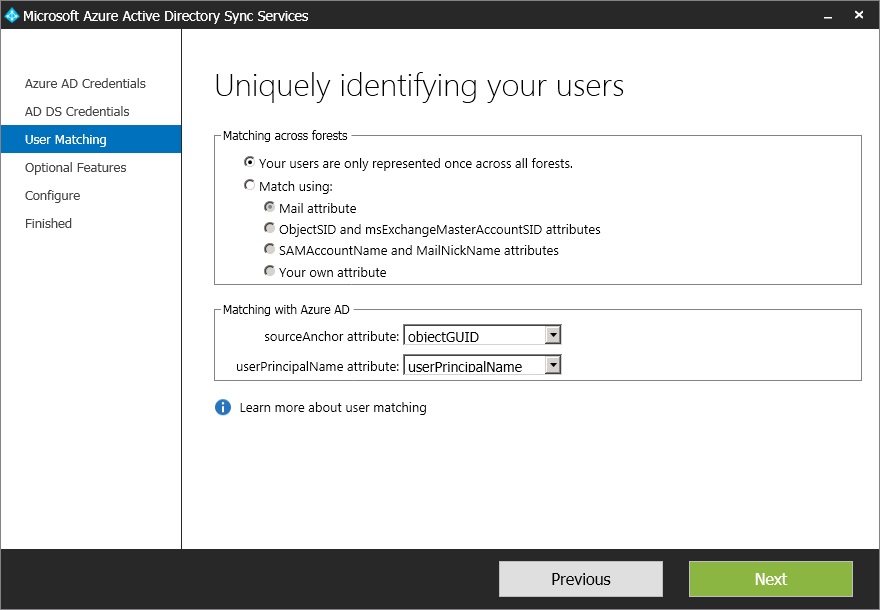
At the next window I am accepting the default and clicking Next.
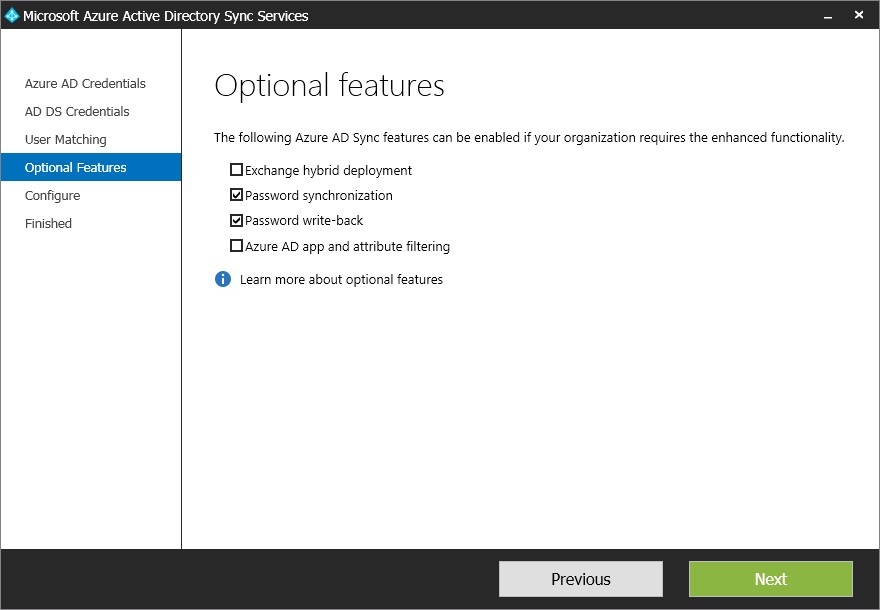
Add in any optional features required for AD Sync and click Next.
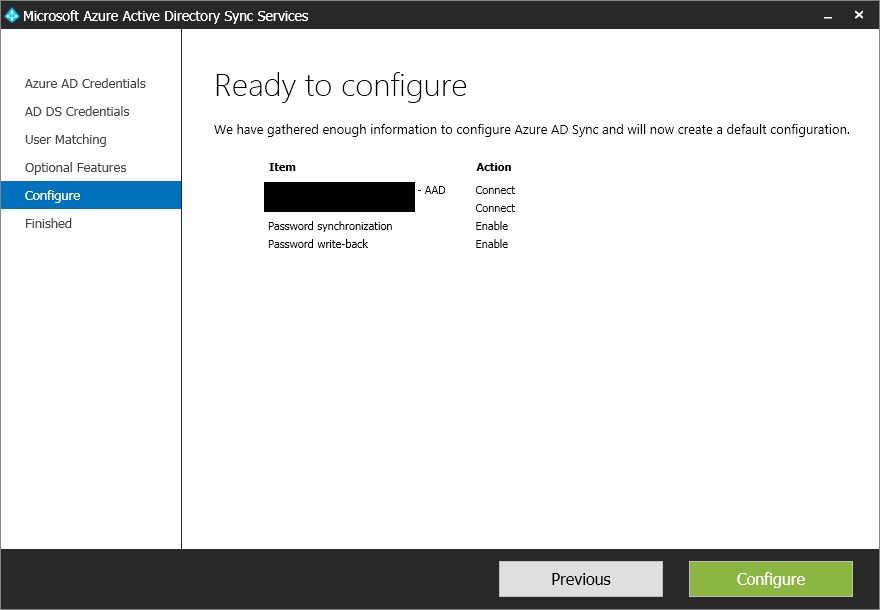
Click Configure to complete the wizard.
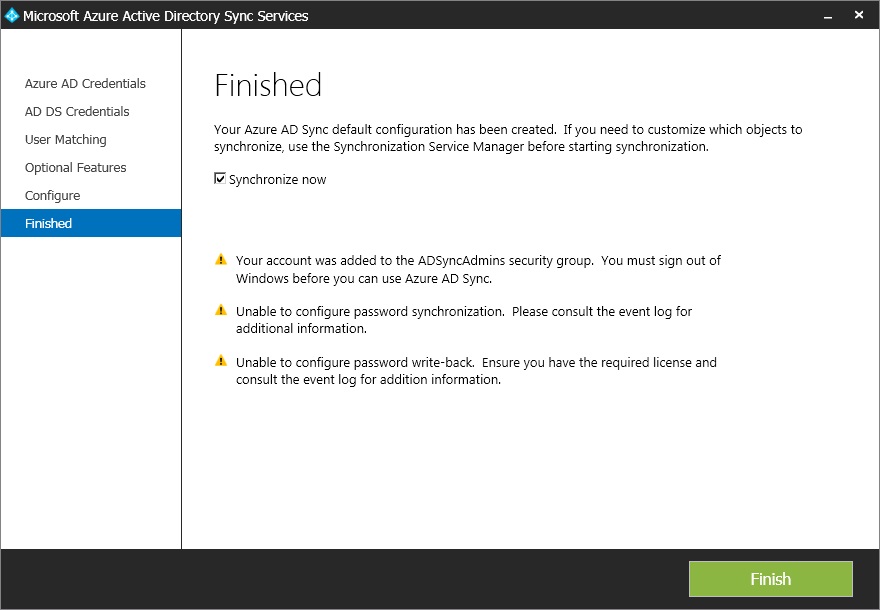
Once completed click Synchronize Now to synch the whole of AD or untick as you can select specific OU’s from the Tools interface (Note errors for the Password Sync and Password write-back options selected earlier. I re-ran the sync tool, re-authenticated and problem was resolved)
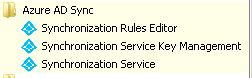
Log off and back onto your domain controller. Launch the Synchronization Service from the Start Menu>Azure AD Sync folder.
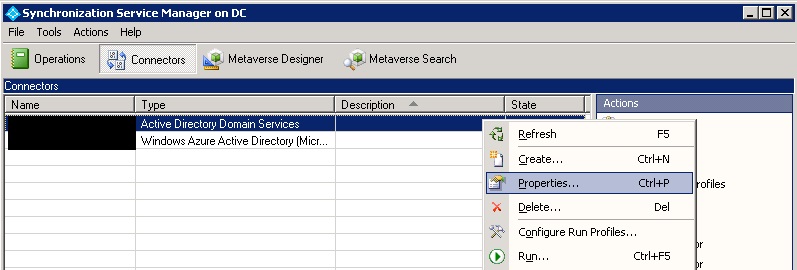
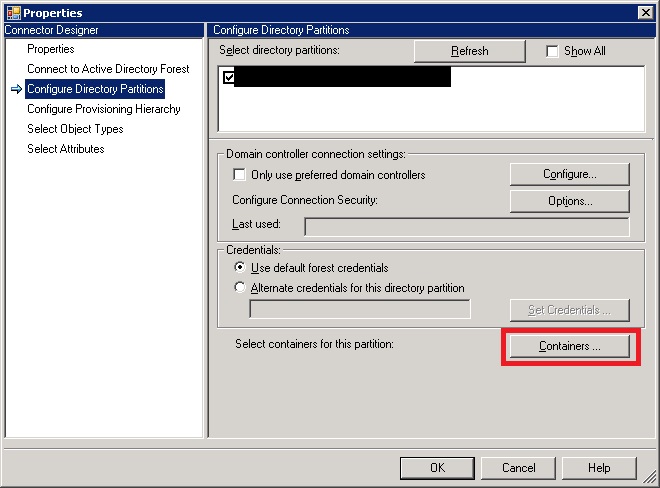
Click the Connectors button and choose the Properties of the Active Directory Domain Services connector.
Select ‘Configure Directory Partitions’ and click the ‘Containers’ button.
Enter credentials to browse AD and click Ok.
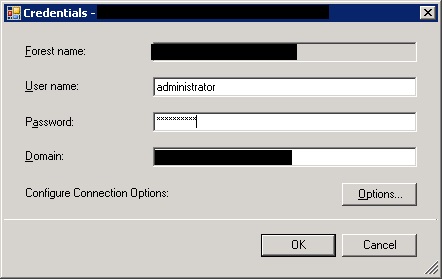
Select the OU you require to be synchronised. Click Ok twice.

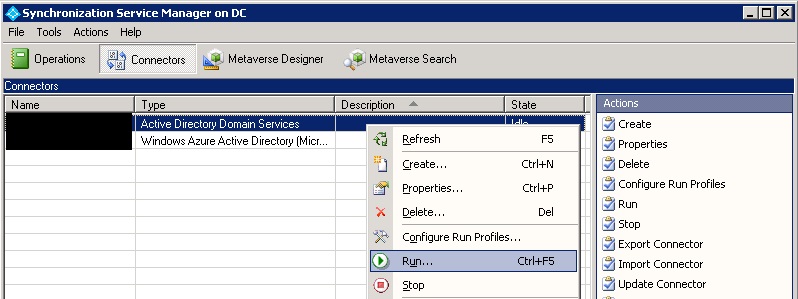
Right click the AD DS connector and choose Run.
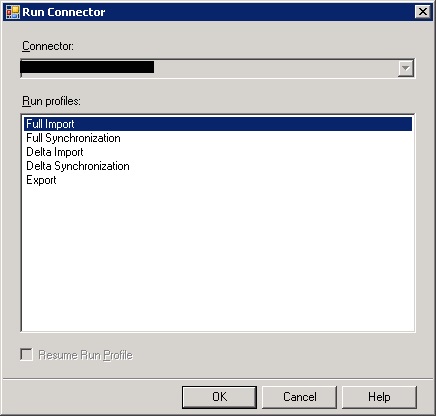
Select a Full Import and click Ok.
Once the synchronisation is complete you will notice the addition of accounts
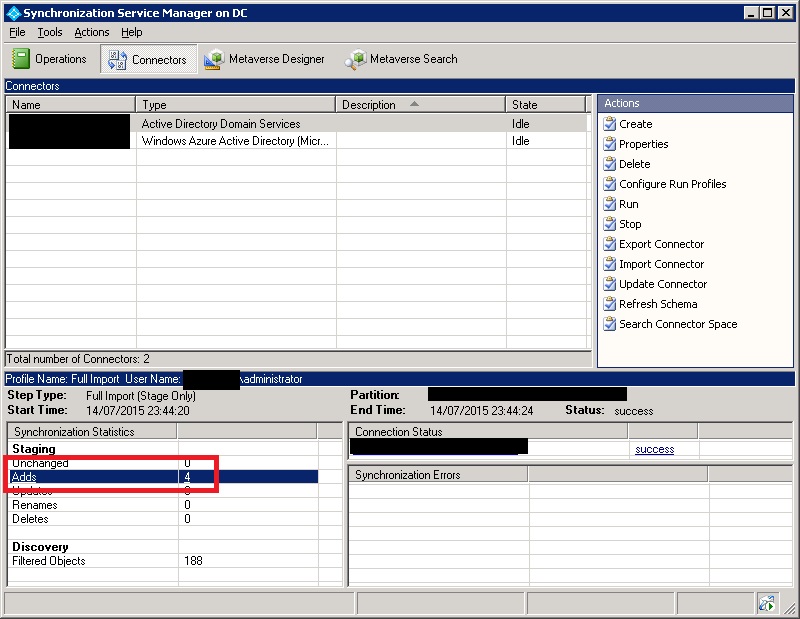
In my example screenshot, my AD account is now synchronised.

The users may take a while to coming into the Intune Portal (for example I waited longer than 10 hours and no users had appeared). To force things through a little quicker fire up a command prompt and navigate to C:\Program Files\Microsoft Azure AD Sync\bin and run the DirectorySyncClientCmd.exe file.
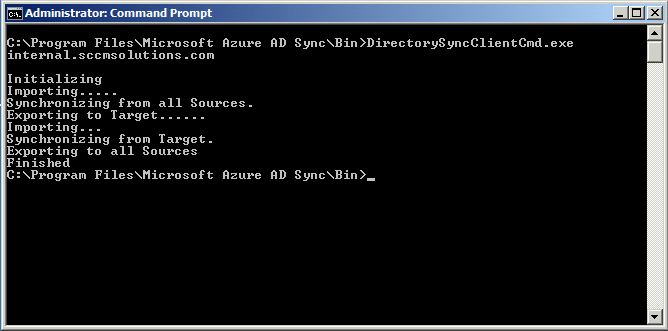
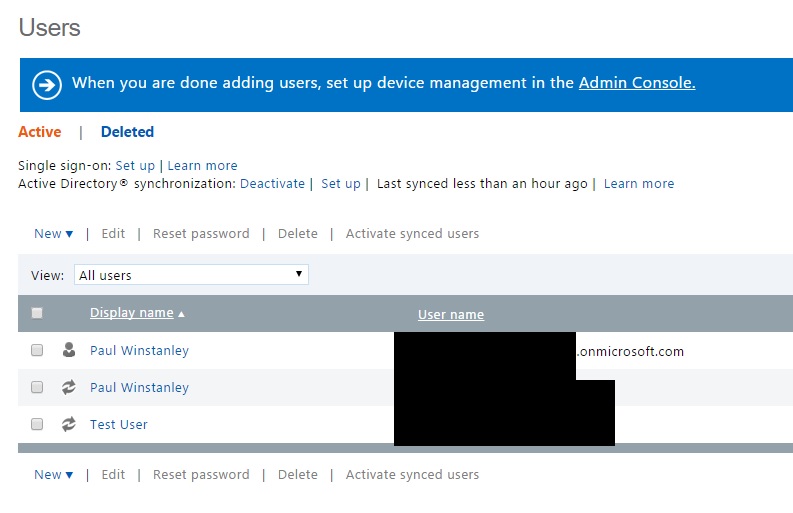
The users will then appear in the portal.
Setup the Intune Subscription and Connector in ConfigMgr2012
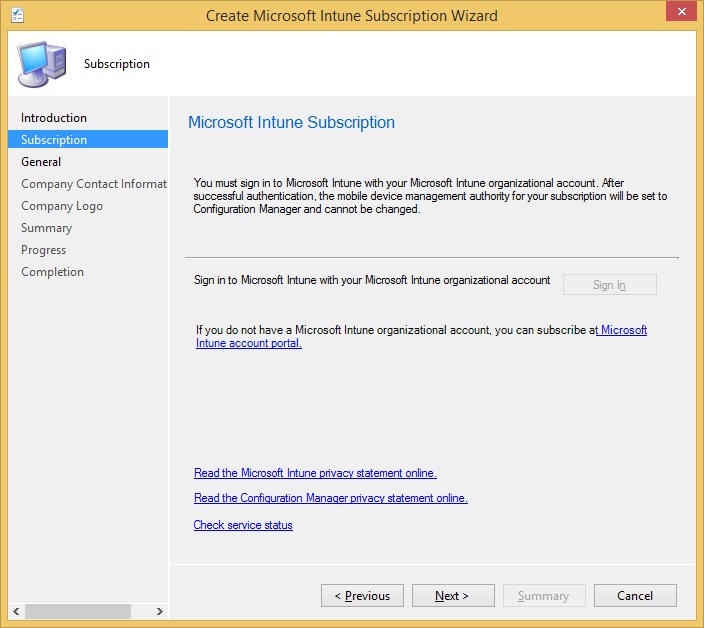
Note that it is best to run the Subscription wizard on a desktop as server policy can block the ability to sign in. For example this is the subscription sign in page on a server. Therefore install the ConfigMgr console on a desktop device.
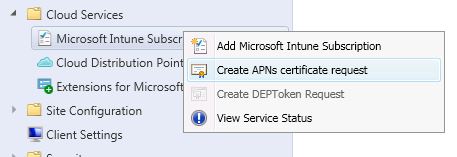
In the ConfigMgr 2012 console navigate to the Administration workspace and choose Overview>Cloud Services. Right click ‘Microsoft Intune Subscriptions’ and select ‘Add Microsoft Intune Subscription’.
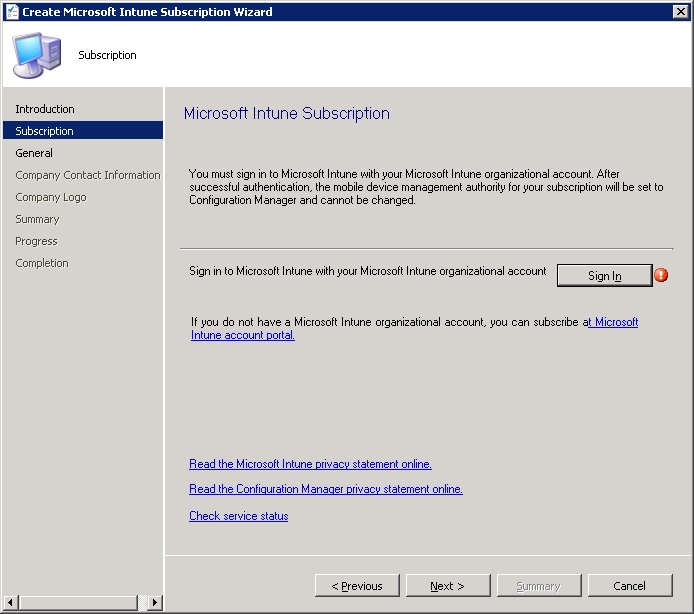
Click Next

Select ‘Sign In’
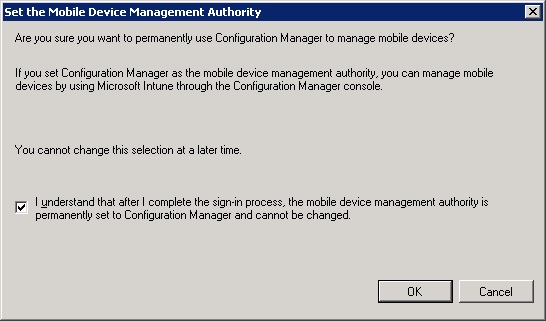
Confirm you wish to use ConfigMgr as the MDM Authority and click Ok.
When prompted sign in with your Intune admin credentials.

Click Next
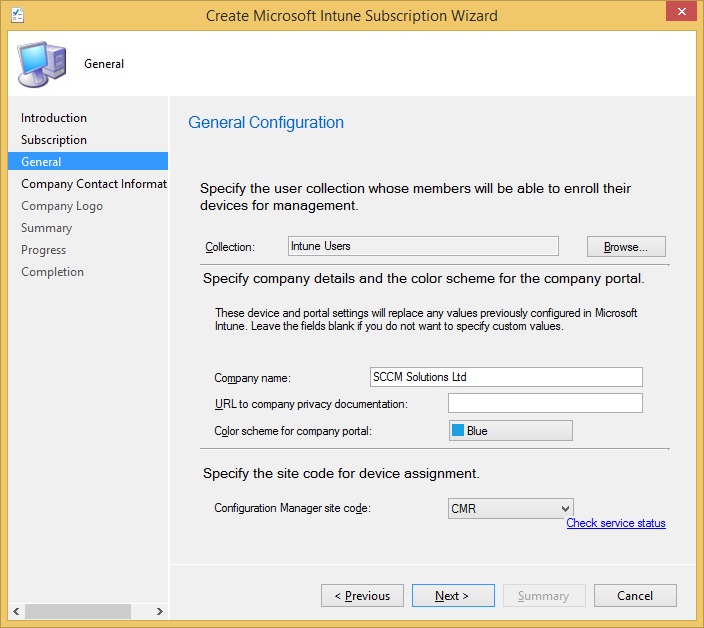
Enter the User Collection created earlier for the Intune users, your company name and ConfigMgr site code details. Click Next.
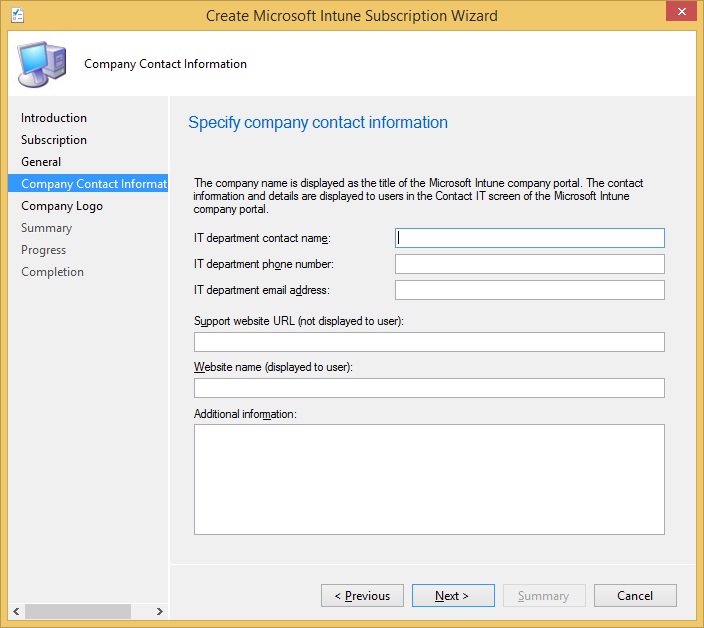
Enter any contact details if required. Click Next.
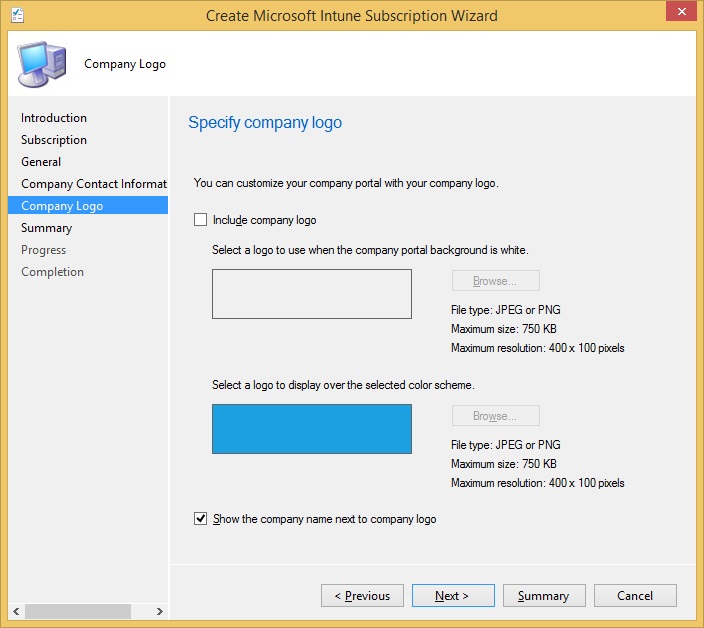
Enter any company brand or logos. Click Next.
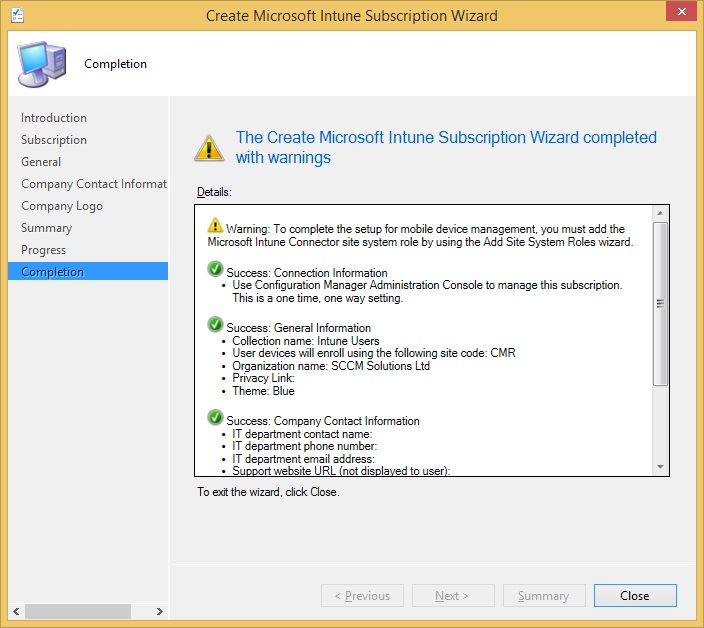
Click Next at the Summary screen,
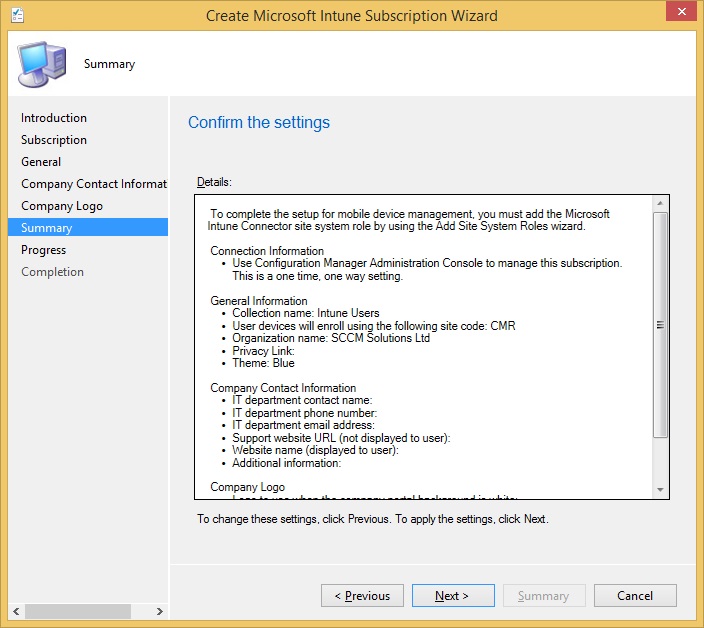
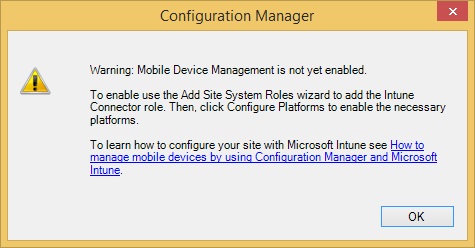
A warning message will appear stating the MDM is not yet enabled and to do this we need to add the Intune Connector role. Click Ok for now.
Click Close to complete the subscription wizard.
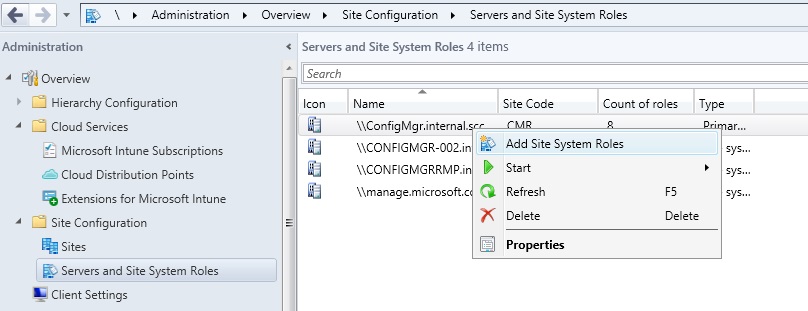
Now we can add in the Intune Connector role. Navigate to the Administration workspace and select Overview>Site Configuration>Server and Site System Roles. Right click the site system to install the role on, in my case the site server, and choose ‘Add Site System Roles’.
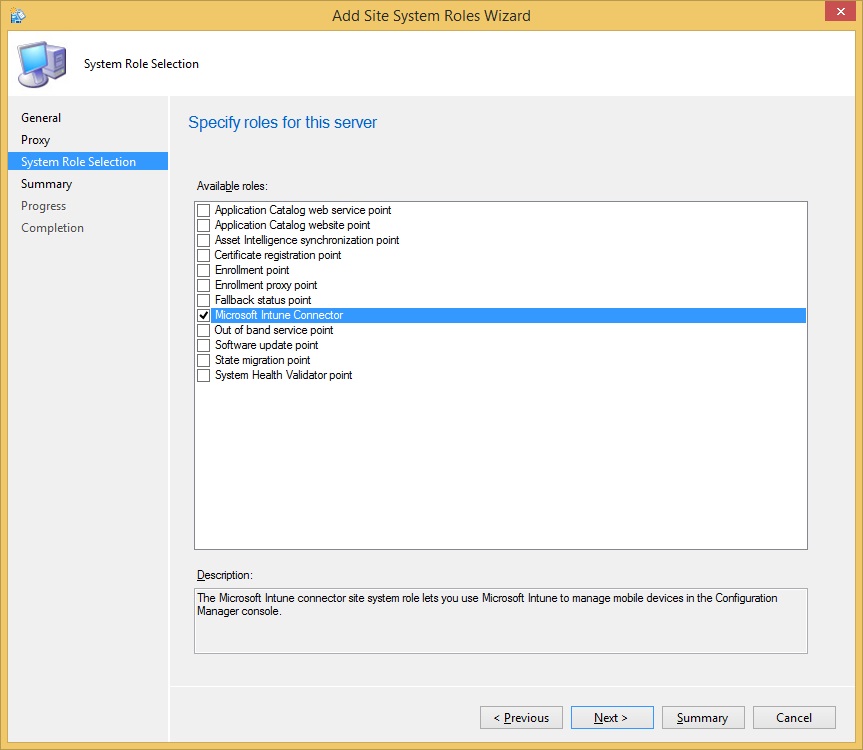
Click Next until you get to the System Role Selection screen and choose ‘Microsoft Intune Connector’. Click Next.
Click Next

Click Close to complete the wizard

The Microsoft Intune Connector site role is now added

In the next part of the blog I will be showing you how to enrol a device with Intune, in particular an iOS device.
Part Two – Implementing Intune integration into ConfigMgr 2012 R2 – Enroling a Device

One comment