
In Part 1 of the Parallels Mac Management for SCCM series I installed the Parallels Configuration Manager Console Extension. I installed this on my site server ‘ConfigMgr’.
Part 2 focused on the installation of the Parallels Proxy which I installed on a remote server called ‘Parallels’ which I intend to use to install the Parallels roles.
Part 3 of the series concluded the ‘role’ installation, namely the NetBoot Server and OS X Software Update Service.
Part 4 of the Parallels series focuses on getting the Parallels Mac client onto a Mac OS X device.
There are various ways in which to get the Parallels Mac client installed on an end device.
- Parallels Network Discovery – Discovers Mac computers on the network, push installs Parallels Mac Client on them, and then enrolls each Mac in Configuration Manager.
- SCCM Active Directory System Discovery – Discovers domain joined Mac computers and adds them as resources to Configuration Manager. The Parallels Configuration Manager Proxy then identifies the discovered resources as Mac computers, push installs Parallels Mac Client on them, and enrolls Mac computers in Configuration Manager.
- Running Parallels Mac Client installer on a Mac – Log into a Mac and manually install Parallels Mac Client on it by running the installation package.
- Using an installation script – Use a script to install Parallels Mac Client on a Mac. The script can be executed manually on each Mac or it can be distributed to and executed on Mac computers using Apple Remote Desktop or a similar remote management software.
- Push install or update Parallels Mac Client – If a Mac computer is already enrolled in SCCM or has been added to it as an unmanaged resource, you can push install or update Parallels Mac Client on it right from the Configuration Manager console.
I will be showing you the push install method in this blog post, however before I can proceed with the installation I need to activate my installation of Parallels Mac Management for SCCM.
Licence Parallels
To do this Parallels sent me a trial licence that I can use for 30 days from receiving it.
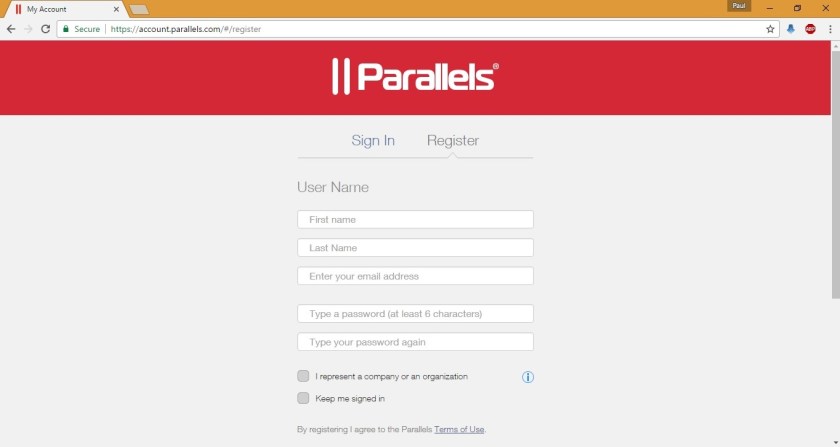
Head on over to https://account.parallels.com and register an account.
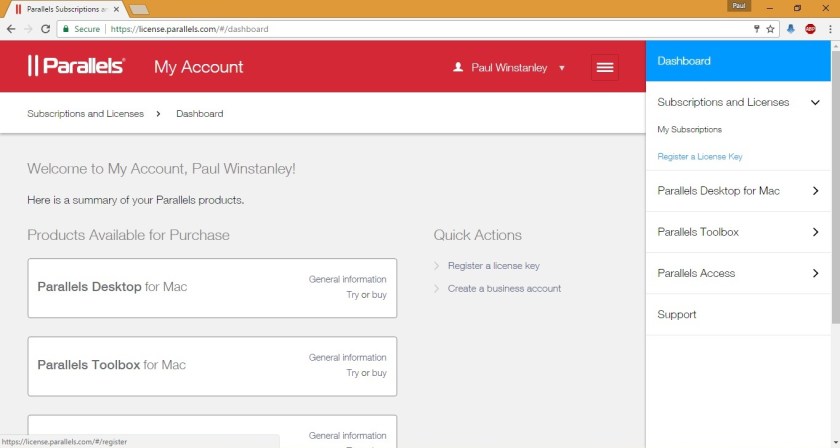
In the Dashboard click the ‘Register a Licence Key’
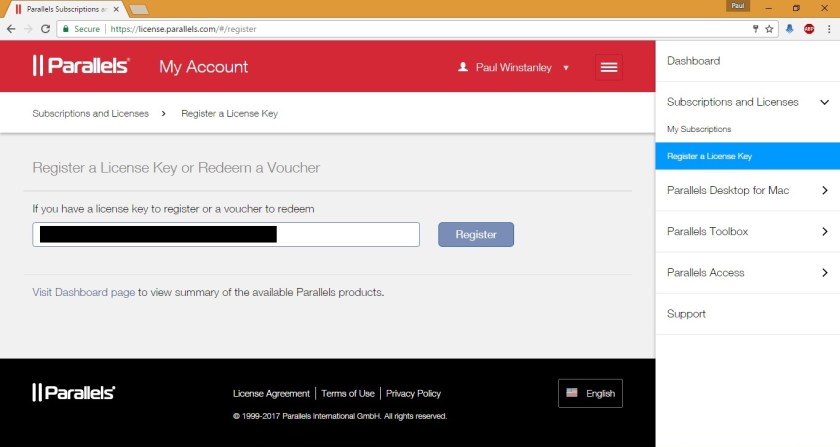
Enter the licence key details provided by Parallels.
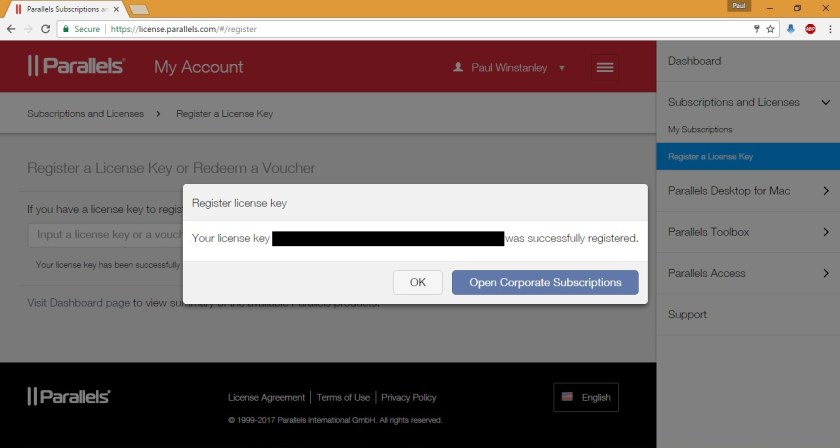
You’ll get confirmation that the key was activated.
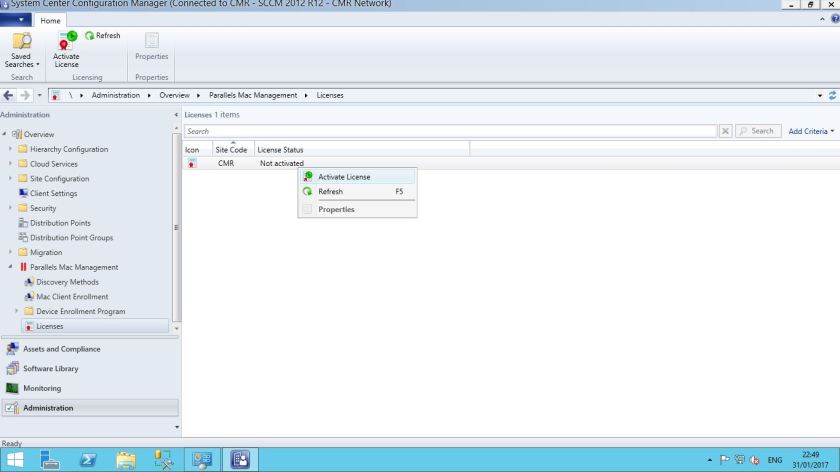
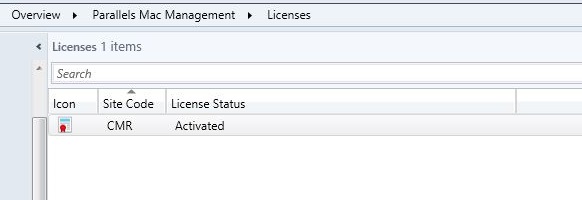
Next head over to the SCCM console. Navigate to the Administration>Parallels Mac Management>Licences node. Right click the Site Code in the main body and choose ‘Activate Licence’
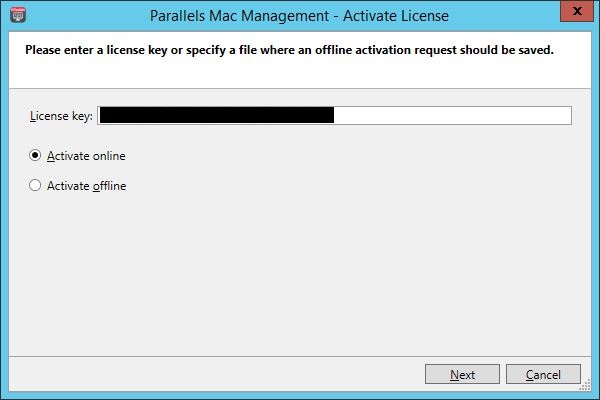
Enter the licence key once again and select ‘Activate online’. Click Next.
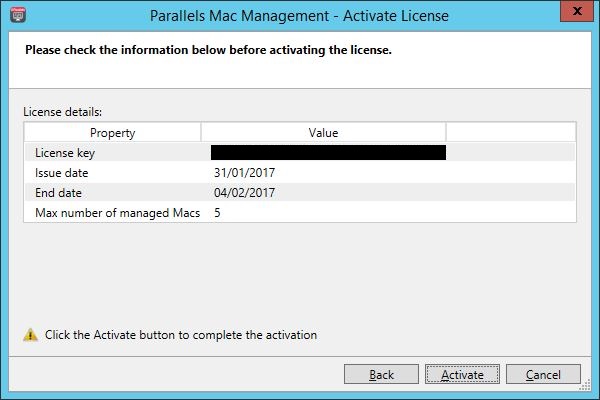
At the summary screen click ‘Activate’.
Click Finish to complete the activation process.
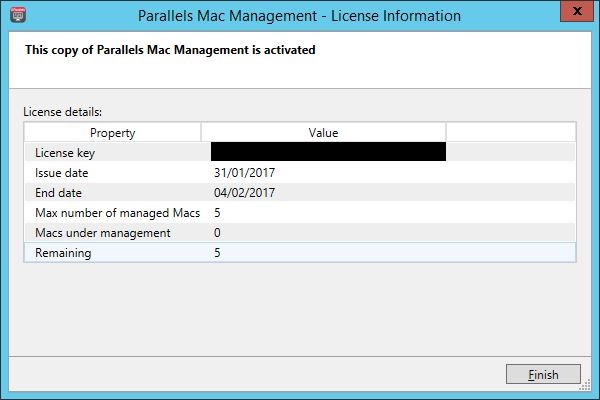
Parallels will now report as being Activated
Discover the Mac devices
Parallels can leverage two methods to discover Mac devices in your environment. It can use the built-in ConfigMgr AD System Discovery, if the devices are domain joined or Parallels have their own Parallels Network Discovery. This can discover both AD join Macs and those that are not connected to a domain.
I will be using Parallels Network Discovery in this blog post since my Mac device is not installed in a domain.
Here’s a run through of the settings to get your Mac discovered.
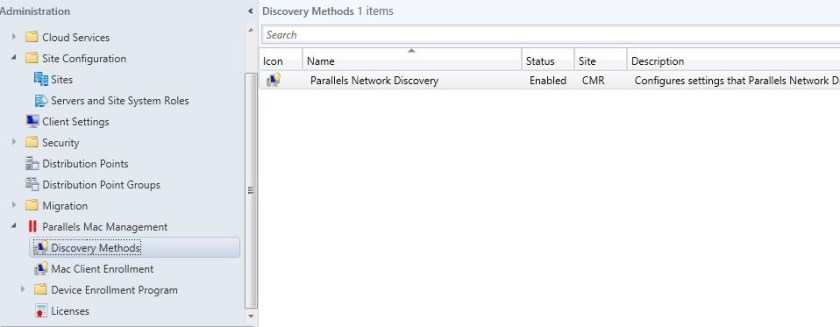
Parallels Network Discovery is accessed from Administration workspace under Parallels Mac Management>Discovery Methods.
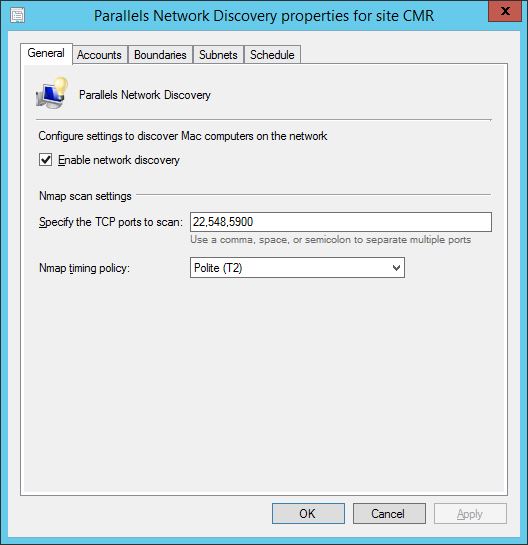
In the General tab ensure that ‘Enable network discovery’ is enabled. Ensure that ports to Mac client are open on one of the ports listed. The default Nmap settings provide the optimal balance between the quality of the results and the time it takes to scan the network.
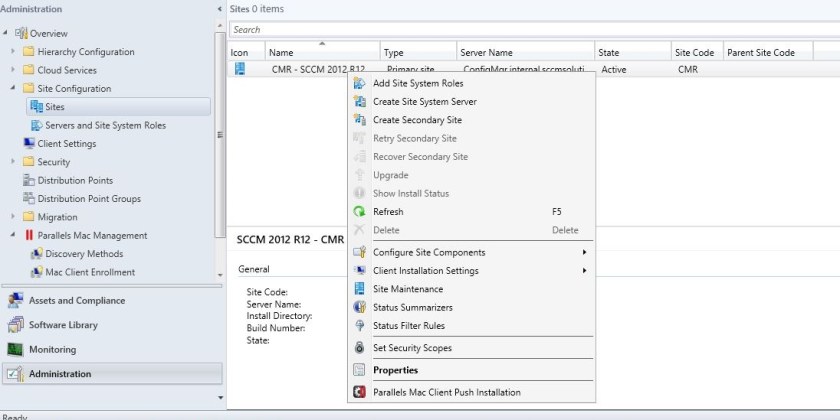
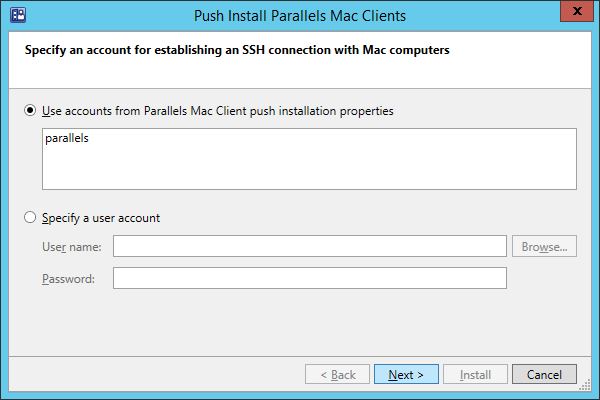
The Accounts tab states that the client push installation will be used to install the client on to a Mac when a Network Discovery takes place. To configure this account go to Site Configuration>Sites. Right click your site and select ‘Parallels Mac Client Push Installation’
In the Accounts tab, click the Yellow starburst

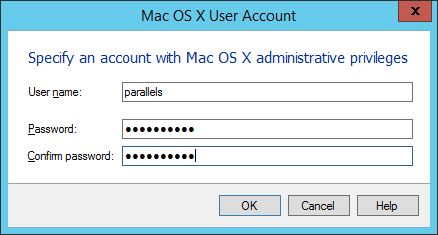
Enter an account which has local admin rights on the Mac devices.
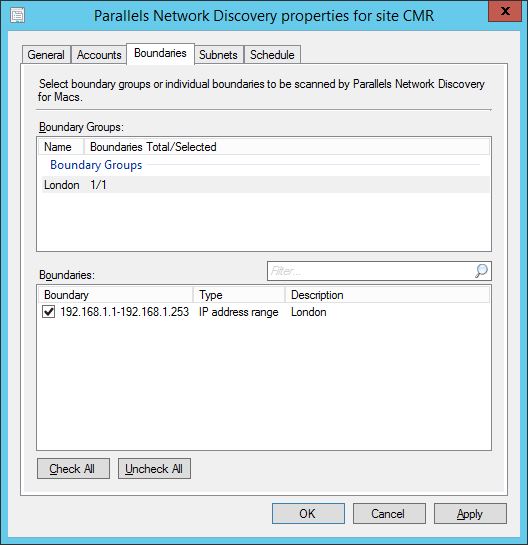
Back at the Parallels Network Discovery set up, in the Boundaries tab select the boundary in your ConfigMgr site that contains the Mac device.
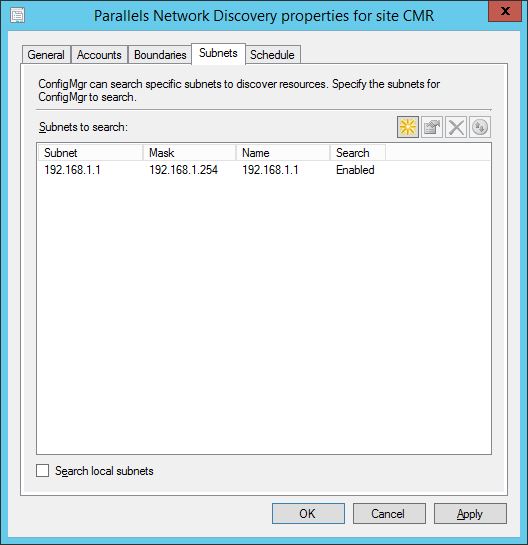
You can also enter a Subnet to discover devices in.
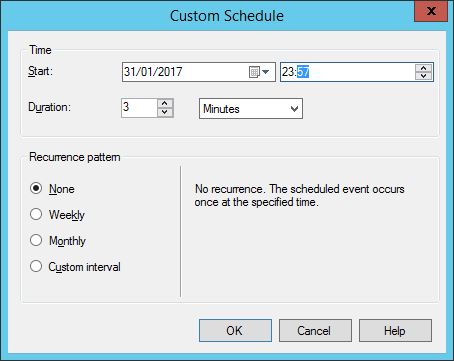
In the schedule tab enter a relevant schedule for discovery.
When discovery runs a pma_discovery.log will be created in the Windows\Logs folder on the proxy server.
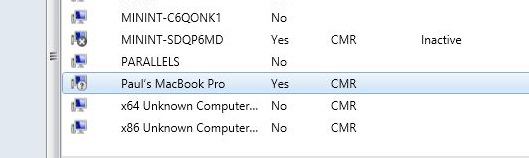
If devices are discovered they will appear in the ConfigMgr console.

Parallels Mac Client Install
Now that we have a Mac object discovered in ConfigMgr we can push the Parallels Mac client to the device. To achieve this however, the following must be enabled on the Mac device.
Grant Administrative Privileges on a Mac to a Domain User or Group
If you want to use a domain account to push install Parallels Mac Client, you need to grant administrative privileges to it on a Mac. You can do this as follows:
- Open System Preferences > Users & Groups and click Login Options at the bottom of the left pane.
- In the right pane, click Network Account Server: Edit… Please note that if the button says “Join…” (not “Edit”) then this Mac is not a member of a domain, so the following instructions will not work.
- In the dialog that opens, click Open Directory Utility.
- On the Services tab page of the Directory Utility dialog, select Active Directory and then click the pencil icon to edit the settings.
- In the dialog that opens, click Show Advanced Options and then click the Administrative tab.
- Select the Allow administration by option and add the desired domain user or group to the list. The username password is used to configure the client push installation.
- Click OK to save the changes and then close all dialogs.
Parallels Mac Client Deployment Grant Administrative Privileges to a Local Mac User
If you have Mac computers that are not members of a domain (or if you don’t want to use a domain account for any reason), you need to create a local OS X user with administrative privileges.
To add a user, open System Preferences > Users and Groups, click the plus-sign icon, select Administrator and specify the user information. The username password is used to configure the client push installation.
Enable SSH Access on a Mac Parallels
The Configuration Manager Proxy will connect to Mac computers over SSH, so you need to enable SSH access on each Mac. To do so:
- On a Mac, open System Preferences > Sharing.
- Enable the Remote login service.
- If you have granted permissions on this Mac to a domain account, add it to the list of users who are allowed remote access. If you’ll be using a local user, add that user to the list.
After enabling SSH access on a Mac and granting a local or a domain user SSH access, you should verify that you can actually establish an SSH connection. The Mac should allow SSH connection with password authentication.
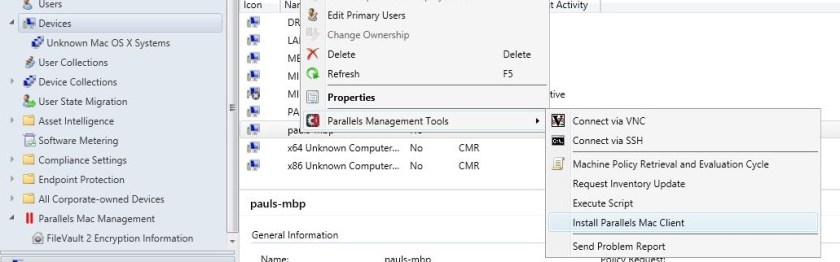
Once the above configuration is enabled on the Mac right click the discovered Mac object in the ConfigMgr console. Select Parallels Management Tools>Install Parallels Mac Client.
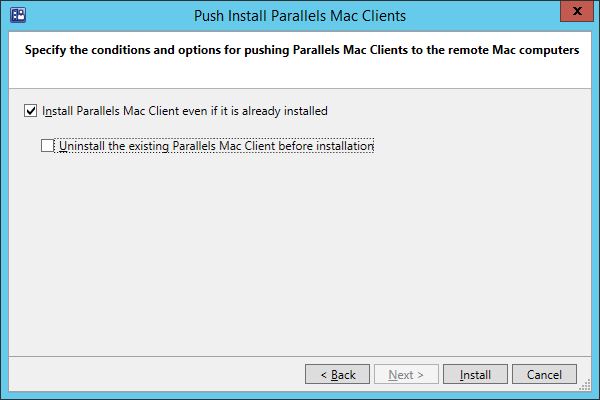
Click Next.
Click ‘Install Parallels Mac Client even if it is installed’ and click Install.
The client will being to install.
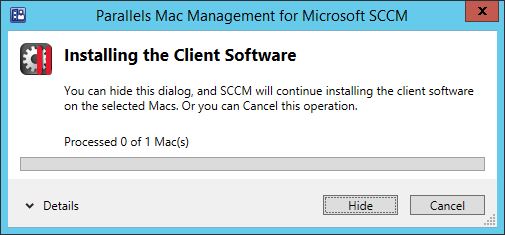
Once complete the device will report back to ConfigMgr and be assigned to the site.
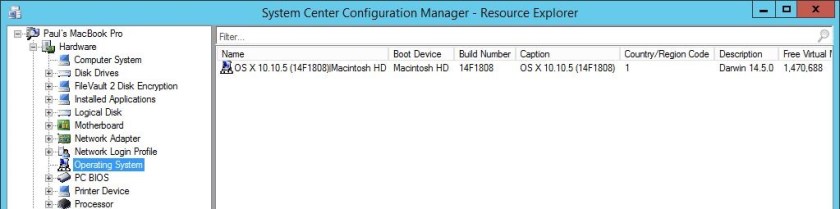
You’ll also be able to check out HINV details of the Mac in Resource Explorer.
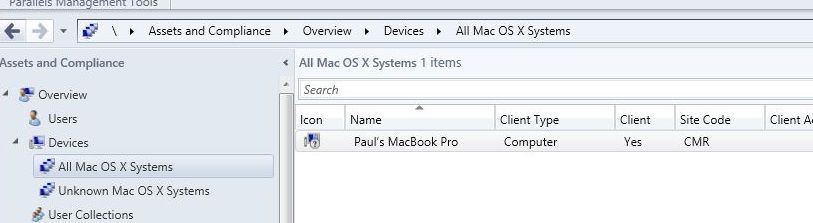
and the Mac will be added to the All Mac OS X Systems collection.
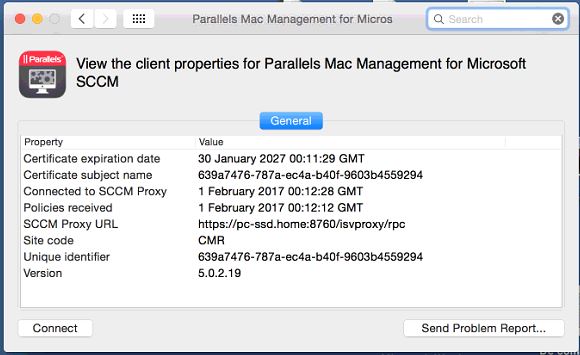
On the Mac device you will see that a Parallels Mac Management applet is now available in System Preferences.
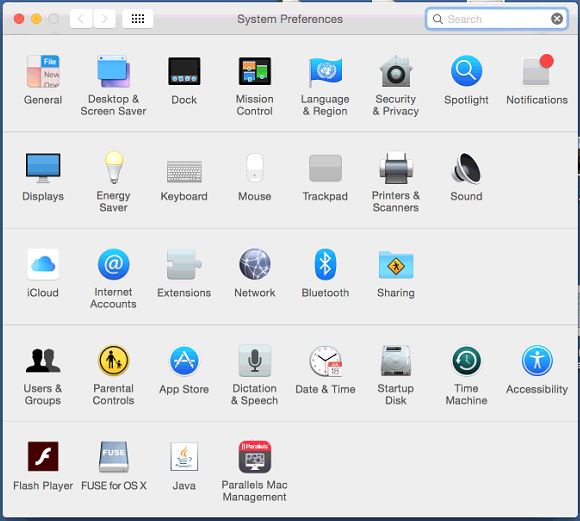
When opened you’ll notice this appears similar to the ConfigMgr control panel applet. It gives information on the site code, proxy it is connected to and more. The ‘Connect’ button allows you to run something similar to a Machine Policy Retrieval.
In the Part 5 of the series, I will show you how to deploy software applications to the managed device.

Will you be deploying Office Mac 2016 to managed device?
Not sure Ram. Initially WinZip but I am having some issues with Hyper-V on my Win 10 TP build so it’s been delayed
Hi Mr. SCCMentor,
Thank you for tutorial posts which are very helpful and clear. I have a question about the remote control and remote desktop client on the mac machine. I selected the newly discovered mac machine ( given that the Parallels Mac Client already installed and other sharing feature, e.g. remote management, enabled on the mac machine.) and right-clicked on the remote control or remote desktop client, and received error message saying “remote machine is not on the network, remote access is not enabled on the remote machine, or remote machine is turned off”. I successfully had remote control or remote desktop client on other discovered Windows-based PCs.
Do I need to install something on Mac machine in order to use the remote control or remote desktop client feature to connect to the mac machine ???
You need to turn on vnc on the mac. This article should get you up an running https://msitproblog.com/2017/03/23/setting-remote-control-using-parallels-mac-management-configmgr/
It worked per your instruction. No wonder why you’re a certified Parallels Mac Management for SCCM with amazing score of 100%.
I have not found any article about the use of the remote control or remote desktop client feature under the start option when selecting the mac device in order to remotely manage it. The feature should be be grayed out or disappeared when selecting the mac device, or otherwise it causes confusion.
THANK YOU SIR,
Paul – I was able to deploy few applications to Mac Book Pro systems within the home lab which includes WinZip. I also created a detailed document with full screen shot on how to deploy. If you want, I can email the document and you can upload here for others to run through the whole process.
Now, I am working on creating a ADR to deploy monthly updates for Mac Book Pro systems. Since ADR has a limit of 1000 updates per rule the update failed. I was modifying the rule to just include the updates for the last 2 months. Still work in progress.
Truong – If you need to rdp to mac systems – try remote desktop manager program. I am using this software – I am able to rdp to 2 mac systems. Make sure to use Apple Remote Desktop and not Microsoft Remote Desktop as the connection entry.
Ram
Cheers Ram. Got my lab fixed so I should be cracking on with the next set of posts soon. Good to hear things are moving forward and that the topic of Mac management is being tired and tested.
Thanks Ram. I will try it.
Reblogged this on System Center.