Note that since this article was written, changes have been made to the CMG role and it is worth checking with the TechNet documents for the latest on configuration – such as all MPs now require HTTPS for CMG clients.
In part 1 of this series, I ran through the process of setting up the CMG with your internal PKI infrastructure.
Microsoft, however, recommends that you set up the cloud management gateway with a server authentication certificate from a public provider, such as Digicert or Verisign.
This second part of the series shows you how to achieve this.
It’s worth noting that when you are setting up CMG with a public certificate that you still require internal PKI for your client authentication, trusted root and management certificate.
Also, rather than referring you back to part 1 when duplicate steps are used, this blog post shows you the full end-to-end to get the process up and running so expect some repetition from first blog in the series.
As before, you can keep your existing internal infrastructure running on HTTP or HTTPS as both are supported, however internal HTTPS is recommended.
The Cloud Management Gateway must be created at the top tier of a SCCM hierarchy, if running a CAS, then the CMG’s must be created on the primary sites.
CMG using external certificates
To set up CMG using a external certificate authority you will need the following certificates:
- A management certificate – to be used in Azure, and when configuring the CMG – this will be created on your internal PKI infrastructure
- A web server certificate – created at the public certificate provider
- The trusted root certificate, and any sub-ordinate certificates in your internal CA chain.
- A client authentication certificate
Start by checking that the Azure domain name that you wish to use is available, it must be unique. To do this log into the Azure portal at https://portal.azure.com. Click New and type in Cloud Service. Go into the Cloud Service and click Create.
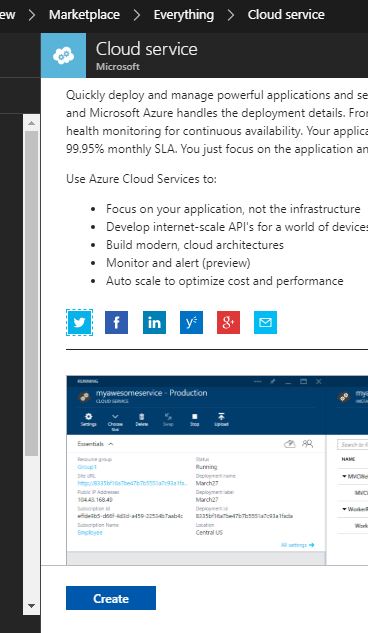
At this point you can enter the DNS name and it will auto check for availability. Don’t create it, but this as the method to discover the DNS name you want. I’m going to go with sccmcmgateway for my DNS name.
Now that you know the name you want you can request the certificates based on this name but first we need to create a CNAME record on your organisations public domain name service. This will be used to map your external name to the cloud management gateway service name.
So for eaxample sccmgateway.<external namespace> needs to map to sccmcmgateway.cloudapp.net.
As you can see, I have created the CNAME record on my DNS public name service.
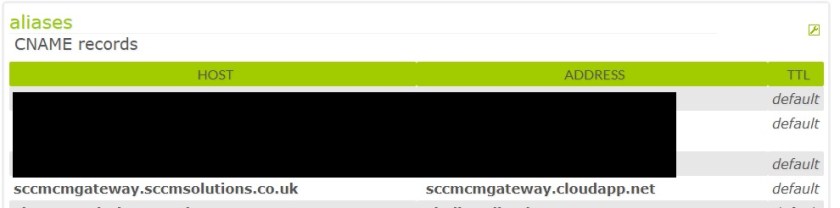
The next step is to request a SSL server certificate from your public certificate provider. I can’t show you this process as each provider is different, but basically the SSL cert needs to have the external name that we specified a moment ago. So, I have requested a sccmcmgateway.sccmsolutions.co.uk certificate. Once you have been granted the certificate put it to one side as now we need to focus on the internal certificates that we require for the CMG.
Setting up the internal certificates
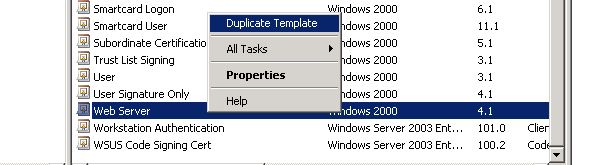
Fire up your certificate authority, drill down to Certificates, right click and choose Manage. Note that I am using an old 2008 DC, the process is the same for 2012 and above.
![2017-11-18 22_58_44-certsrv - [Certification Authority (Local)_internal-DC-CA_Certificate Templates].jpg](https://sccmentor.com/wp-content/uploads/2017/11/2017-11-18-22_58_44-certsrv-certification-authority-local_internal-dc-ca_certificate-templates.jpg?w=616)
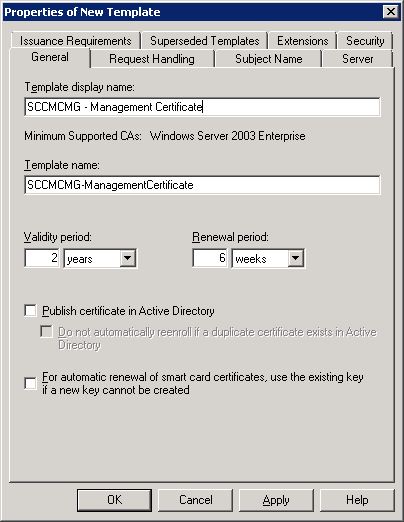
Right click the Web Server template and select Duplicate Template.
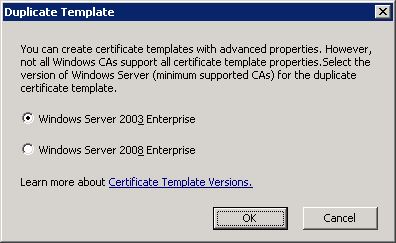
Select Windows Server 2003 Enterprise. Click OK.
Enter a name for the template. I’ve called mine ‘SCCMCMG – Management Certificate’ as I am going to create another template for my Web Server cert.
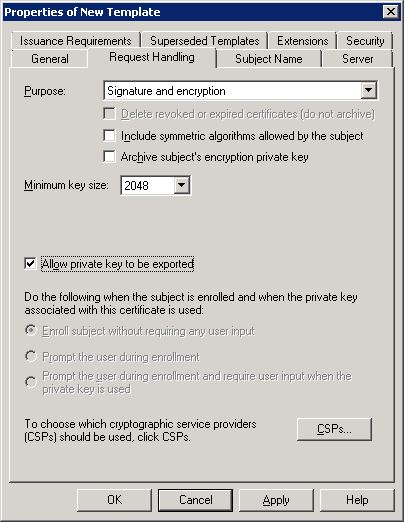
In the Request Handling tab choose Allow private key to be exported.
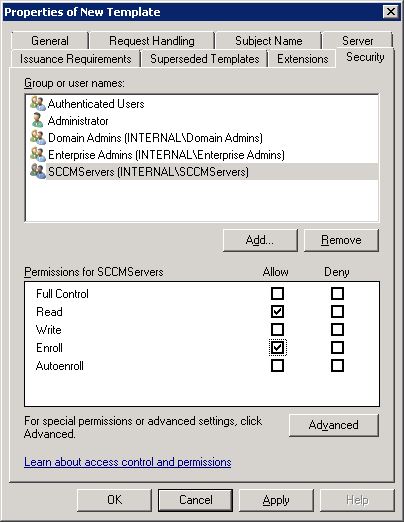
Set security accordingly so that enrollment can take place, Read and Enroll permissions are required for this.
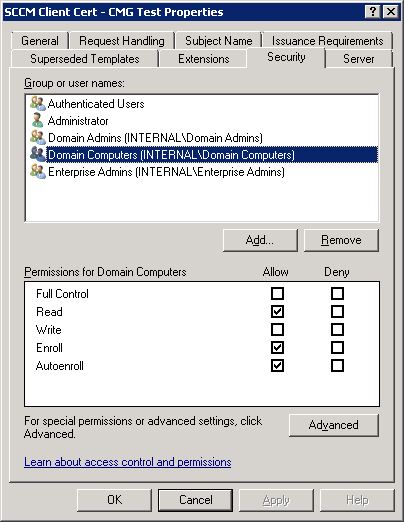
Now we need to create a template for the client authentication. If you already have PKI roles in your SCCM hierarchy, then you won’t need to do this since you will already have client authentication in place.
As with the web server templates, you need to right click and choose Manage. Again choose Windows Server 2003 Enterprise and enter a meaningful name for the template.
In the Security tab set the following for Domain Computers – Read, Enroll and Autoenroll.
With the templates in place, we need to issue them so that we can enroll them.
To do this right click the Certificate Templates folder in the Certificate Authority and choose New>Certificate Template to Issue.
![2017-11-13 20_53_09-certsrv - [Certification Authority (Local)_internal-DC-CA_Certificate Templates].jpg](https://sccmentor.com/wp-content/uploads/2017/11/2017-11-13-20_53_09-certsrv-certification-authority-local_internal-dc-ca_certificate-templates.jpg?w=840)
Choose the certificate template, in this instance the management cert template and click OK.

The certificate template will be available for enrollment. Repeat the process for your client authentication template.
![2017-11-20 17_13_42-certsrv - [Certification Authority (Local)_internal-DC-CA_Certificate Templates].jpg](https://sccmentor.com/wp-content/uploads/2017/11/2017-11-20-17_13_42-certsrv-certification-authority-local_internal-dc-ca_certificate-templates.jpg?w=840)
Next up, you need to request the certificates on a computer.
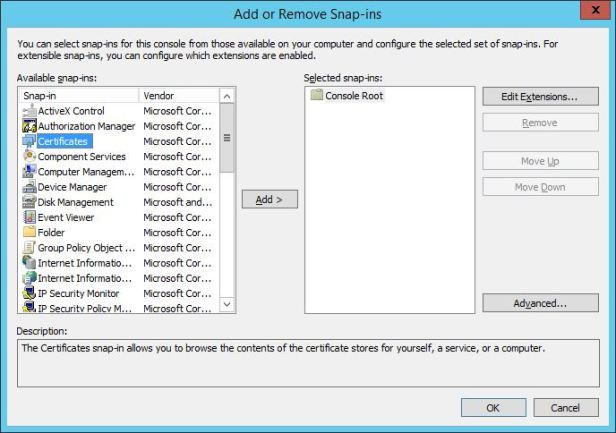
Let’s start with the management certificate.Load up MMC and choose File>Add/Remove Snap-in…
![2017-11-18 23_35_02-Console1 - [Console Root].jpg](https://sccmentor.com/wp-content/uploads/2017/11/2017-11-18-23_35_02-console1-console-root.jpg?w=616)
Select Certificates and then click Add>.
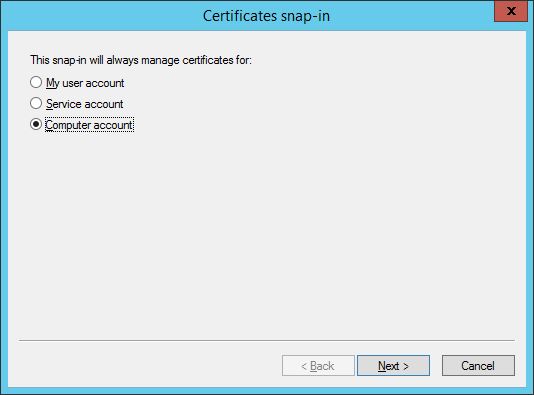
Choose Computer account and click Next.
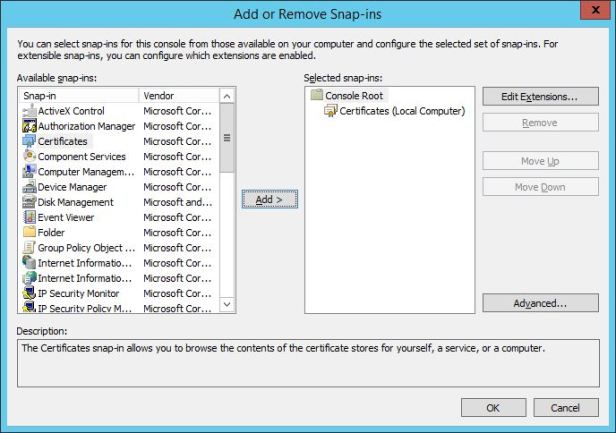
Ensure Local computer is selected and click Finish.

Note that Certificates (Local Computer) is in the Selected snap-ins pane. Click OK.
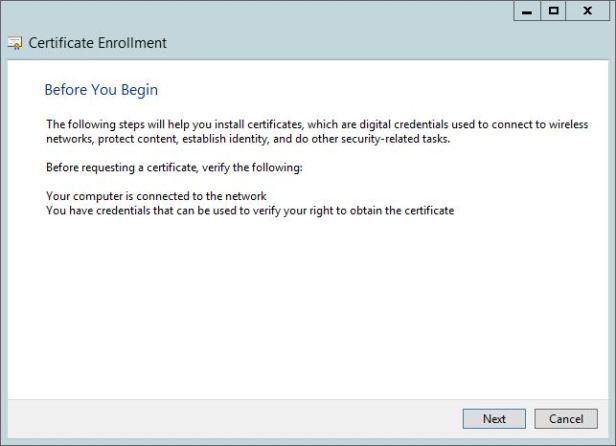
Navigate to the Personal store and right click, choose All Tasks>Request New Certificate.
![2017-11-17 20_00_01-Console1 - [Console Root_Certificates (Local Computer)_Personal_Certificates].jpg](https://sccmentor.com/wp-content/uploads/2017/11/2017-11-17-20_00_01-console1-console-root_certificates-local-computer_personal_certificates.jpg?w=616)
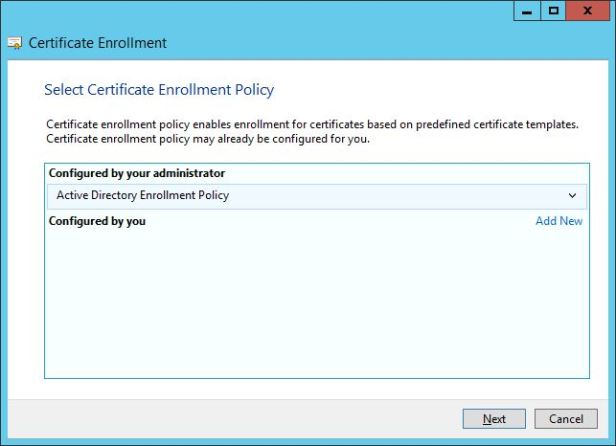
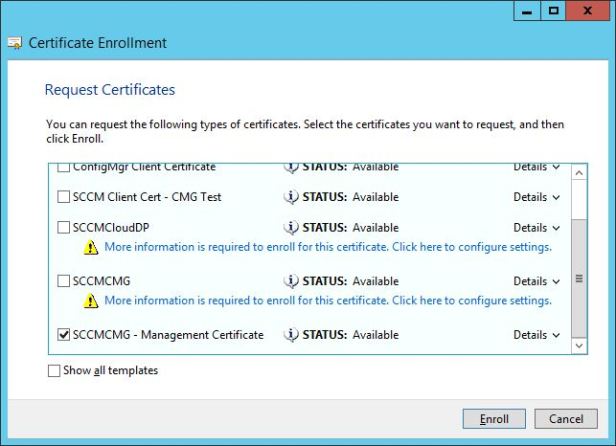
Click Next to begin the certificate enrollment.
Go with the defaults here by clicking Next.
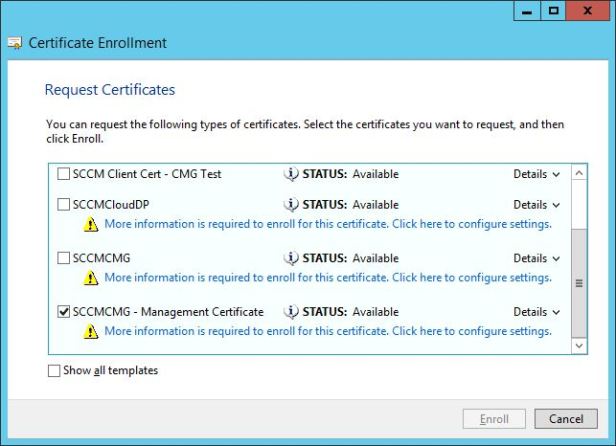
Select the management certificate template that was created earlier. Then click the More information link.
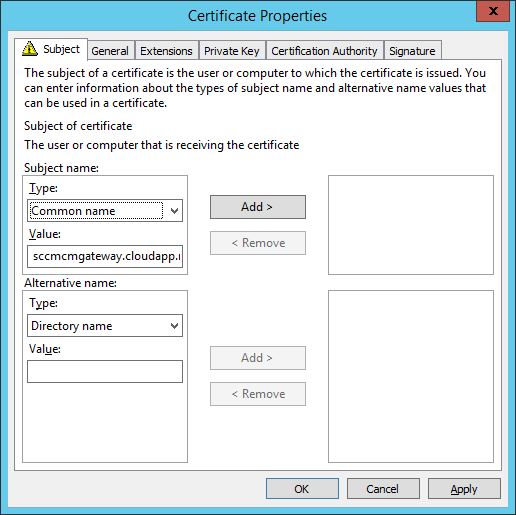
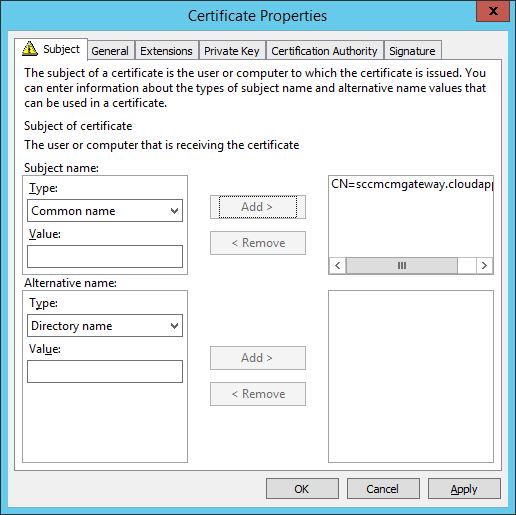
In the Subject tab click the Type drop down and enter the FDQN for the cloud service, this is the DNS name you checked for availability + cloudapp.net, in the Common name type. Once done, click Add>.
Click OK.
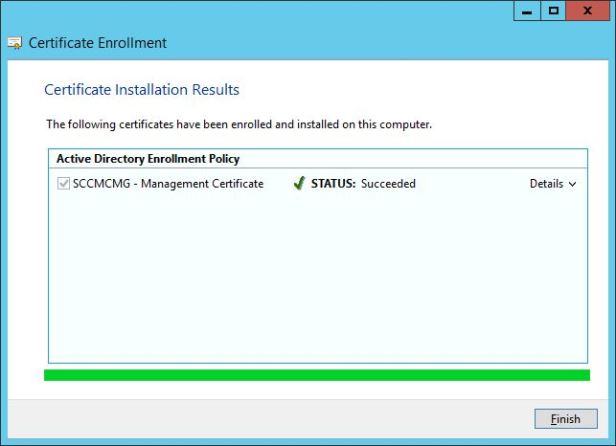
Click the Enroll button to enroll the certificate.
When the process is complete click Finish.
The next step in the certificate process, is to export the certificate so we can import them in with or without a private key. We will use this export to upload the management certificate into Azure and to configure the CMG.
In the personal store, if you refresh you will see you have a new cert. Right click the management certificate, you can check the Certificate Template column to ensure you have the correct one, select All Tasks>Export.
![2017-11-20 00_11_34-Console1 - [Console Root_Certificates (Local Computer)_Personal_Certificates].jpg](https://sccmentor.com/wp-content/uploads/2017/11/2017-11-20-00_11_34-console1-console-root_certificates-local-computer_personal_certificates.jpg?w=840)
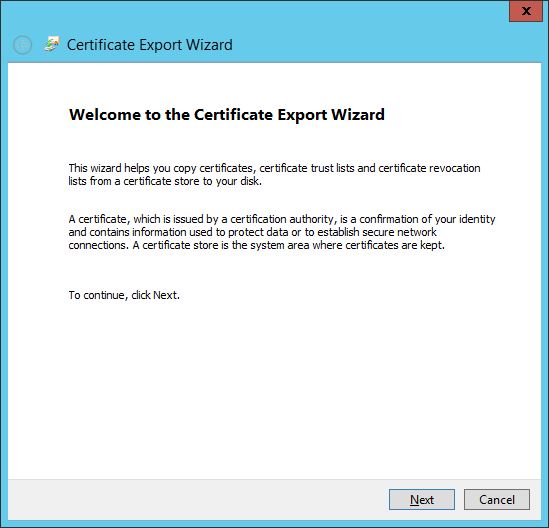
Click Next on the export wizard.
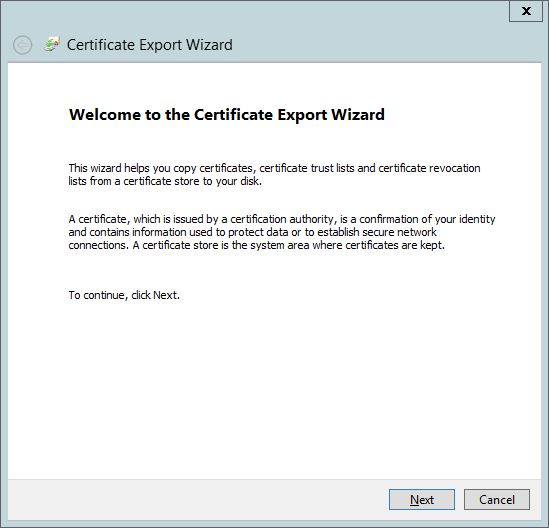
Choose not to export the private key and click Next.
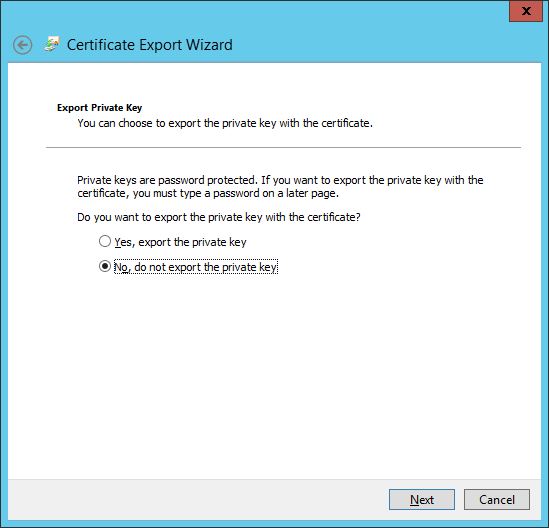
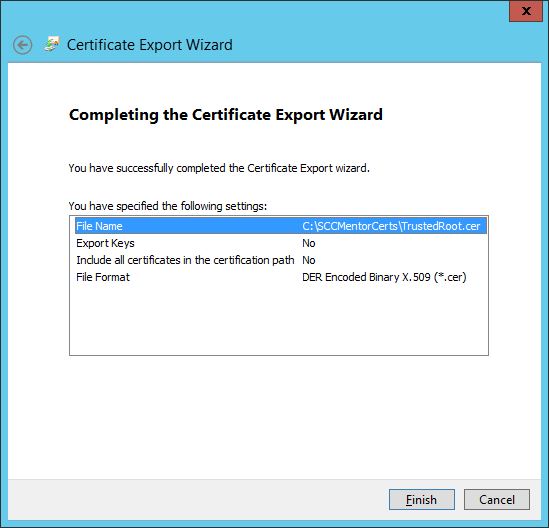
Export the DER encoded binary X.509 (.CER) format and click Next.

Save the certificate as the .cer file. Name it accordingly so you know which cert it is.
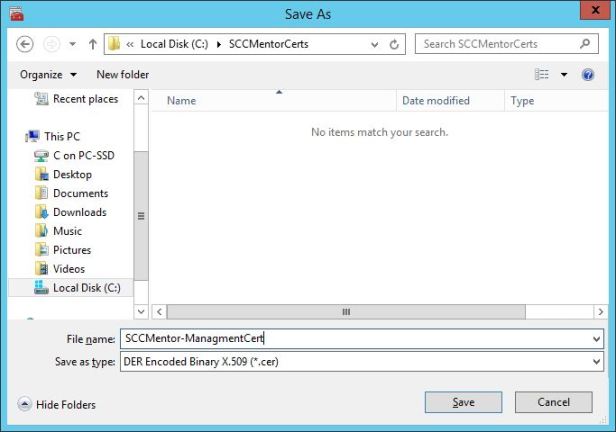
Click Finish to complete the process.

You will be notified that the export was successful.
The next step is to create an exported certificate with a private key.
As before, in the MMC>Personal>Certificates store, right click the management certificate and choose All Tasks>Export.
Click Next.
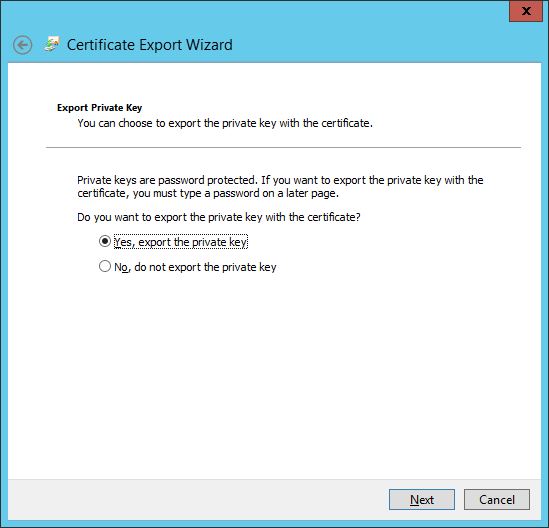
This time select Yes, export the private key. Click Next.
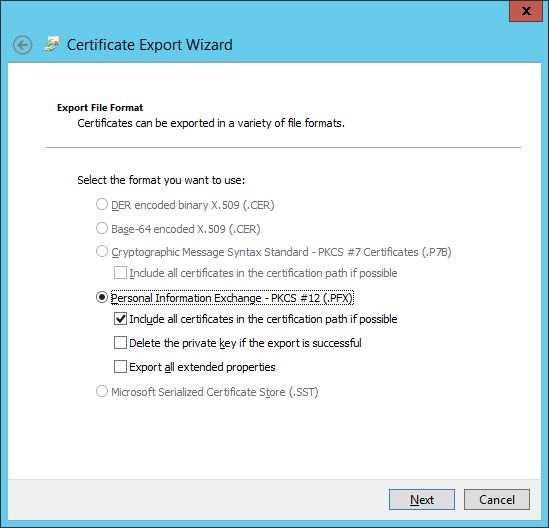
This time the .pfx format is selected. Go with the defaults and click Next.
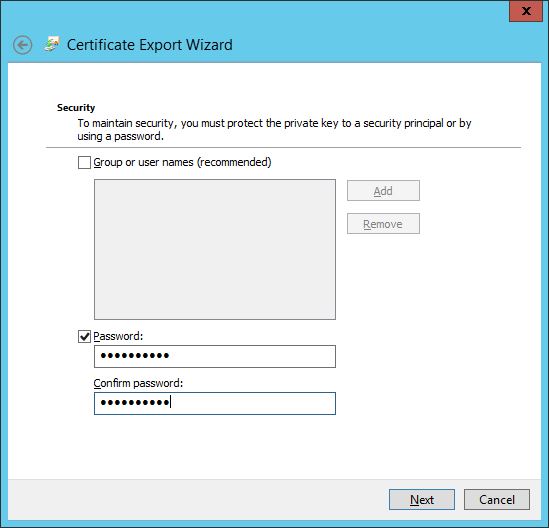
Enter a strong password for the pfx file and click Next.
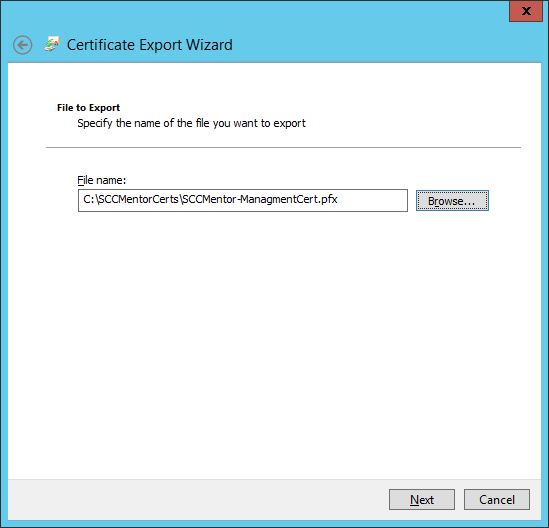
Save the certificate.
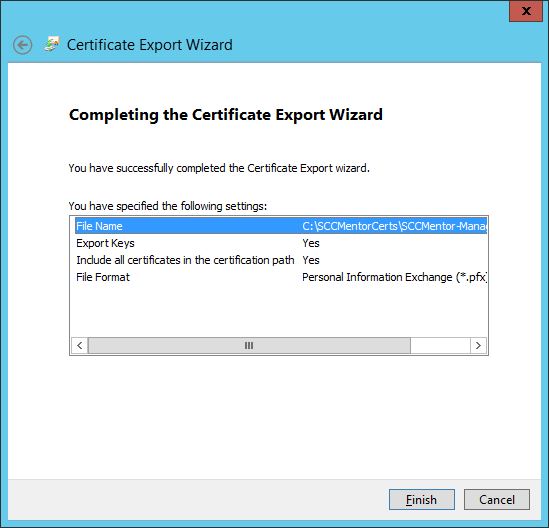
Click Finish to complete the export.
OK, we’re not quite there yet as we still need our trusted root and our client authentication certificates from our internal PKI.
Let’s start with the trusted root cert.
In the MMC, double click one of the certificates, web server or management cert – it does not matter which.
Go to the Certification Path tab and double click the root.
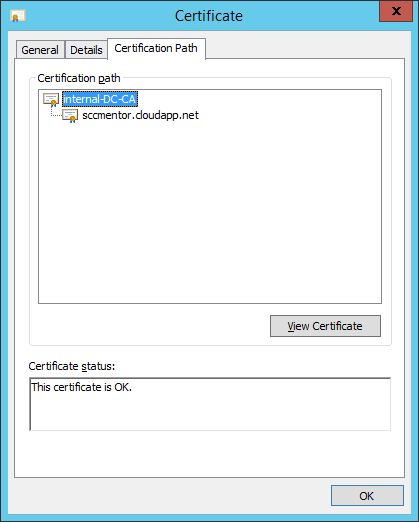
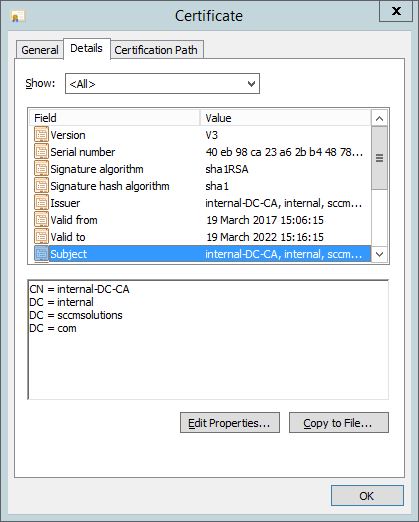
This will open up the root cert. You can confirm this is the root cert via the subject name. Click Copy to File.
Click Next.

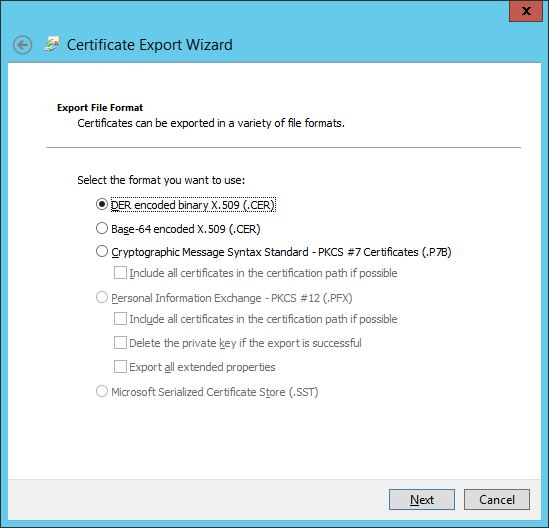
Export as a .cer file. Click Next.
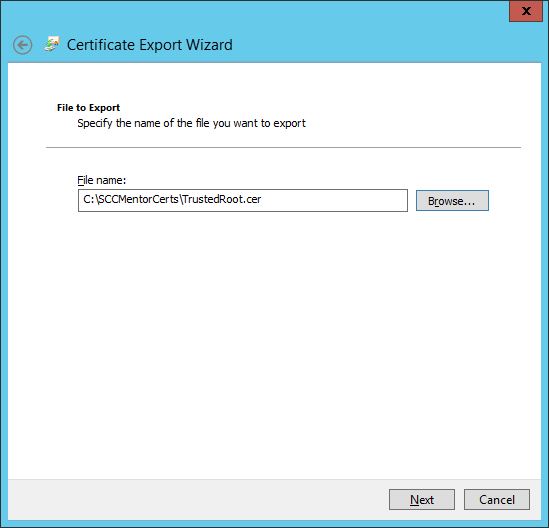
Save the file accordingly.
Click Finish to complete the export of the trusted root. If your certificate authority has sub-ordinate CAs then you will need to export the full chain as they will be required for aut
We are now onto the last of the internal certificates to create, the client authentication certificate.
We created the template earlier, now we need to issue the certificate to our client devices.
To do this simply create a GPO and deploy it out to the devices.
The settings required for this are, in the Group Policy Management Editor, choose Computer Configuration>Policies>Windows Settings>Security Settings>Public Key Policies. Select the Certificate Services Client – Auto-enrollment policy and edit it.
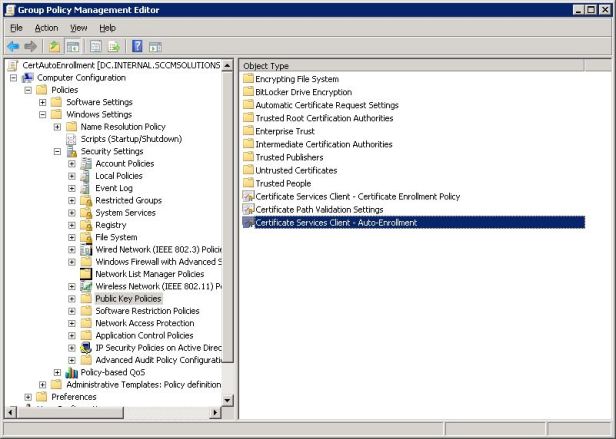
Enable the Configuration Model and check both Renew expired certificates, update pending certificates, remove revoked certificates and Update certificates that use certificate templates.

Restart a domain joined computer and the certificate will appear in its Personal store.

Export the pfx from the external certificate for use in the CMG
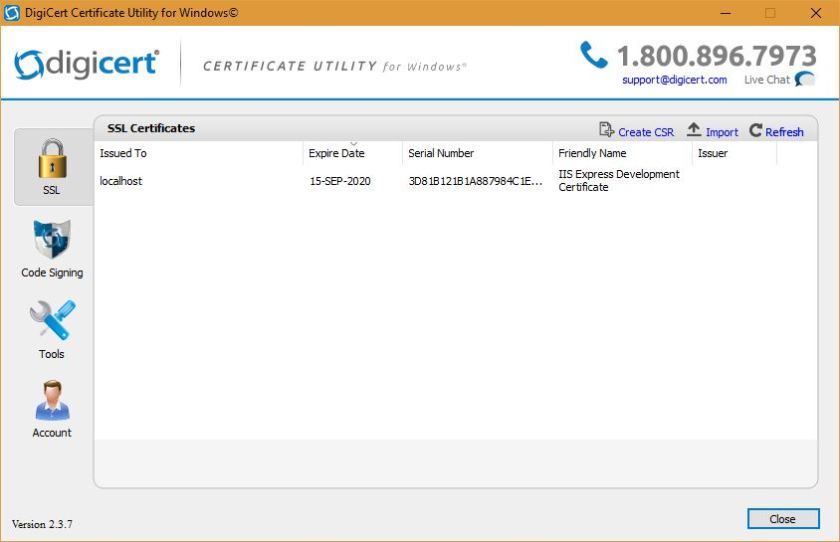
Now we need to export a pfx from the external certificate provided by your certificate provider.
Digicert provides me with a utility that allows me to import the crt file they provide and then export the pfx required for the CMG.
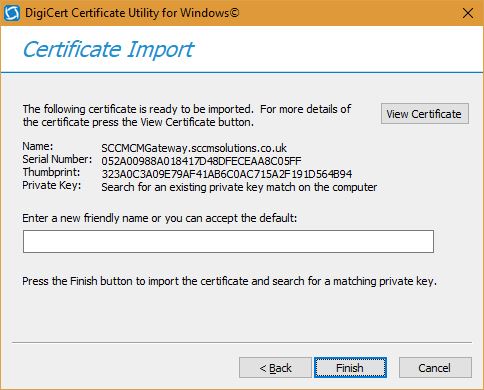
It’s as simple as clicking the Import button
Selecting the .crt file.
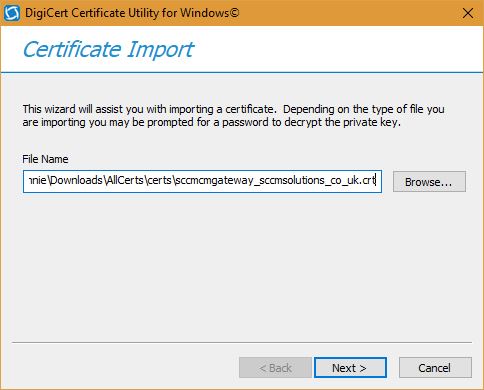
and clicking Finish.
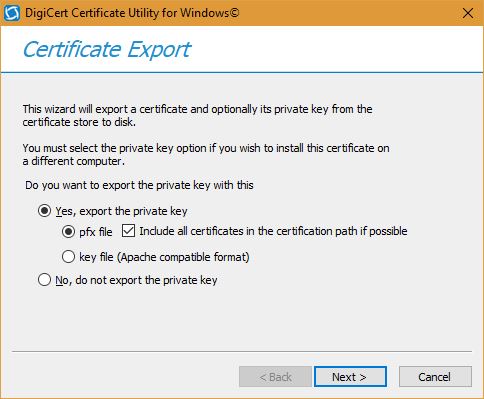
I can then export the certificate

and export the private key in pfx format.
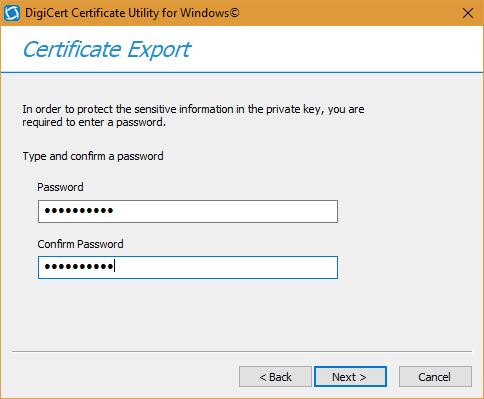
As with any pfx export, we need to specify a strong password.
and complete the export.
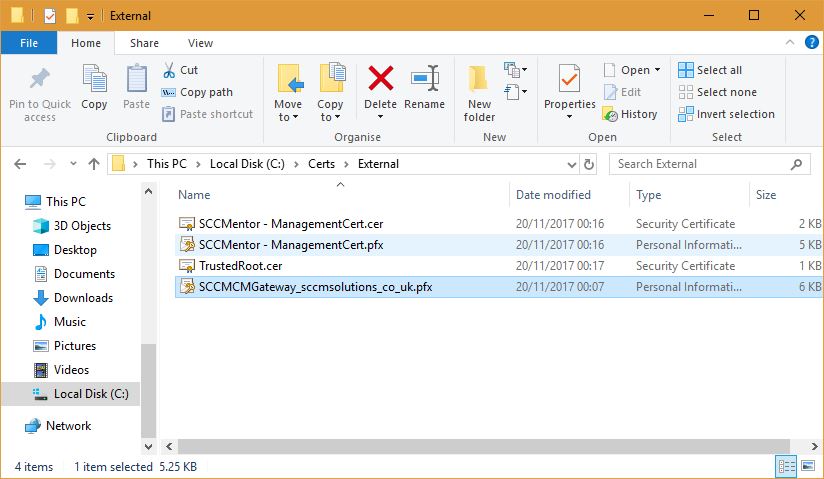
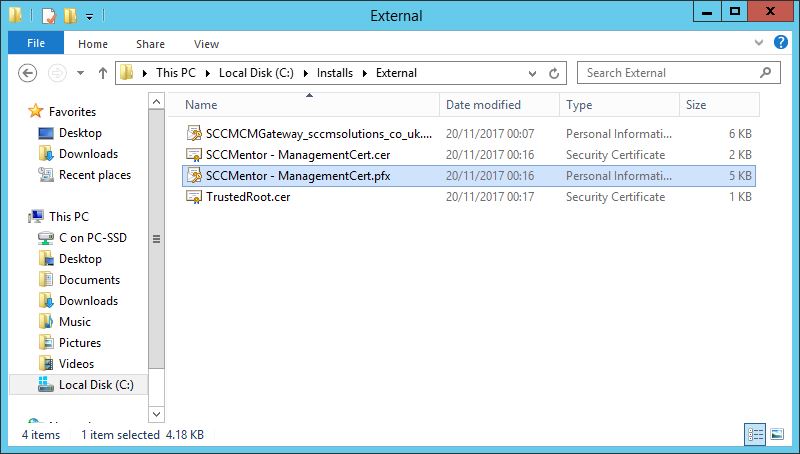
At this stage, we are ready to start building up the CMG environment but just to recap you should have four exported certificate files. 2 x Managment Certs (.cer & .pfx), 1 x trusted root cert and 1 x public SSL in pfx format.
Add the management certificate to Azure
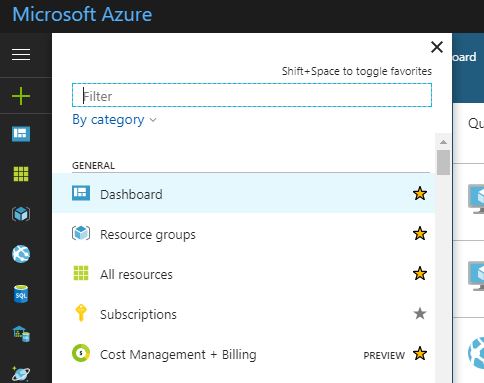
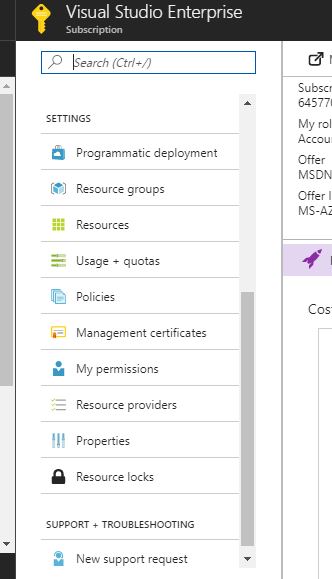
In the Azure Portal , navigate to Subscriptions and then select your subscription.
Select Management Certificates from the list of options.
Click the Upload link.
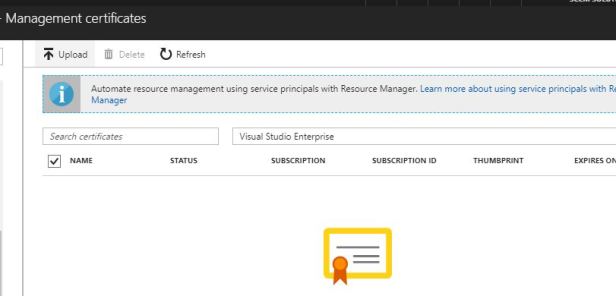
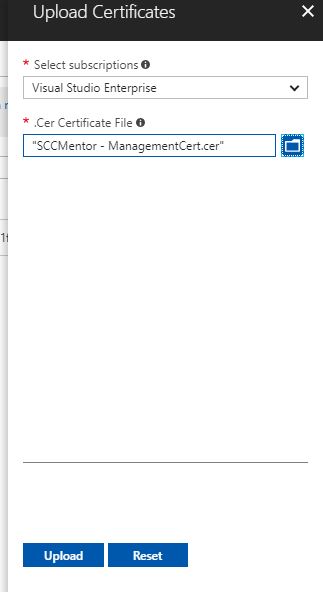
Next we need to select a .cer file to upload. This will be the management certificate .cer file created earlier.
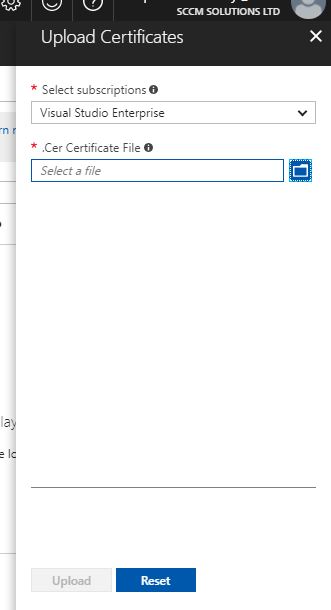
Click Upload.
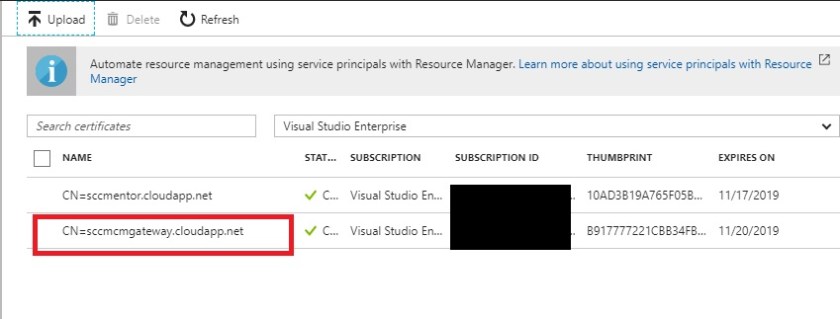
Ensure the cert is uploaded successfully. Copy your Subscription ID as you will need this next.
Set up the Cloud Management Gateway
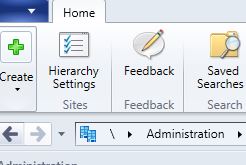
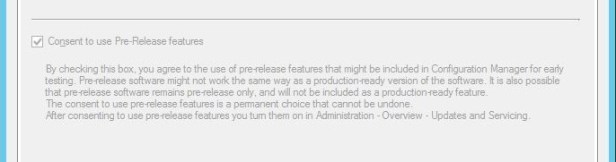
Since the CMG is still a pre-release feature, you will need to enable pre-release features on your site. This is a one off task, and to do this go to \Administration\Overview\Site Configuration\Sites. Click the Hierarchy button.
You need to Consent to use Pre-Release features. I have already enabled this on my site and hence this option is grayed out.
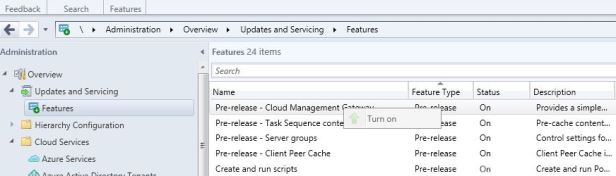
Now that pre-release features are allowed, we need to turn on the feature we need to use, in this case Pre-release – Cloud Management Gateway.
Go to \Administration\Overview\Updates and Servicing\Features, locate the Pre-release – Cloud Management Gateway, right click and Turn on.
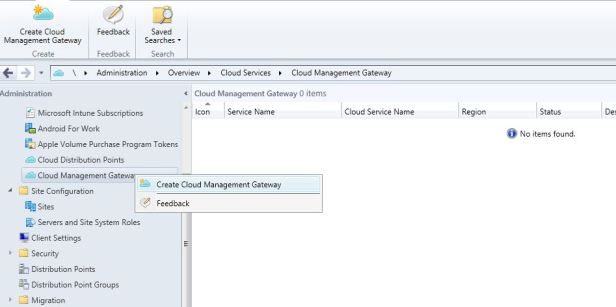
Now we can add in the CMG. Go to \Administration\Overview\Cloud Services\Cloud Management Gateway. Right click and choose Create Cloud Management Gateway.
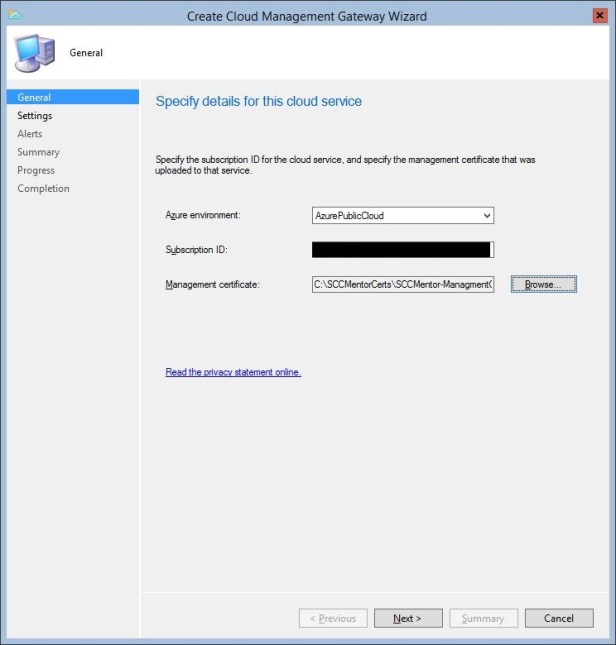
At the Create Cloud Management Gateway Wizard, ensure you have the correct Azure environment selected. Paste in the Subscription ID copied from Azure earlier and then click Browse.
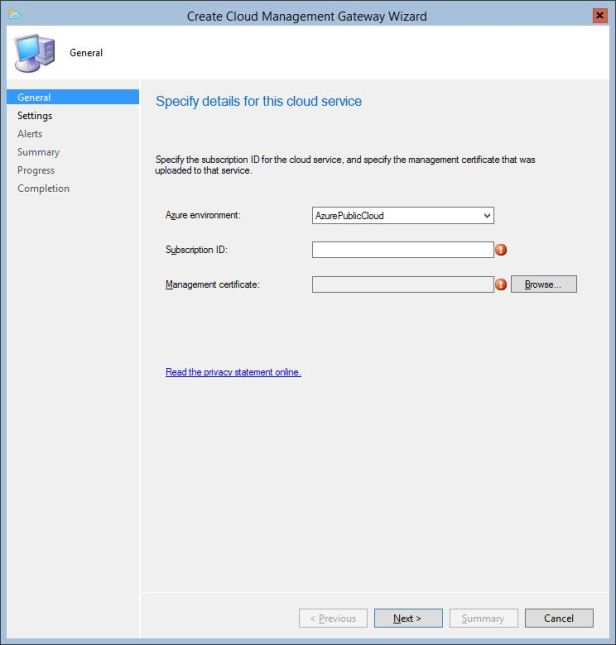
Select the management certificate pfx file.
Enter the password for the certificate when prompted and click OK.
With the information populated, click Next.
The information will be validated on the cloud service.
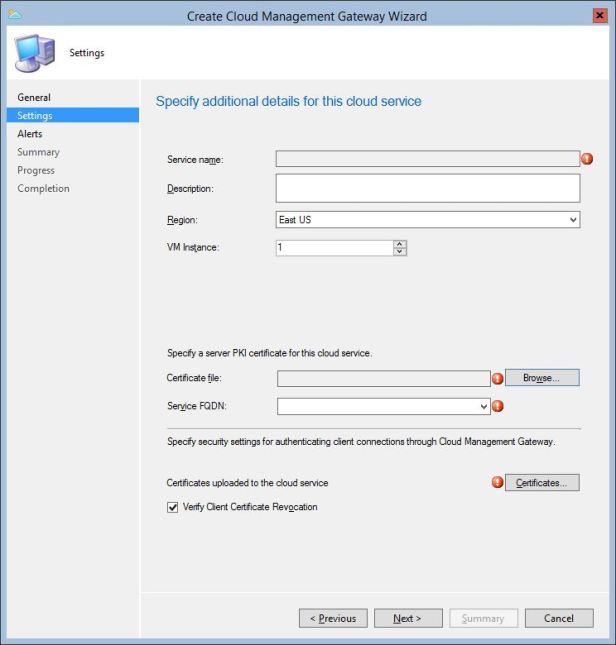
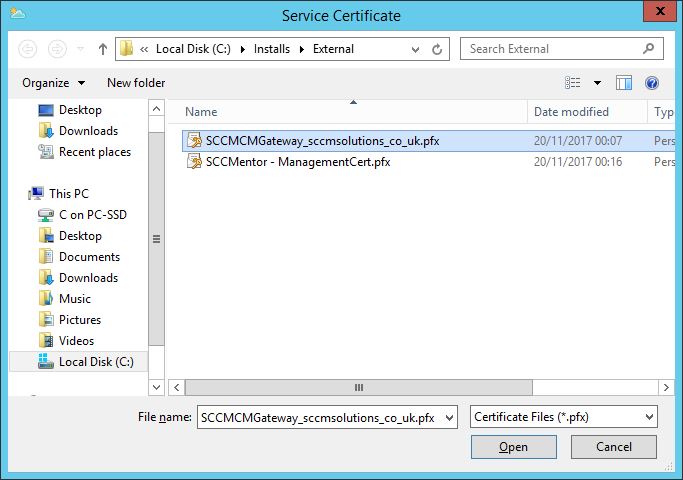
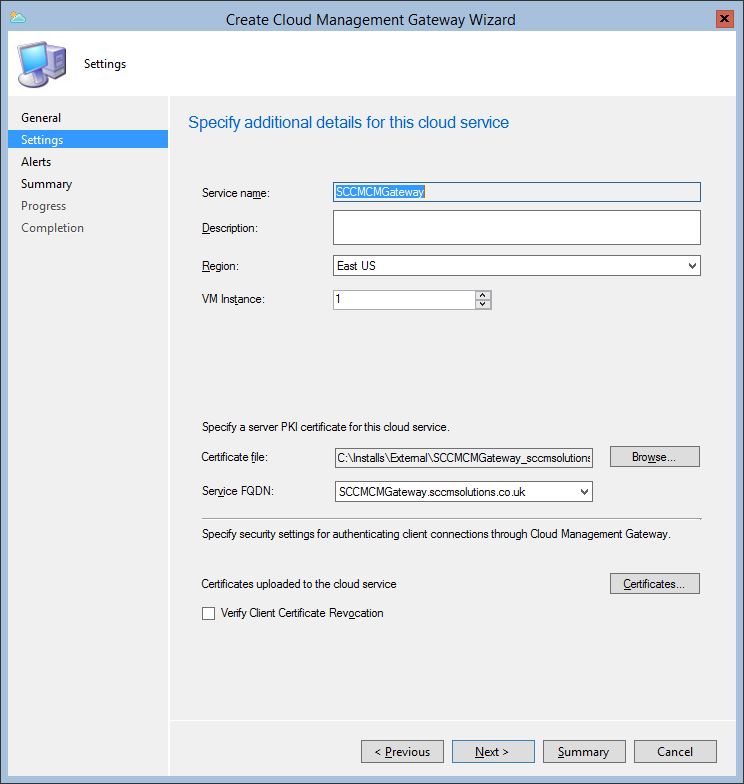
On the Settings section of the wizard, click the Browse button.
Select the external SSL Web Server certificate .pfx file.
Confirm the password for this certificate.

At this stage, you will notice that the service name has been automatically populated from the DNS name for your external DNS name, also the FQDN will be populated accordingly with the external name and namespace. Next click the Certificate button.

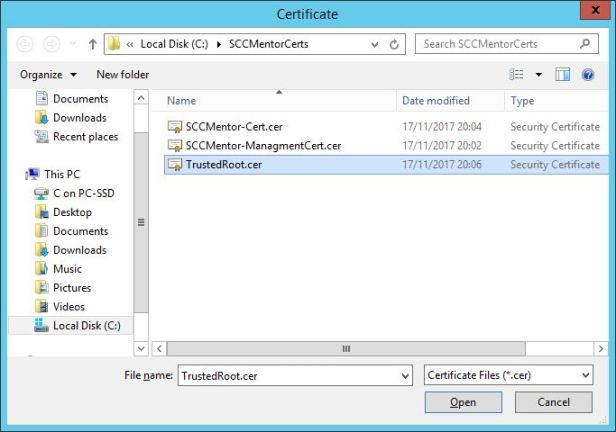
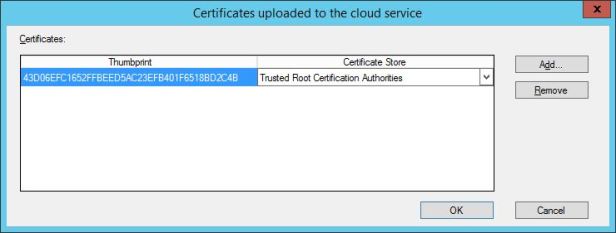
Click Add.
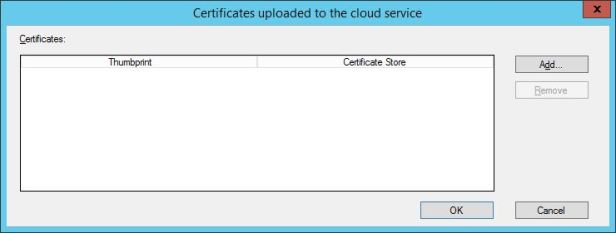
Now we need to upload any trusted root and sub-ordinate certificates. Since I only have a trusted root, I only need to upload that.
Note the thumbprint ID, make sure that matches the thumbprint from the Details tab of your trusted root cert. Ensure Trusted Root Certification Authorities. If you need to add in a sub-ordinate cert then click Add, but ensure that Intermediate Certification Authorities is chosen from the Certificate Store drop down. Click OK when done.
Note also, that there is a limit of 2 x trusted root and 4 x subordinate certs that can be added here.
Untick the Verify Client Certificate Revocation chedcbox, unless you’re publicly publishing your CRL information. Finally, select the Region and number of VM Instances required.
Note that clients, at present can connect to any CMG in the hierarchy regardless of location, but that logic will be introduced into the product in a future release.
Click Next.
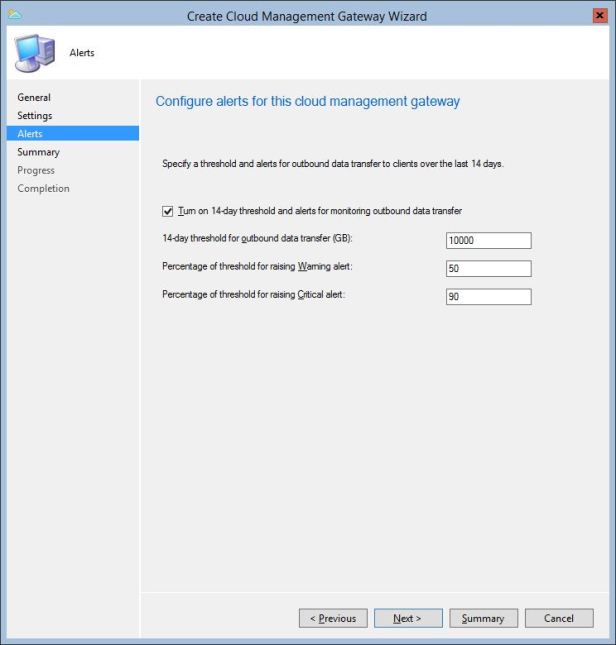
Set the relevant threshold alerts for CMG. I have left the defaults but you may wish to tailor for your needs. Click Next.
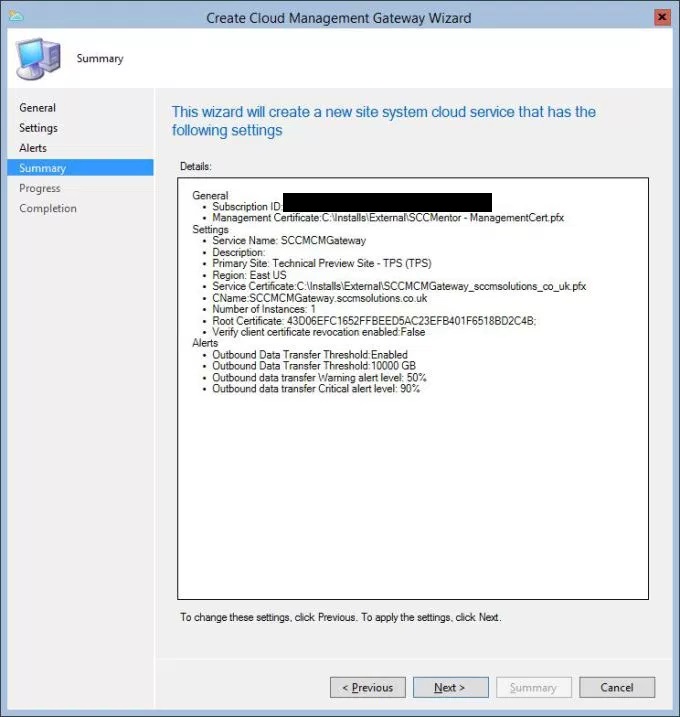
Click Next.
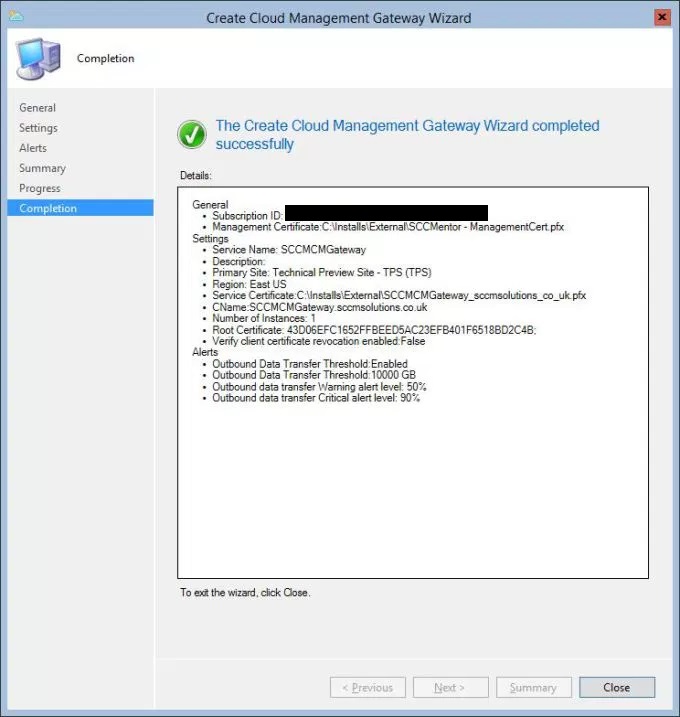
Click Close to complete the wizard.
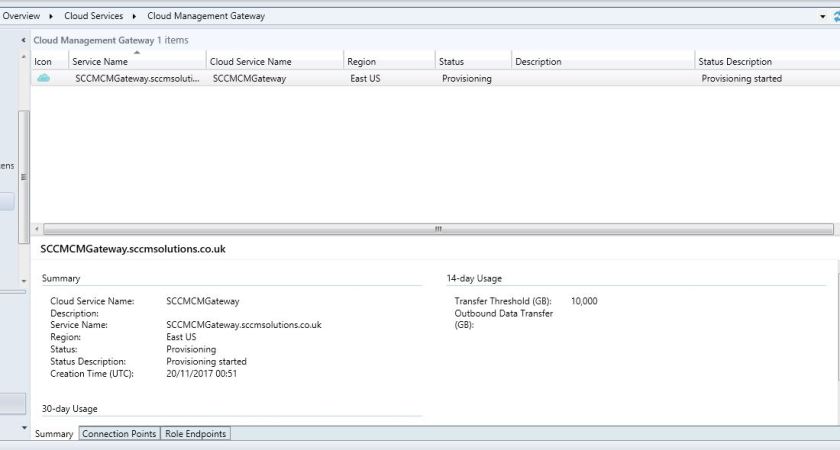
The CMG will start to provision.
Take a look at the CloudMgr.log file on the site server for information on what is happening.
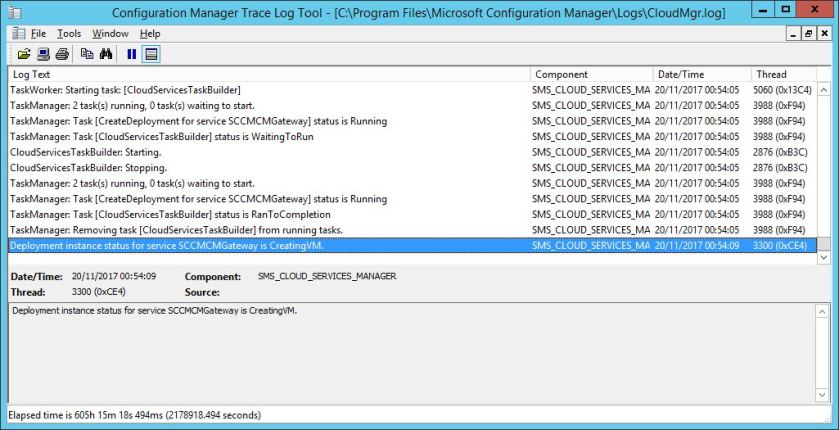
Here, for example, we can see certificates being added to the service, and that a subordinate cert is not
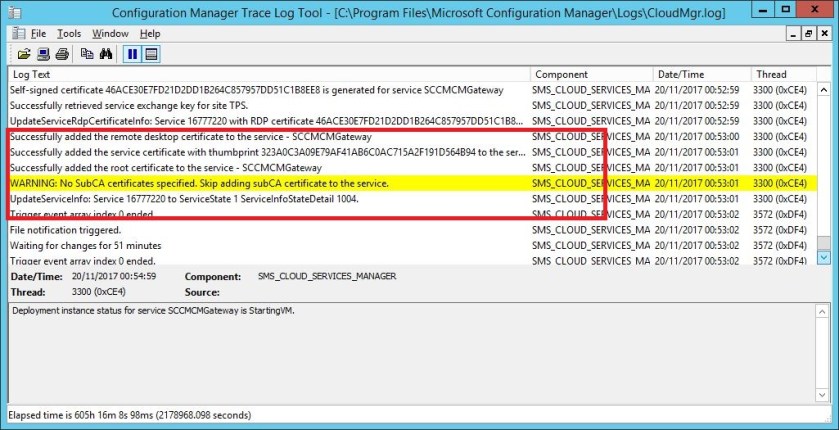
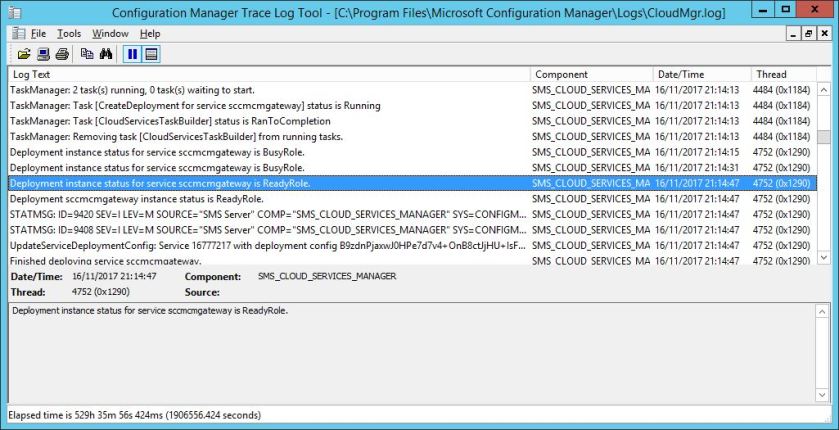
Eventually the deployment will report as ready.
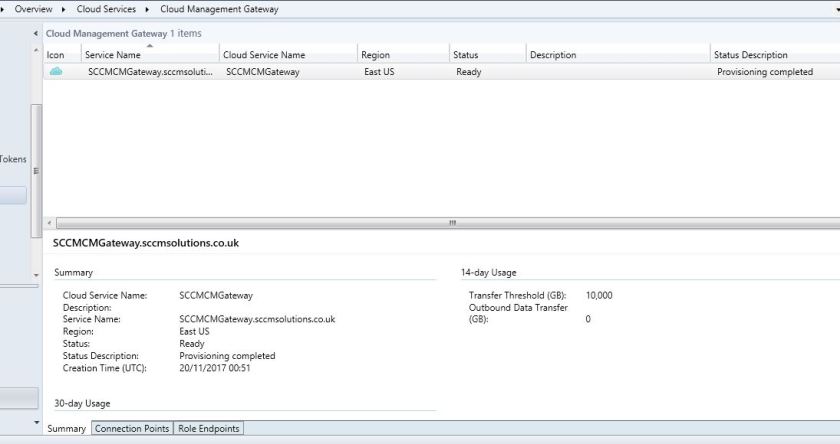
You notice that no connection points exist for the CMG. We need to create the connection point next.

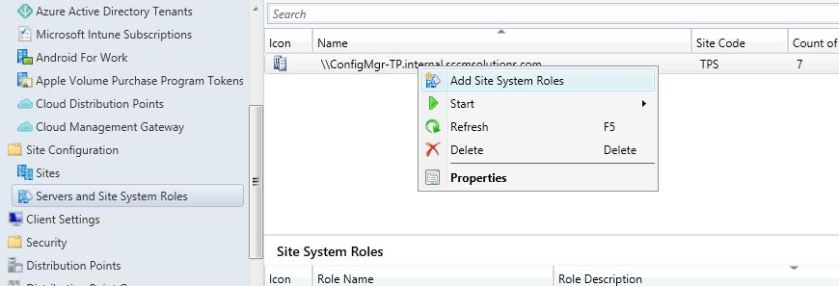
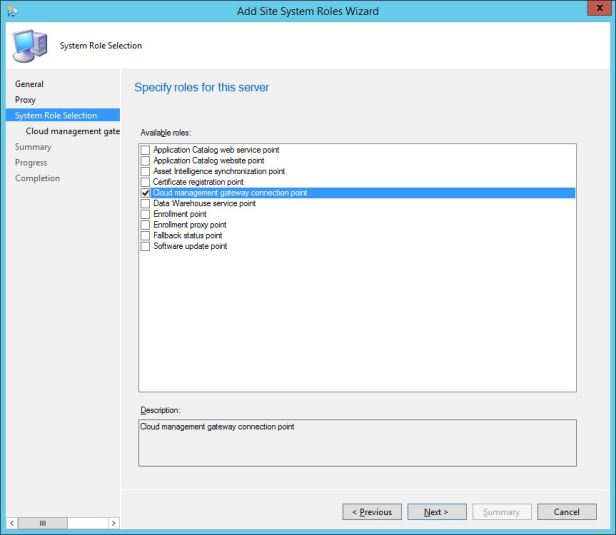
In the ConfigMgr console, navigate to \Administration\Overview\Site Configuration\Servers and Site System Roles and right click the site server or site system to install the role on and choose Add Site System Roles.
Click through the wizard and select Cloud management gateway connection point.
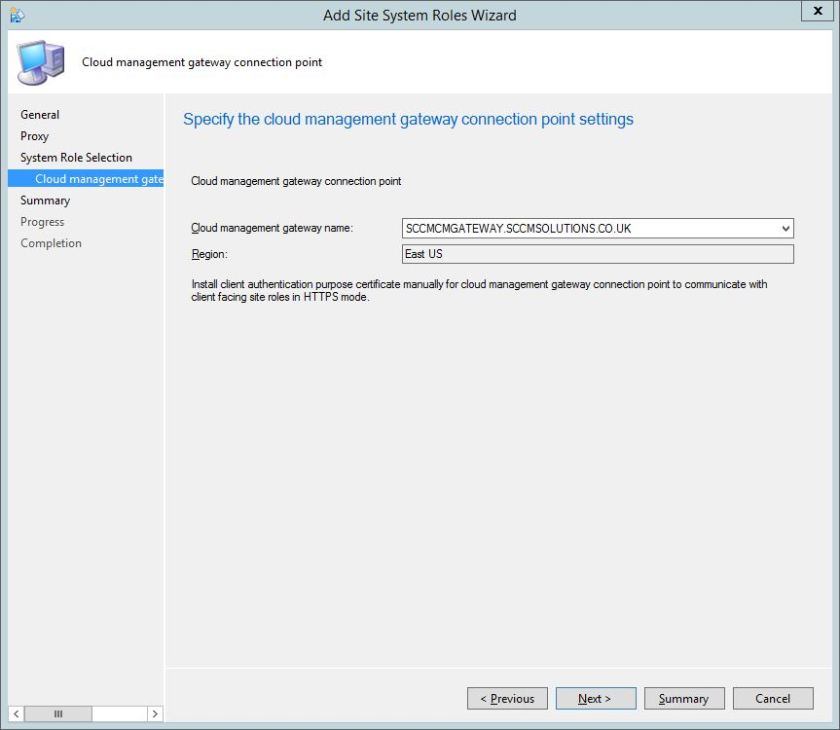
On the next page of the wizard, you notice that the information for the CMG will be auto populated with the external FQDN you used to create your public cert with.
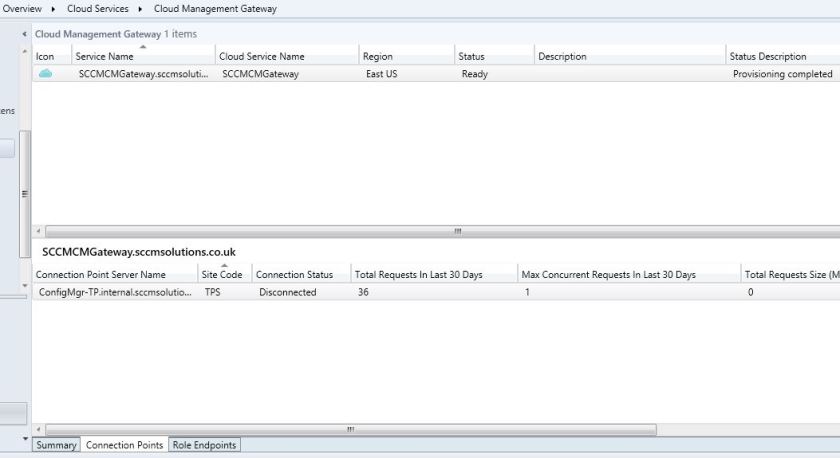
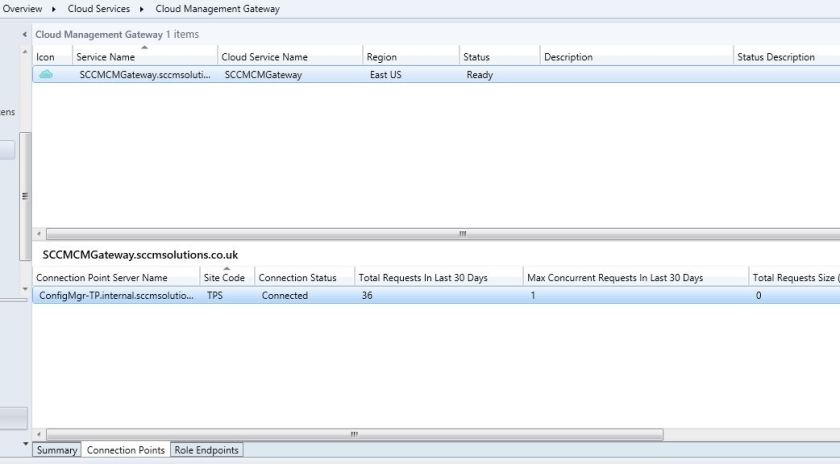
Complete the wizard, return to the CMG and the connection point will be populated but report as Disconnected.
We will now have a new log to record information about the connection point, the SMS_CLOUD_PROXYCONNECTOR.log file. This will be created on the site server or system that you install the role on.
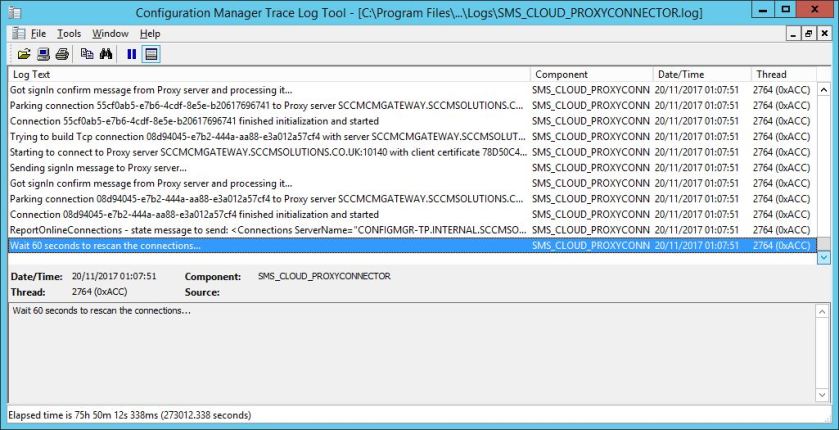
Once set up, the connection point will report back as Connected.
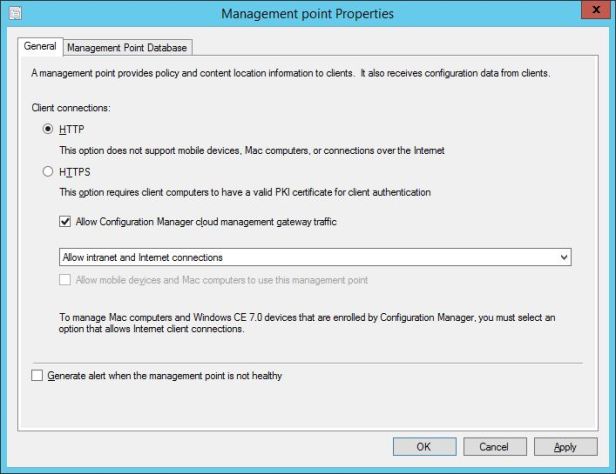
Finally, we need to set our Management Points and SUPs to allow CMG traffic. Go into the properties of your MP/MPs and check Allow Configuration Manager cloud management gateway traffic.
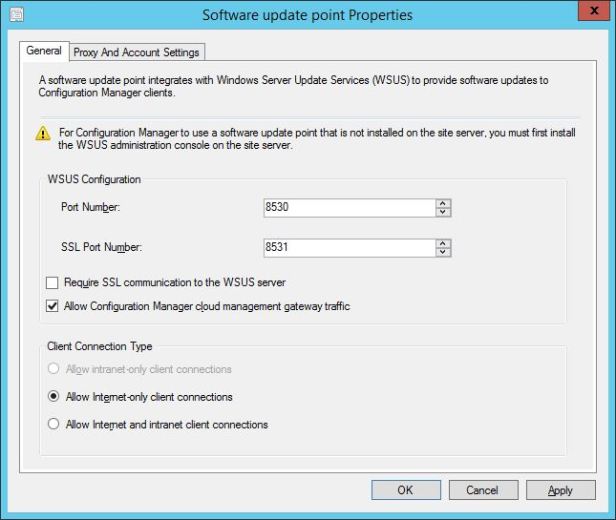
Do the same for your SUP/SUPs.
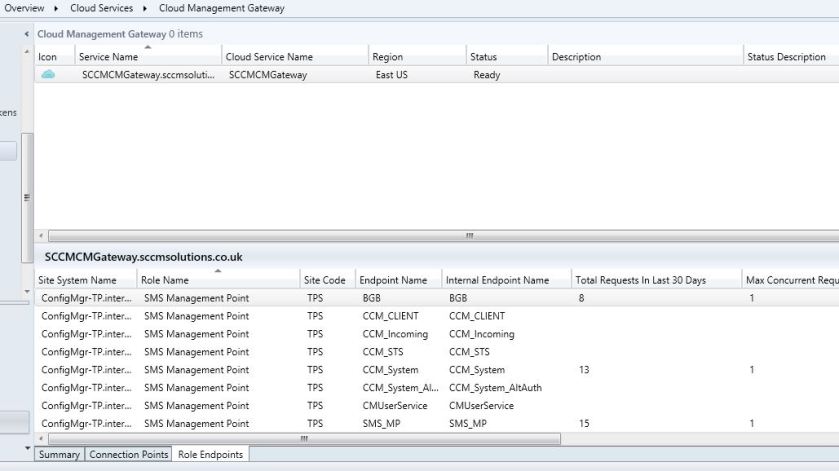
Take note of the details of any MP/SUP in the Role Endpoints section of your CMG.
Clients and the CMG
So we have the infrastructure in place for the CMG to function. Our clients have the client authentication certificate installed. What next? Well it’s simply a case of the clients becoming ‘aware’ of the CMG’s existence.
Clients will get information about the CMG on their next location request, the polling cycle for this is every 24 hours, but it can be forced by restarting the SMS Host service.
Let’s see a client using the CMG.
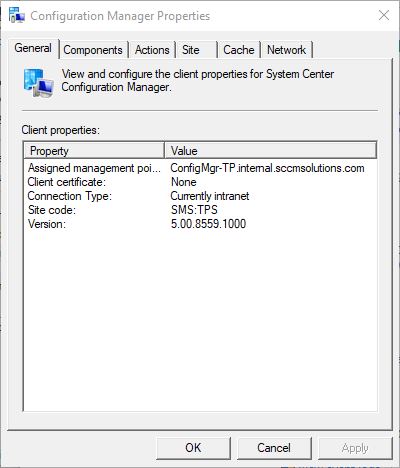
The client starts off on the internal network. We can see the assigned MP and the Connection Type is set to Currently intranet.
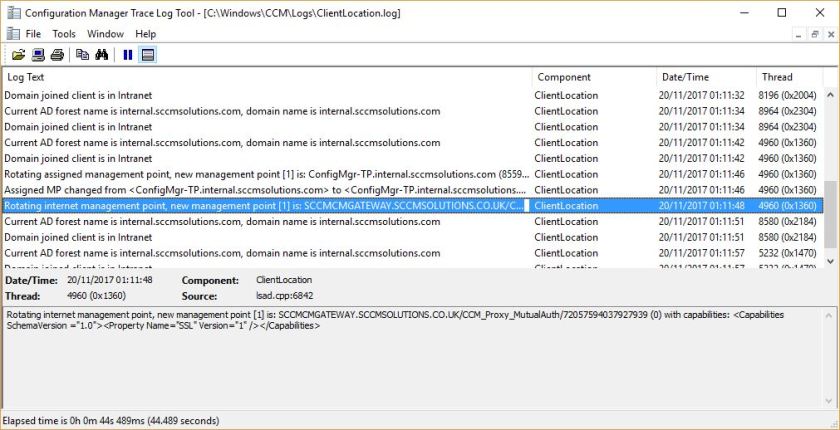
After the location request, the client is aware of the CMG
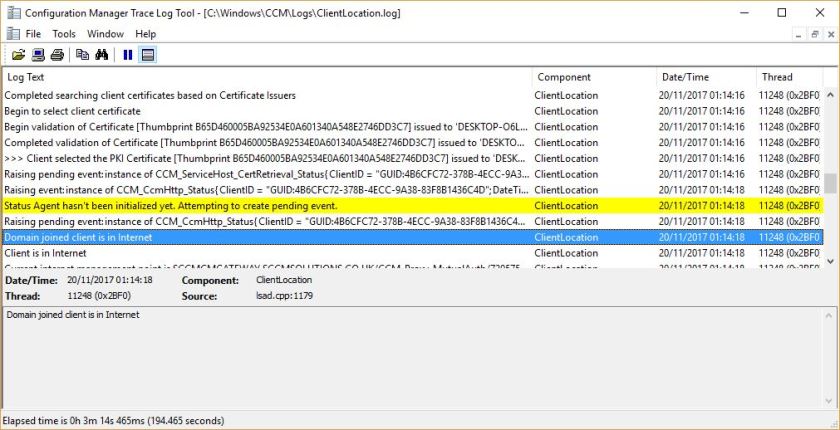
The client is taken off the internal network onto an external connection, the clientlocation.log reports back that the client is on the Internet.
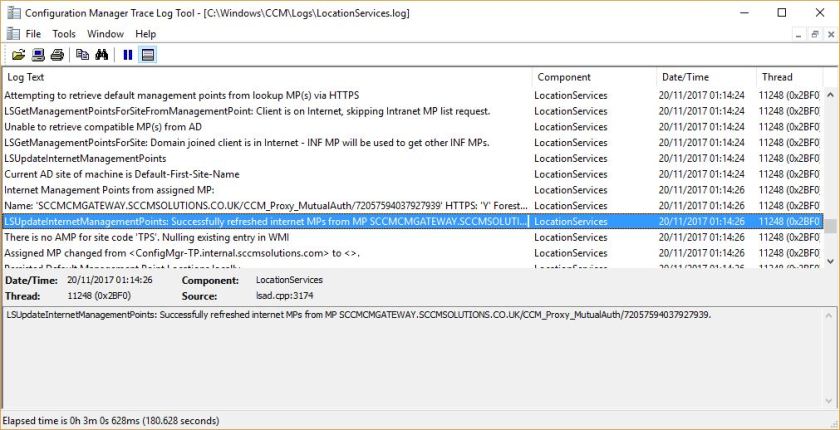
The locationservices.log informs that the client has rotated its MP to the CMG.
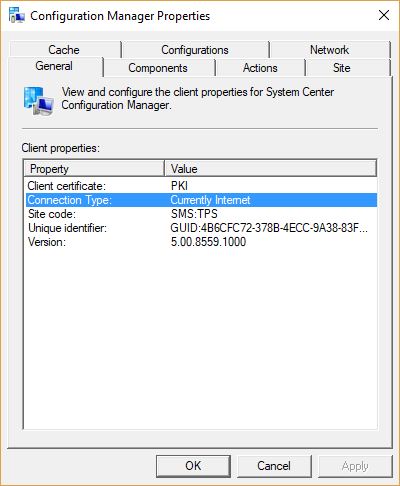
A quick look at the ConfigMgr applet, confirms that the Connection Type is now reporting as Currently Internet.
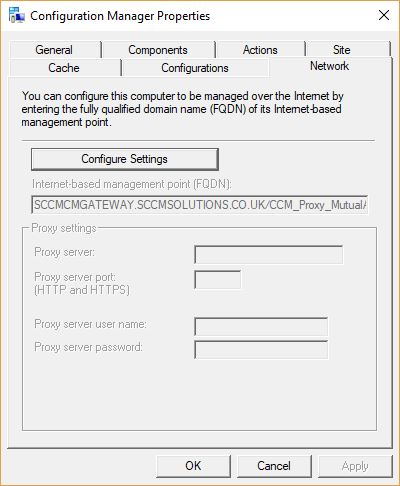
and in the Network tab the CMG is reported as the Internet based MP.
This completes the set up for the Cloud Management Gateway using a public certificate. In the next part of the blog I will show you how you can utilise cloud DP with the CMG to push out software across the Internet to your endpoint devices.

Reblogged this on System Center.
Hello. Nice guide thanks. I have now to update certificates since are expiring and I can’t, I have the following error:
Service Certificate
“The service certificate has the following errors/warnings.
[Warning] The service certificate has a wildcard DNS name. Ensure you update the CName with the correct FQDN. [Warning] The following DNS names were found in the service certificate based on the Subject Name and the Subject Alternate Name lookup.
XXXXX.com *XXXXX.com
Verify and ensure you update it with the correct DNS name. The existing certificate has a CName of CloudManagementGateway.XXXXX.com.
The new certificate has a CName of *XXXXXX.com. New certificate must have the same CName as previous certificate. ”
After I click OK to close the error window, I can type in the “Service FQDN” field, but the “certificate file” field is empty (the certificate file wasn’t accepted) and I have an exlamation mark beside the browse button, so I can’t continue.
Any suggestion?
Hi Paul Winstanley,
Than you for this wonderful guide. Can you please share/let know the SAN and CN values for CMG VM PKI certificate?
I a creating CMG vm as CMGVM01.cloudapp.net and created internal DNS alias as CMGVM01.mycompanyinternaldomain.com
Can you please guide the SAN & CN for the above. Use case is co-managment and internet facing.