With the CMG set up via internal or external certs (see Parts 1 & 2), we can now use cloud distribution points to get content to our external endpoints.
Three certificates are needed to set up the cloud DP, the client authentication certificate which we have already created in either part 1 or 2, an Azure management certificate and a web server certificate for the cloud DP. We can use the same technique for the cloud DP certificate creation as in the previous blogs but for completeness let’s run through that process again.
Creating the cloud DP management cert
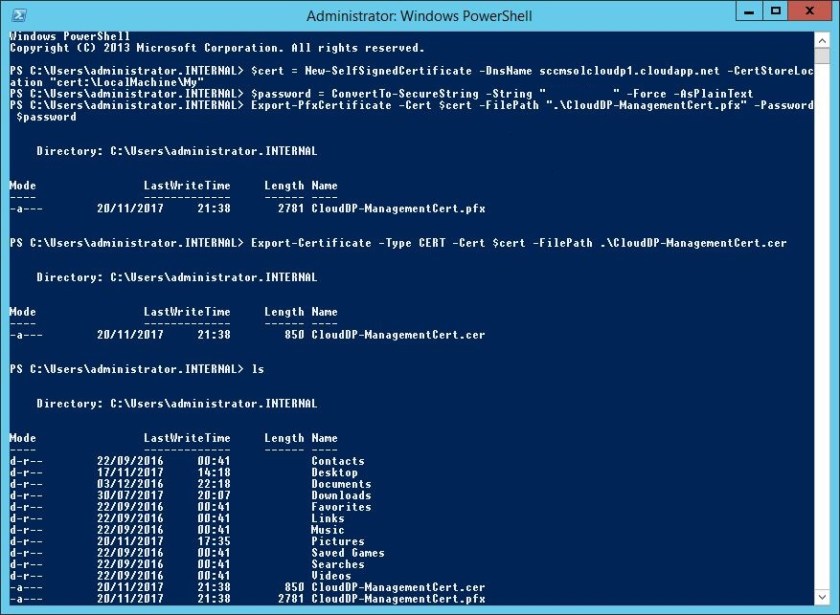
The management certificate for the cloud DP service can be created in the same manner as in parts 1 and 2 of this series. However, for part 3 I thought I would show you another way that you can create a management certificate, this time using some PowerShell commands.
Type in the following command into an elevated PowerShell windows
$cert = New-SelfSignedCertificate -DnsName <yourdomain>.cloudapp.net -CertStoreLocation "cert:\LocalMachine\My"
$password = ConvertTo-SecureString -String "<your password>" -Force -AsPlainText
Export-PfxCertificate -Cert $cert -FilePath ".\CloudDP-ManagementCert.pfx" -Password $password
Export-Certificate -Type CERT -Cert $cert -FilePath .\CloudDP-ManagementCert.cer
As you can see this quickly generates a pfx and cer management certificate.
Creating the cloud DP certificate
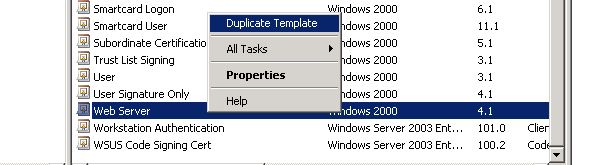
Fire up your certificate authority, drill down to Certificates, right click and choose Manage. Note that I am using an old 2008 DC, the process is the same for 2012 and above.
![2017-11-18 22_58_44-certsrv - [Certification Authority (Local)_internal-DC-CA_Certificate Templates].jpg](https://sccmentor.com/wp-content/uploads/2017/11/2017-11-18-22_58_44-certsrv-certification-authority-local_internal-dc-ca_certificate-templates.jpg?w=616)
Right click the Web Server template and select Duplicate Template.
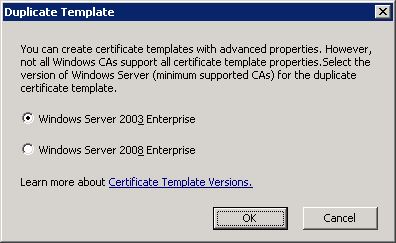
Select Windows Server 2003 Enterprise. Click OK.
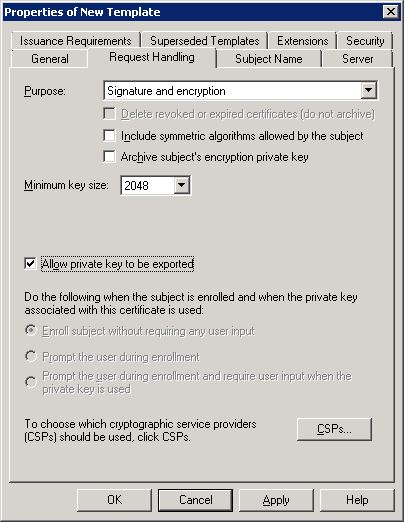
Enter a name for the template. I’ve called mine ‘SCCMCMG – Management Certificate’ as I am going to create another template for my Web Server cert.

In the Request Handling tab choose Allow private key to be exported.
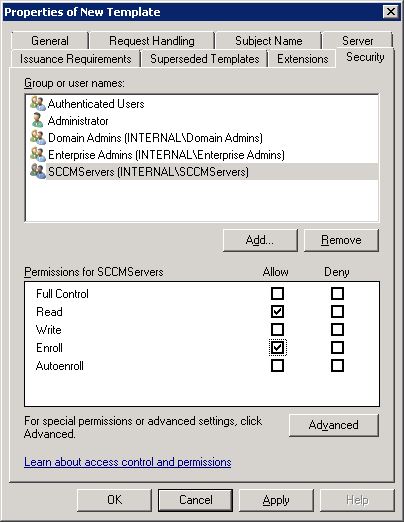
Set security accordingly so that enrollment can take place, Read and Enroll permissions are required for this.
With the template in place, we need to issue it so that we can enroll with it.
To do this right click the Certificate Templates folder in the Certificate Authority and choose New>Certificate Template to Issue.
![2017-11-13 20_53_09-certsrv - [Certification Authority (Local)_internal-DC-CA_Certificate Templates].jpg](https://sccmentor.com/wp-content/uploads/2017/11/2017-11-13-20_53_09-certsrv-certification-authority-local_internal-dc-ca_certificate-templates.jpg?w=840)
Choose the certificate template, in this instance the cloud DP template and click OK.
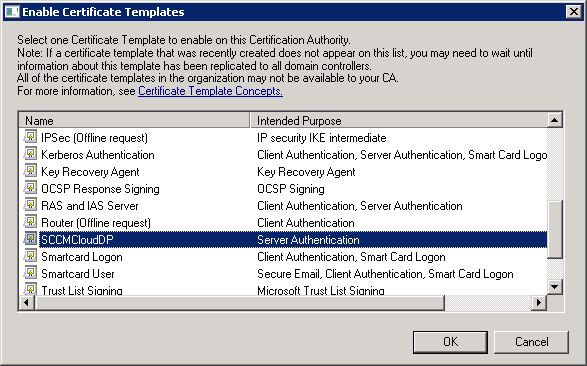
The certificate template will be available for enrollment.
![2017-11-13 20_53_50-certsrv - [Certification Authority (Local)_internal-DC-CA_Certificate Templates].jpg](https://sccmentor.com/wp-content/uploads/2017/11/2017-11-13-20_53_50-certsrv-certification-authority-local_internal-dc-ca_certificate-templates1.jpg?w=840)
Next up, you need to request the certificates on a computer.
Load up MMC and choose File>Add/Remove Snap-in…
![2017-11-18 23_35_02-Console1 - [Console Root].jpg](https://sccmentor.com/wp-content/uploads/2017/11/2017-11-18-23_35_02-console1-console-root.jpg?w=840)
Select Certificates and then click Add>.

Choose Computer account and click Next.

Ensure Local computer is selected and click Finish.

Note that Certificates (Local Computer) is in the Selected snap-ins pane. Click OK.

Navigate to the Personal store and right click, choose All Tasks>Request New Certificate.
![2017-11-17 20_00_01-Console1 - [Console Root_Certificates (Local Computer)_Personal_Certificates].jpg](https://sccmentor.com/wp-content/uploads/2017/11/2017-11-17-20_00_01-console1-console-root_certificates-local-computer_personal_certificates.jpg?w=840)
Click Next to begin the certificate enrollment.

Go with the defaults here by clicking Next.

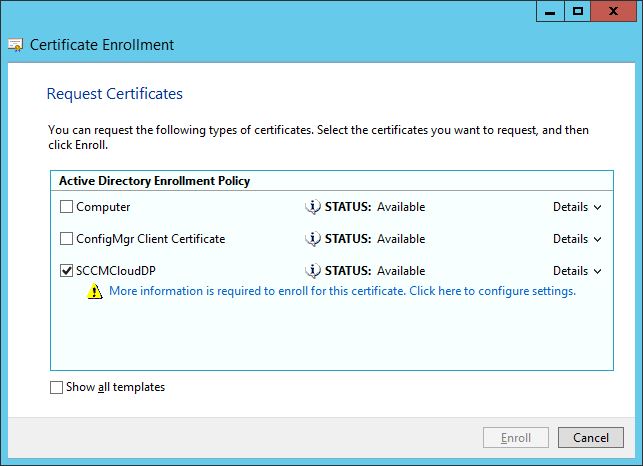
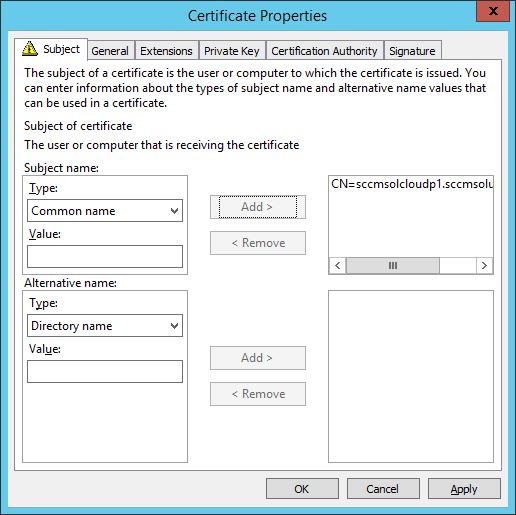
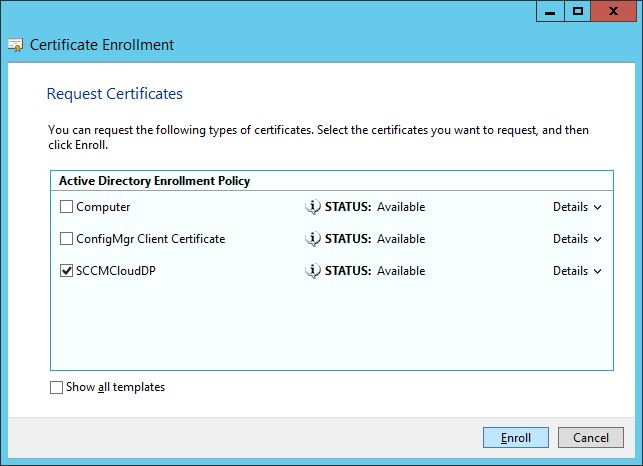
Select the cloud DP template that was created earlier. Then click the More information link.
In the Subject tab click the Type drop down and enter a common name for the cloud DP service. For my example, I have used sccmsolcloudp1.sccmsolutions.co.uk. Once done, click Add>.
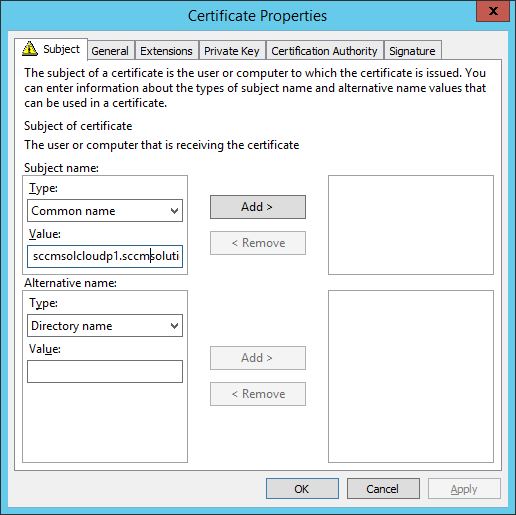
Click OK.
Click the Enroll button to enroll the certificate.
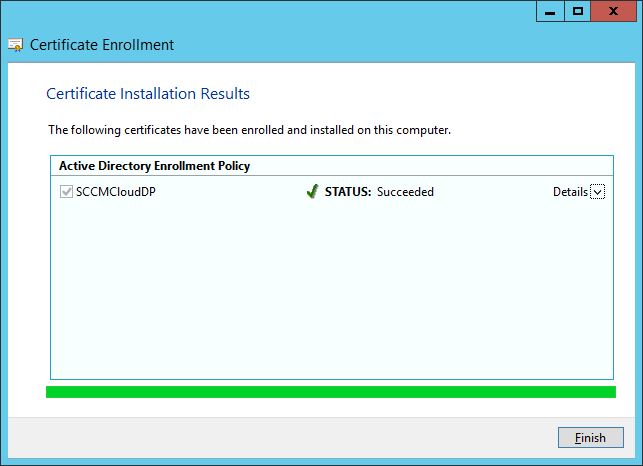
When the process is complete click Finish.
The next step in the certificate process, is to export the certificate so we can import it in with or without a private key. We will use these exports to upload the certificate into Azure and to configure the cloud DP.
In the personal store, if you refresh you will see you the new cert. Right click the cloud dp certificate, you can check the Certificate Template column to ensure you have the correct one, select All Tasks>Export.
![2017-11-20 22_16_43-Console1 - [Console Root_Certificates (Local Computer)_Personal_Certificates].jpg](https://sccmentor.com/wp-content/uploads/2017/11/2017-11-20-22_16_43-console1-console-root_certificates-local-computer_personal_certificates.jpg?w=840)
Click Next on the export wizard.

Choose not to export the private key and click Next.

Export the DER encoded binary X.509 (.CER) format and click Next.

Save the certificate as the .cer file. Name it accordingly so you know which cert it is.

Click Finish to complete the process.
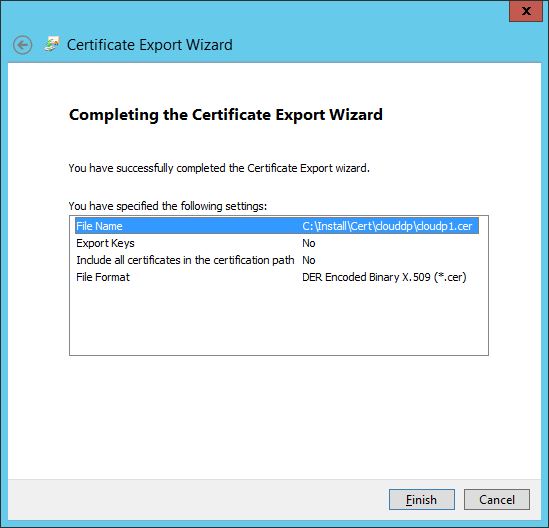
You will be notified that the export was successful.

The next step is to create an exported certificate with private keys.
As before, in the MMC>Personal>Certificates store, right click the cloud dp certificate and choose All Tasks>Export.
Click Next.

This time select Yes, export the private key. Click Next.

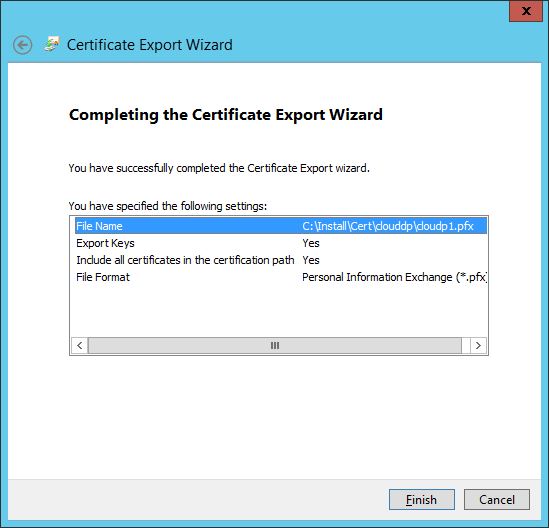
This time the .pfx format is selected. Go with the defaults and click Next.

Enter a strong password for the pfx file and click Next.

Save the certificate.

Click Finish to complete the export.
Set up Azure for cloud DPs
As with the CMG we need to upload a managment certificate into Azure for the cloud service.
In the Azure Portal , navigate to Subscriptions and then select your subscription.

Select Management Certificates from the list of options.

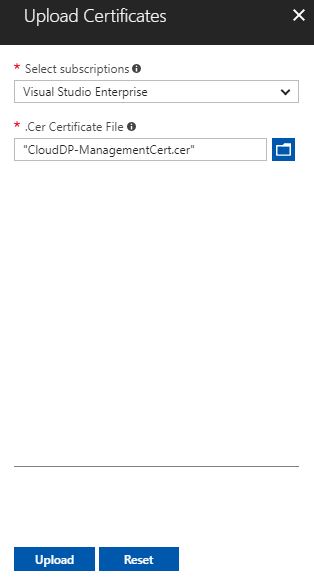
Click the Upload link.
Next we need to select a .cer file to upload. This will be the management certificate .cer file created earlier.

Click Upload.
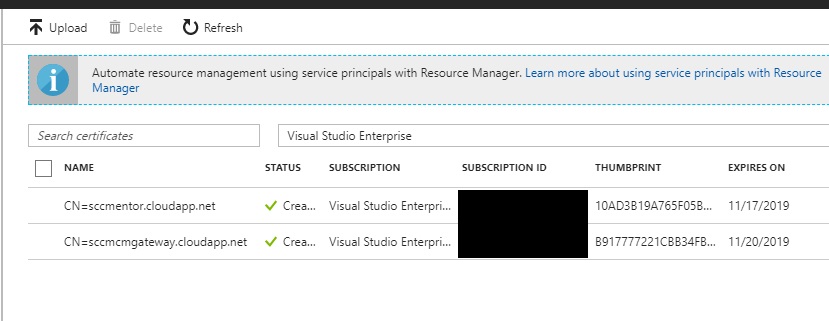
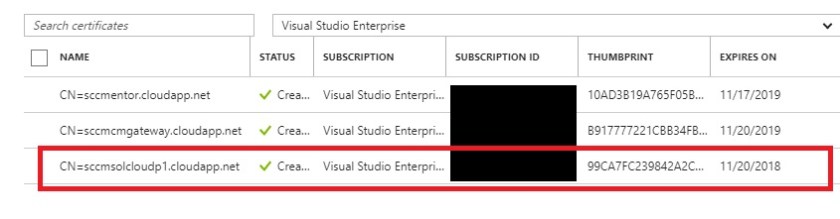
Ensure the cert is uploaded successfully. Copy your Subscription ID as you will need this next.
Install the Cloud Distribution Point in ConfigMgr
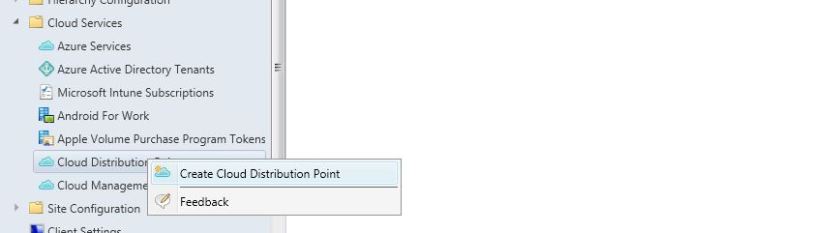
In the ConfigMgr console navigate to \Administration\Overview\Cloud Services\Cloud Distribution Points. Right click and choose Create Cloud Distribution Point.
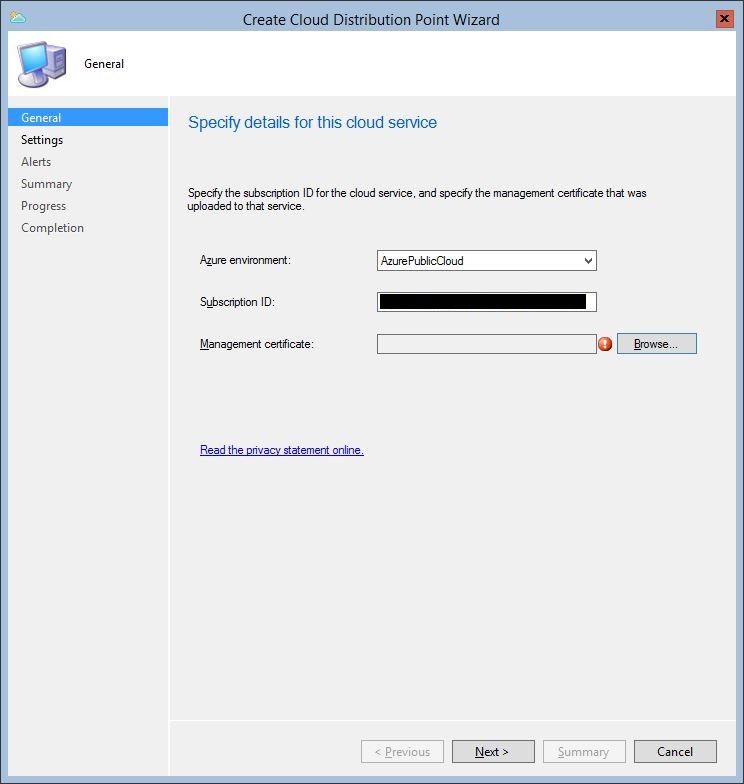
Enter the Subscription ID noted from the Azure portal and click the Browse button.
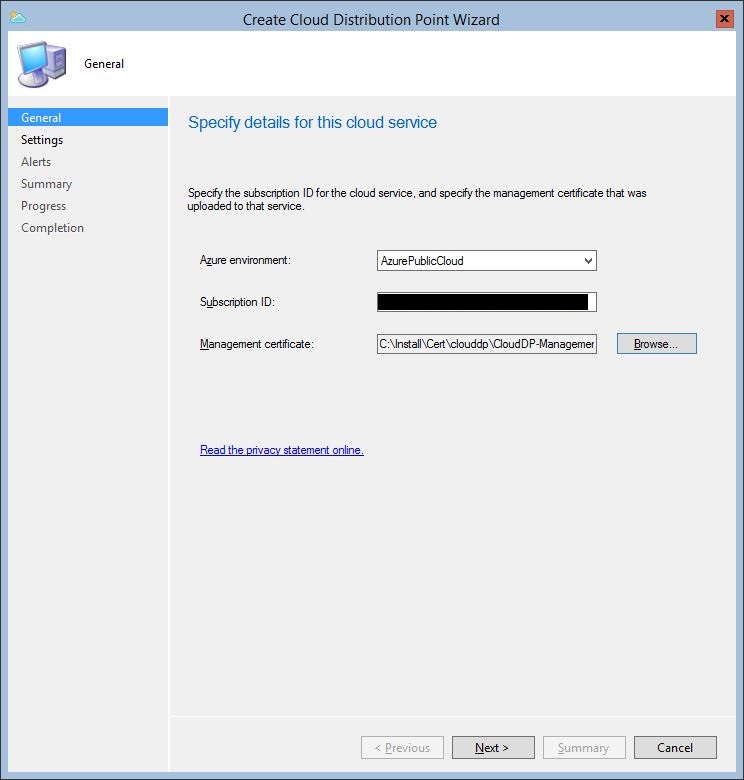
Select the pfx export of the management certificate.

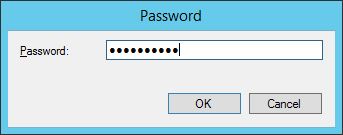
Enter the password for the .pfx and click OK.
Click Next.
The cloud service information provided will be validated.
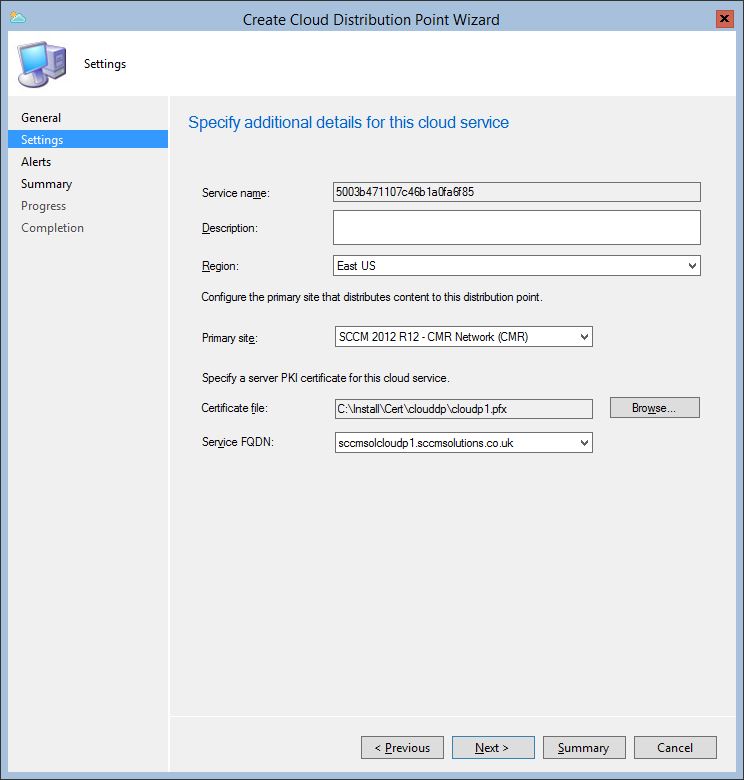
Note that Azure will automatically generate a GUID for the service name. Make a note of this GUID as we will need this later in the set-up. Click the Browse button.
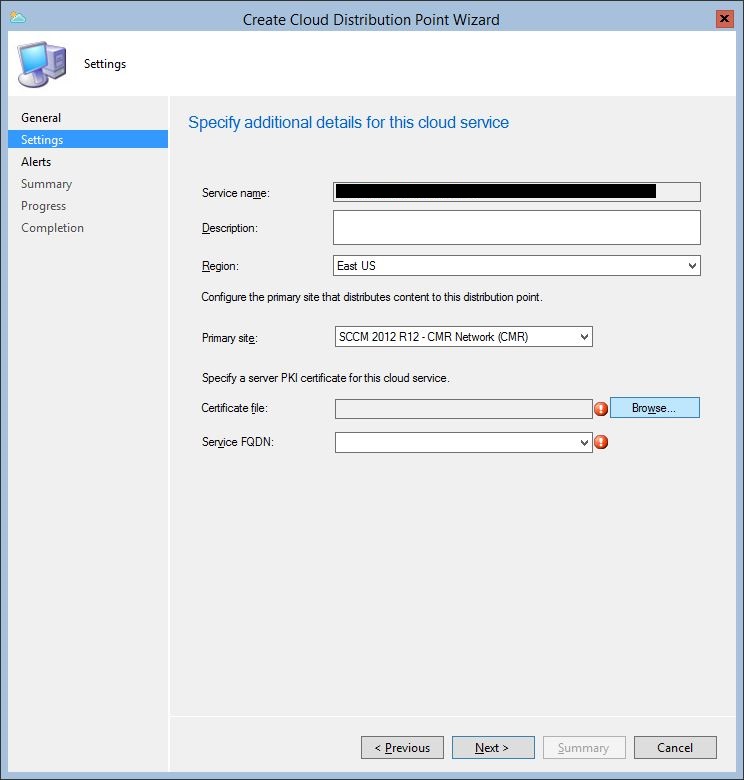
Choose the cloud DP certificate file.

Enter the password for the .pfx and click OK.
Note that the service FQDN is automatically populated. We’ll need to map this address to the <Service name GUID>.cloudapp.net address shortly. Click Next.
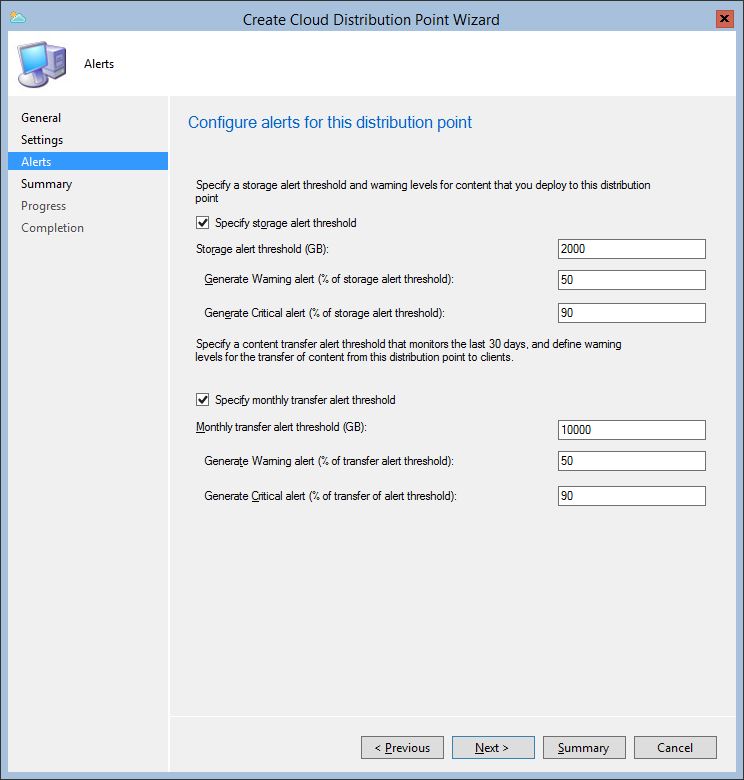
Set any threshold alert levels for the cloud DP at this stage and click Next.
Click Next.
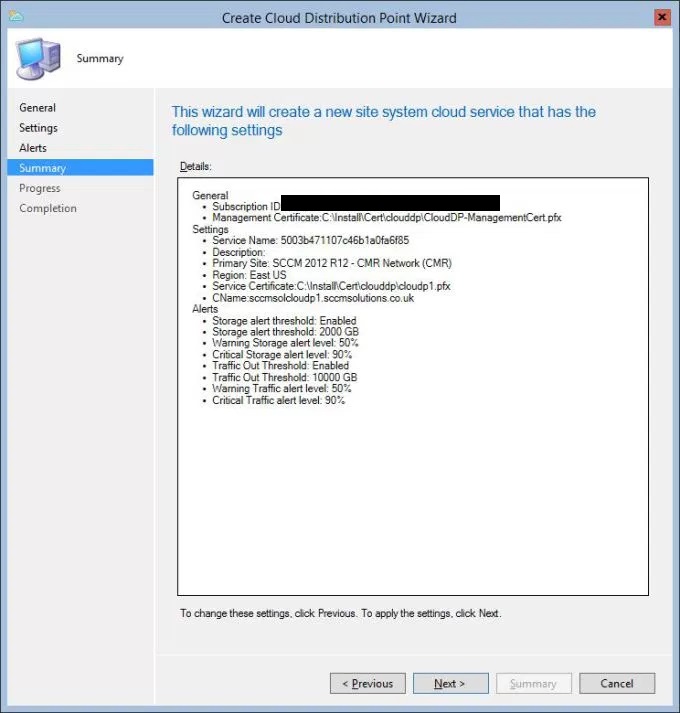
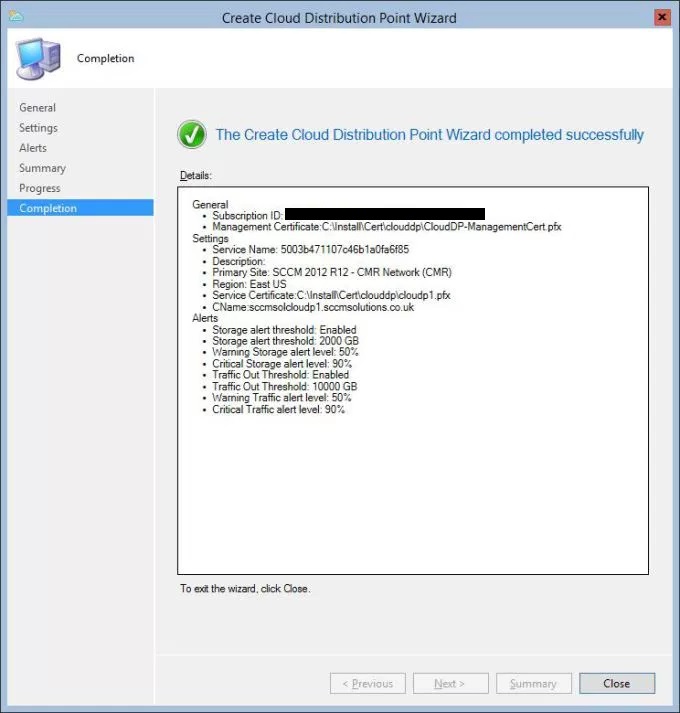
Click Close to complete the set up wizard.
The cloud DP will be in a provisioning state. It can take a while to build the cloud DP

The progress can be monitored in the CloudMgr.log file.
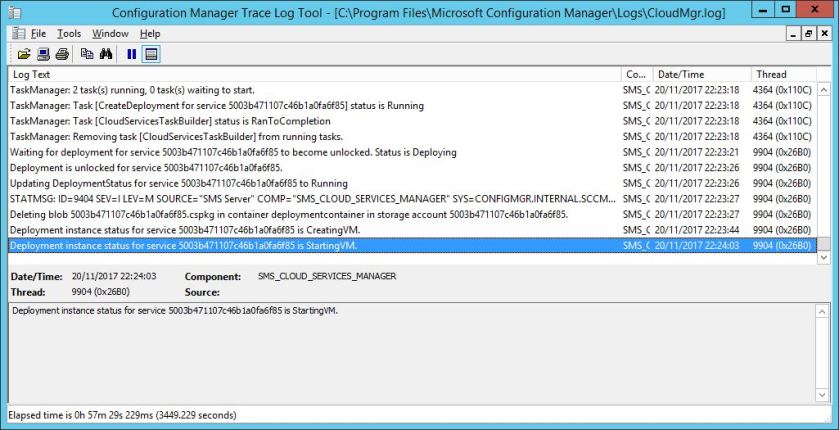
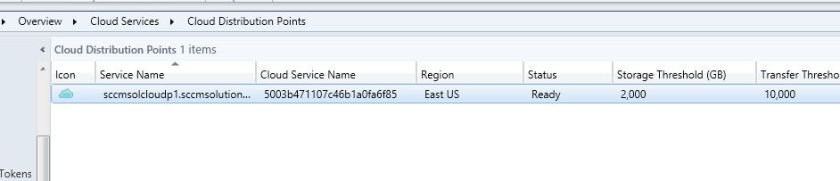
When provisioning has completed the cloud DP will report as ready.
Set up name resolution for the cloud DP
To resolve the cloud DP, you need to map the address of the service FDQN to the <service GUID>.cloudapp.net address.
So for my example, I need to create a CNAME record to cater for this.

Upload content to the cloud DP
At this stage, our cloud DP is ready, configured and raring to go. We can upload content to it in the same way as we do any on-prem DP.

The finale – push software to a client connected via the CMG
So we’ve been building up to this point. We showed in parts 1 and 2 that we could connect clients to the SCCM environment via the CMG, which acts as a proxy to the internal MP and SUP. We need cloud DP since you cannot route internally to non-Internet facing DPs.
So as a test, I am going to publish a 7-Zip installation to the Internet connected client and install the software across the Internet
First up, I have confirmed that my client is still connected via the Internet – note the Domain joined client is in Internet in the ClientLocation.log

A quick check and nothing is assigned to the device for software deployment.

I then created an available deployment for 7-Zip targeted at my Internet based client and on the client ran a policy retrieval – all standard ConfigMgr tasks.
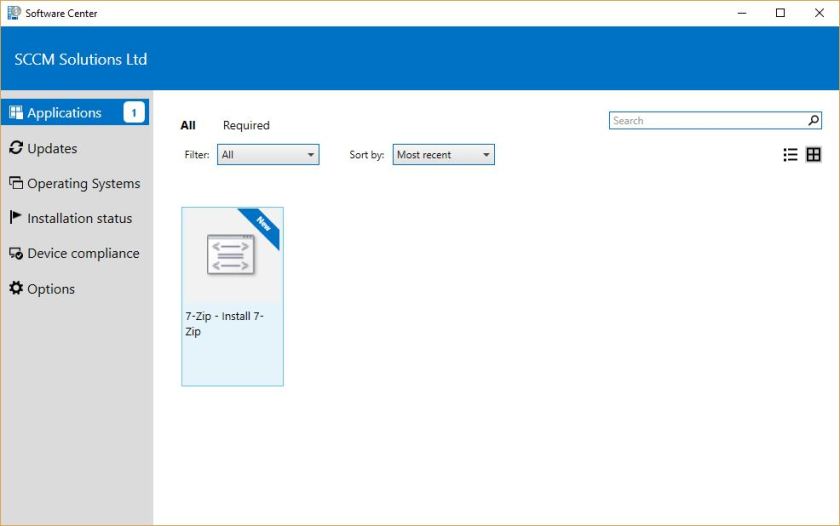
After policy had updated the Software Center showed 7-Zip as an available install.
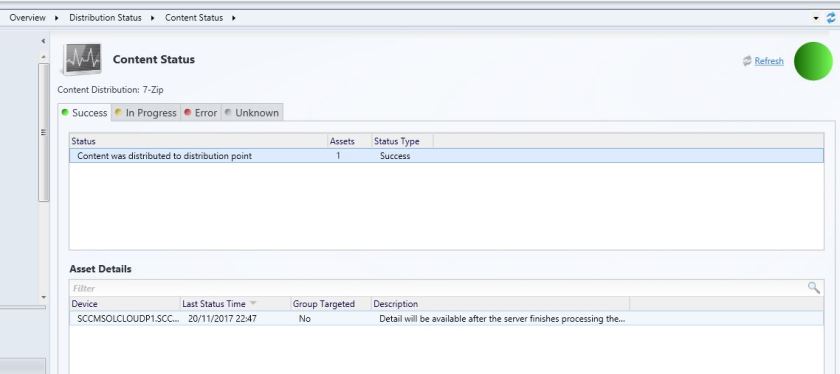
After kick starting the 7-Zip install, a quick glance at the CAS.log shows the download taking place, and from my cloud DP, sccmsolcloudp1.sccmsolutions.co.uk.
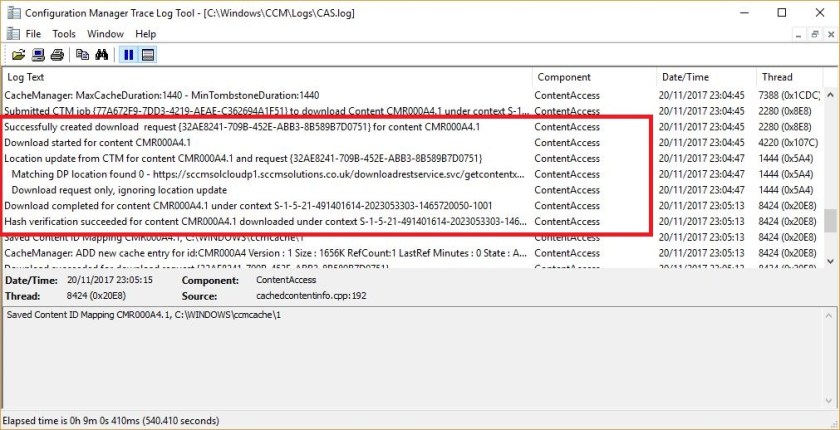
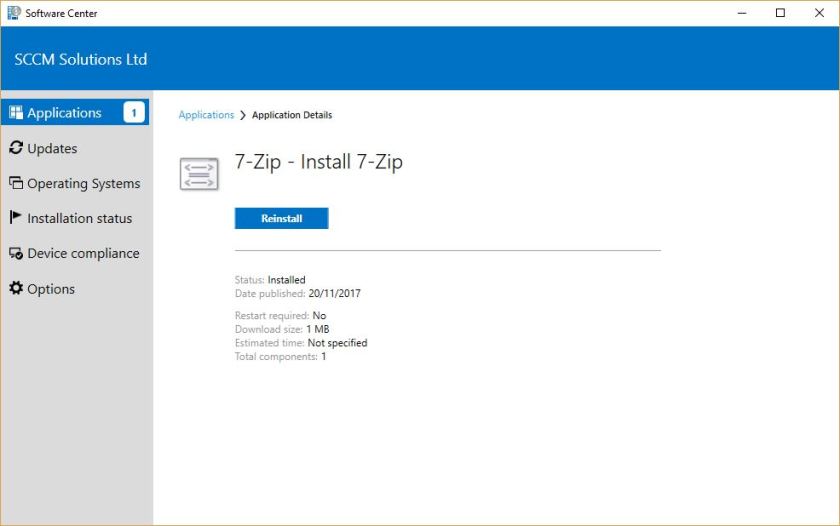
and that the install succeeds.
There’s a lot to take in with the new Cloud Management Gateway and it’s integration with cloud DP and internal MP and SUP. I have show how to get the services up and running but there are plenty of planning considerations that need to be examined prior to doing these installations.
I recommend that you read the following before deploying these services.
Plan for the cloud management gateway in Configuration Manager at https://docs.microsoft.com/en-us/sccm/core/clients/manage/plan-cloud-management-gateway
Use a cloud-based distribution point with System Center Configuration Manager at https://docs.microsoft.com/en-us/sccm/core/plan-design/hierarchy/use-a-cloud-based-distribution-point

Hi Paul – Completed all the steps and my lab CB1710 with CMG and CDP is fully functional.
For people who are performing this at Home Lab – Please bear in mind the cost involved with CMG and CDP configuration. I looked at Azure and it is costing me around Canadian $ 3 per day. So plan accordingly.
I would like to ask Paul – How to cut down the cost for Home Lab users? Can, I stop the VM or Disable the Service or is there any other method to reduce the cost?
Thanks always for detailed notes.
Ram
You’ll have to remove the cmg connector and remove the cloud dp from your cm instance. It’s a real pain
Dear Paul,
These are probably the most comprehensive notes I have come across in setting up both the CMG and the CDP. Thank you for the time you put into this, especially getting one’s head around the certificates.
I followed one setup elsewhere for creating the CMG, but it all got muddled up with the CDP that I had to find another source to fix that. Yours brings it all together, rather quite nicely.
Yes, the cost is one linear upward graph and your tip of removing the CMG connector and Cloud DP would come in use. *Always read the comments.*
Regards,
Akin
Thanks. That was the intention. Clarify the installation, reduce the confusion 😉
Hi Paul,
Thanks for this incredibly clear tutorial.
So many certificates can quickly become an headache (it did for me…)
I just have one issue with the PS script to generate the DP Management certificate.
When importing the generated pfx, SCCM says that the password for the certificate is not correct.
I tried different option with the “, without the “, with a complex password, with not complex, from CA server, from the primary server but still doesn’t accept it.
I even just generated the certificate and export it manually, but no chance.
Do you have an idea, where this could come from?
Regards
Alex
Hi Paul,
I have been spending days on the PS script issue, and just after writing the previous comment, I found the solution. Ahah…
So actually, I was running the PS script as an admin, but SCCM was running with my own account. So the certificate was stored in the personnal store of the admin account, while SCCM was trying to import it from my own.
Maybe you can update the PS script part to aware others from that to happen again.
Thanks for you awesome posts, I hope see more soon.
Regards
Alex
Alex, thanks for the positive feedback. As far as I aware you should include the ” ” for this command. I’ve not had a problem to be honest, even using a simple Password123 style. The commands are actually take from this TechNet article. https://docs.microsoft.com/en-us/azure/cloud-services/cloud-services-certs-create. Is it worth trying a copy paste from there in case there is some syntax issue with my commands? Cheers Paul