OK so this blog is a bit of fun.
I use a cool application called Sonic Pi to make music with code. The application is created by Sam Aaron, and it’s a free app that can be installed on Windows, Mac and Raspberry Pi. Every now and then, I’ll teach children how they can create synth sounds, loop samples, start to code Twinkle, Twinkle Little Star, techno music or load up a burb sample. It’s great fun. Take a look at the web site here if you are interested.
I thought it would be great to control SonicPi from ConfigMgr using PowerShell, and I could trigger a sound sample to alert me every time a Task Sequence completes and it turns out that it’s pretty simple to do, thanks to some awesome coding work by Sam and his contributors and an OSC binary for PowerShell.
What do we need to do it?
- Download a copy of Sonic Pi. Rather than grabbing the installer, it’s worth just using the portable release. I create this portable version for Sam each time a new release of Sonic Pi comes out. The latest release, which is required for this is v3.1 and is available from here.
- Next you will need to grab the SharpOSC binaries from Github here.
- I’ve also downloaded a red alert sample, from Star Trek TOS, from this site http://www.trekcore.com/audio/, as I wanted a nice klaxxon sound when the build completes. I’ve converted the sample to wav format so I can use it in SonicPi.
Load up Sonic Pi on your site server, and create an OSC listener. OSC – Open Sound Control, allows you send messages to and from external programs (both running on your computer and on external computers).
By default, SonicPi listens on port 4559, and an example listener code is available in the SonicPi tutorials here. I’m tweaking that listener code slightly to trigger the Star Trek sound sample.
The code you need is:
sync "/osc/trigger/sample"
use_real_time
sample 'C:/Install/SonicPi/Samples/tos_red_alert.wav'
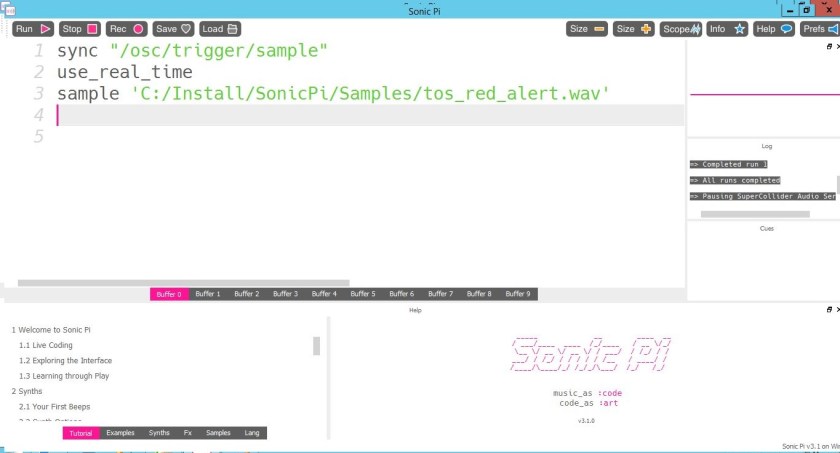
In the above code, we have described an OSC path "/osc/trigger/sample" which we’re syncing on. SonicPi uses the prefix /osc/ for all its incoming OSC messages. What we need to do it trigger our sample to play, the sync command blocks until we do so, and since SonicPi prefixes with /osc/ then we only need to send over /trigger/sample to remove that block. Once we do that, the sample command will execute and we will get our red alert klaxxon.
So that’s the listener in place, we now need to compile our code that will send the trigger. We can use PowerShell to do this, in-conjunction with the .Net library, SharpOSC, from Github.
With the SharpOSC binary extracted, we need to reference this in our PS code. So create a script with the following:
add-type -path '<pathtobinary>\SharpOSC.dll'
$sender = new-object SharpOSC.UDPSender "127.0.0.1", 4559
$message = new-object SharpOSC.OscMessage "/trigger/sample";
$sender.Send($message);
Note that we are sending to localhost, 127.0.0.1, but we could enable SonicPi to receive across the network and therefore not run the SonicPi app on the site server. To do this, go to Preferences\IO\Network and enable Receive Remote OSC Messages. Also, the default port SonicPi listens on for OSC is 4559.
As mentioned, we need to send over a /trigger/sample message to remove the sync block and this is achieved in lines three and four of our code.
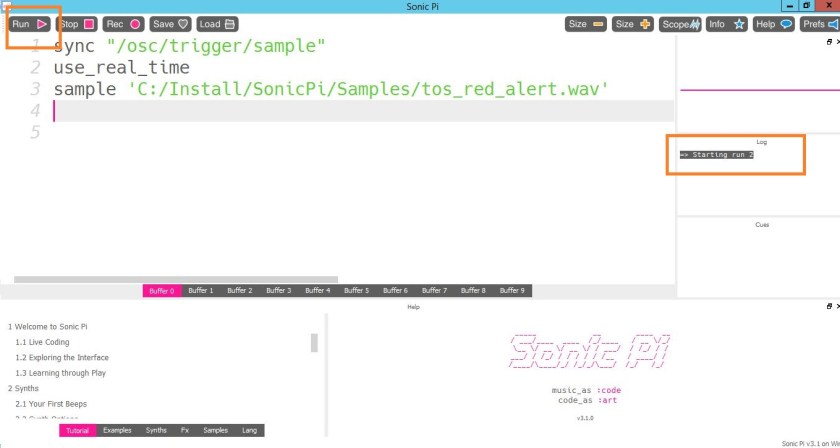
We can manually test that this is working for us and to do this we must run the code in SonicPi to activate the OSC listener. Click the Run button. Notice the log window reporting back ==> Starting run followed by the number of the run (increments by one each time). Cool we are ready to receive trigger commands. Executing the PS script should trigger the sample.
Finally we need to add the execution of that PS script when a Task Sequence completes. We can use ConfigMgr status messages to achieve this.
In the ConfigMgr console, go to \Administration\Overview\Site Configuration\Sites. Right-click the site and select Status Filter Rules.

We will need to create a new rule.
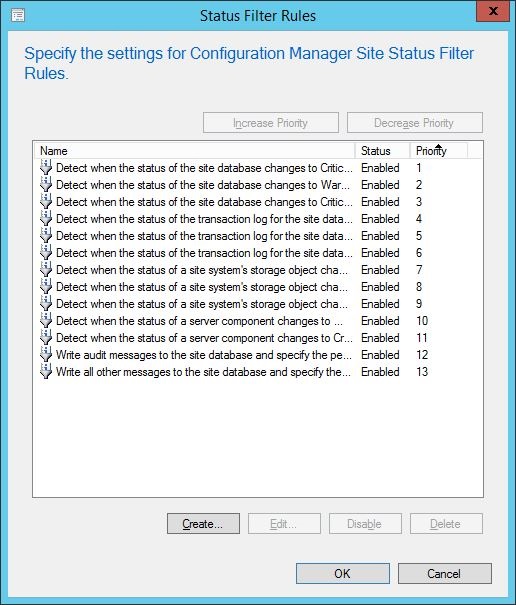
For the Status Filter rule, we need to add in a Name, Source – set to client, Message ID – set to 11171 (Successful TS completion ID), Property – set to Package ID and Property Value – set to the ID of the Task Sequence being executed.

We then need to tell the rule to run an action, in our case the PowerShell script using the command – C:\Windows\System32\WindowsPowerShell\v1.0\powershell.exe -file <location of script>.

When the wizard is completed, the rule is enabled by default.

When the task sequence completes, and message ID 11171 is reported back via the status message, the script kicks in and SonicPi does its stuff.
In the interface, you will see the trigger in the Cue window. Once the sample plays the run will complete.

You can keep the OSC listener running by enclosing the code in a live_loop that will keep the runs going, and therefore every successful build will trigger the sample.
The final SonicPi code to achieve this is:
live_loop :foo do
 sync "/osc/trigger/sample"
 use_real_time
 sample 'C:/Install/SonicPi/Samples/tos_red_alert.wav'
end
:foo is just the name for the loop, you can enter any name here.
Let’s take a look at it in action.

I am so grateful for the video, which you attached. What can be more interesting than this. I Thank you for posting. I do hope you win.