With the release of ConfigMgr Tech Preview, we have some new Tenant Attach toys to play with.
This blog post will take you through one of these, the ability to run a script against a device via the Admin Center.
You will need to set up Tenant Attach as a prerequisite for this action. You can follow the guide I have for this here. This guide showed you how to configure Tenant Attach in ConfigMgr 2002.
For TP 2005, there’s no real difference, except that you have a new checkbox to Enable Endpoint Analytics for devices uploaded to Microsoft Endpoint Manager in the Configure Upload section. You can enable this if you want but we are not going to cover this in this blog post.

Prerequisites
As mentioned, you’ll need Tenant Attach up and running in your TP 2005 lab.
You’ll also need:
- One of the following browsers:
- Microsoft Edge v77 or later
- Google Chrome
- A user account discovered with AAD and Active Directory user discovery (see the Tenant Attach blog post for details on AAD user discovery).
- A device running the latest ConfigMgr client
- PowerShell 3.0 or later running on the targeted device.
- An approved script in ConfigMgr – more on this shortly
The following permissions are required for this cool feature to operate:
- Read permissions on the device’s collection in ConfigMgr
- Have the Run Scripts permissions for collections in ConfigMgr
- Added as an admin user in the Configuration Manager Microservice application in Azure AD.
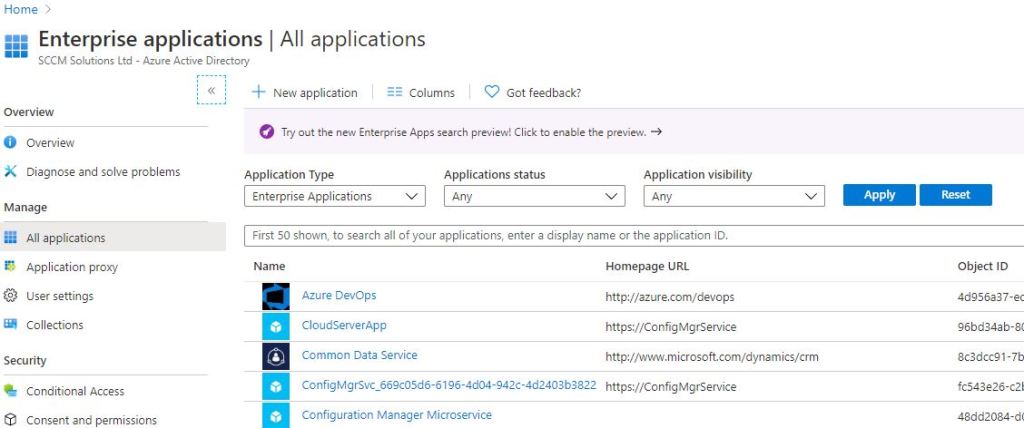
To become a admin user in the Configuration Manager Microservice application search for Enterprise Applications in the Azure Portal.
Under All applications, you’ll see the Configuration Manager Microservice. Click on the application.
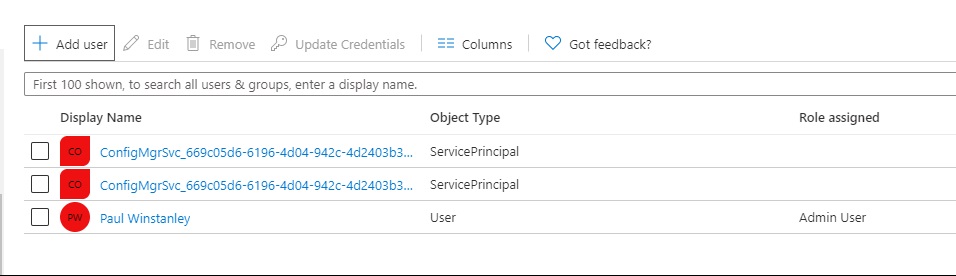
Click the 1. Assign users and groups box.

Click the Add user link and add in an account or group of users you wish to assign admin user access.
In the ConfigMgr Console
You’ll need to have an approved script in you ConfigMgr console for this to then appear as a script in Tenant Attach.
If you haven’t added a script to ConfigMgr before, here’s a quick overview.
The process is split into two parts. First, an admin adds in a script to run which can be executed. Second, another admin has to approve the script as a valid script to avoid any potential disastrous scenarios.
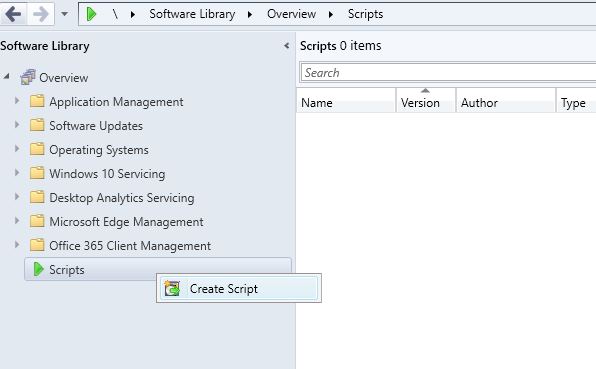
Under \Software Library\Overview\Scripts, right click Scripts and choose Create Script.
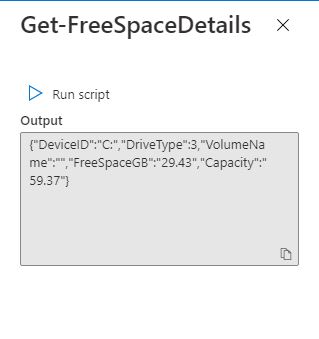
Enter a Script name and select an appropriate Script language. You can import a script but I’ve pasted in my PowerShell code. This code will check a device’s local disk for free space. Click Next. You can pretty much click through the wizard to completion after this step.

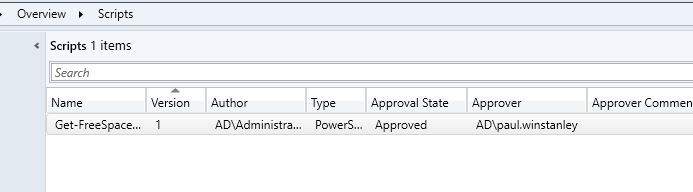
The script will appear in the console, note the Approval State is Waiting for approval. So you need another admin to approve this script for you.

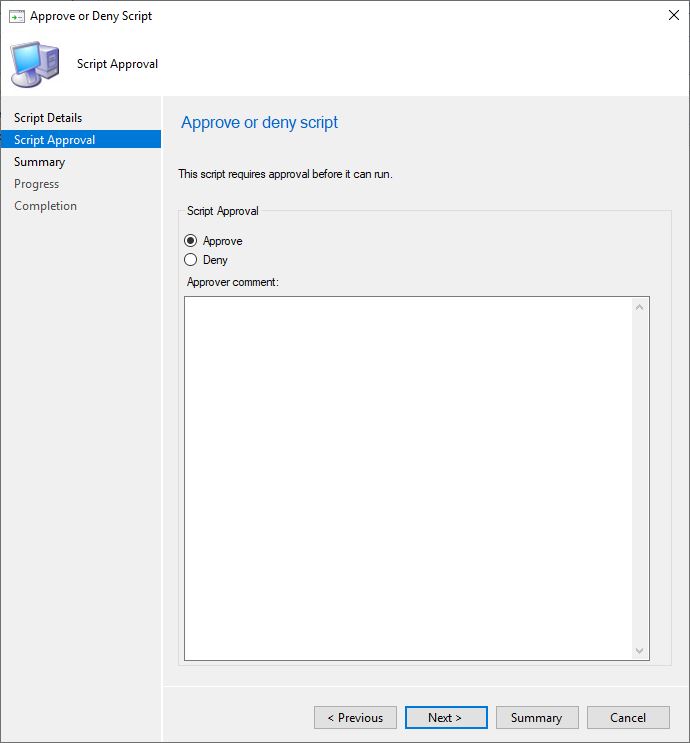
The approver right clicks the script and selects Approve/Deny.

This will fire up a wizard for the approver. They will see the code which has been entered. Click Next.
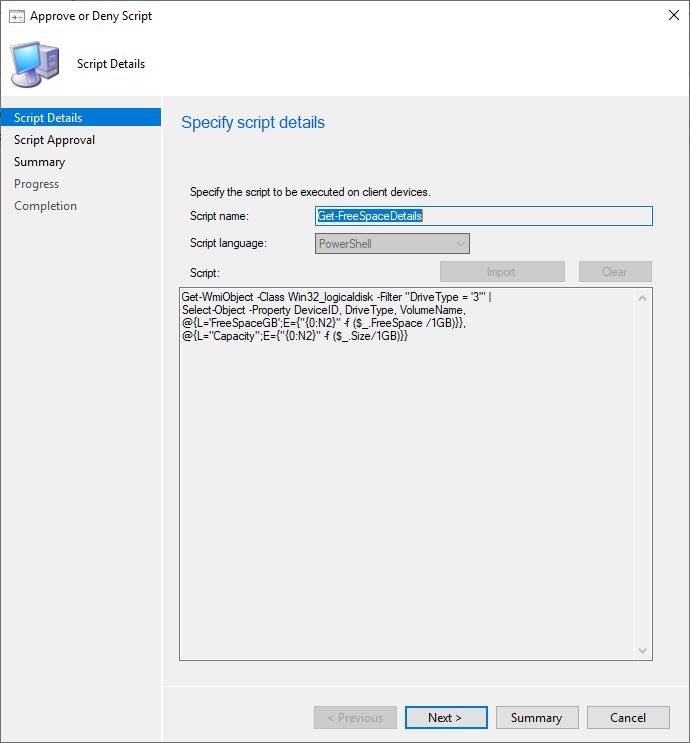
The approver can Approve or Deny the script and add in a Approver comment. My admin has approved the script and then clicked Next and click through to the end of the wizard.
In the console, the Approval State has changed to Approved and you can see the Approver and any Approver Comments.
Running the script via Tenant Attach
In the ConfigMgr console, go to \Assets and Compliance\Overview\Devices and right click a device which has been uploaded via the Tenant Attach process.
Select Start\Admin Center Preview.

Authenticate with the account which has been assigned the access as an admin user.
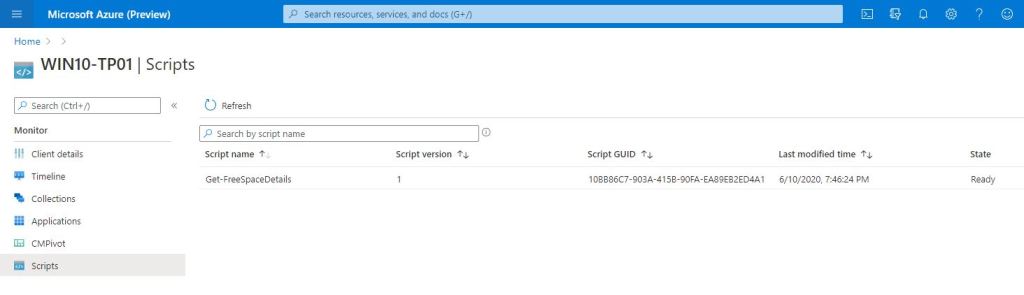
When the Admin Center loads up highlighting the particular device you selected in the ConfigMgr console, click Scripts. You’ll see the approve script listed in the console.
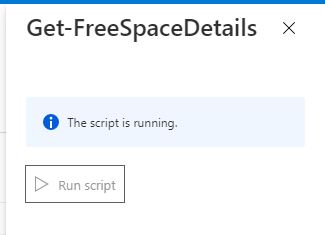
Click the script and a window will appear at the top right hand corner of the console. Click the Run script button to run that script against that device.
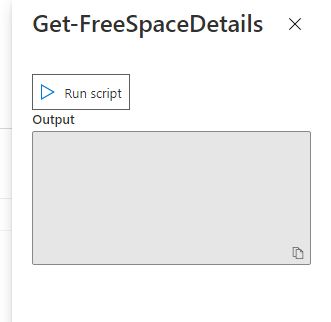
The console will report that the script is running.
And when complete, hopefully give you the results you want.
This is great little addition to the Tenant Attach feature set and hopefully we’ll see more and more cool features appearing in the Admin Center as the year progresses.

One comment