
When it enrolling your first macOS device into Intune take note, there’s a couple of prerequisites you need in place.
- Ensure the device is eligible for Apple device enrollment
- Ensure users have an assigned Intune licence
- Make sure you have an Apple MDM push certificate
Device Eligibility
For device eligibility, the Mac computers must be running OS X Mavericks 10.9 or later.
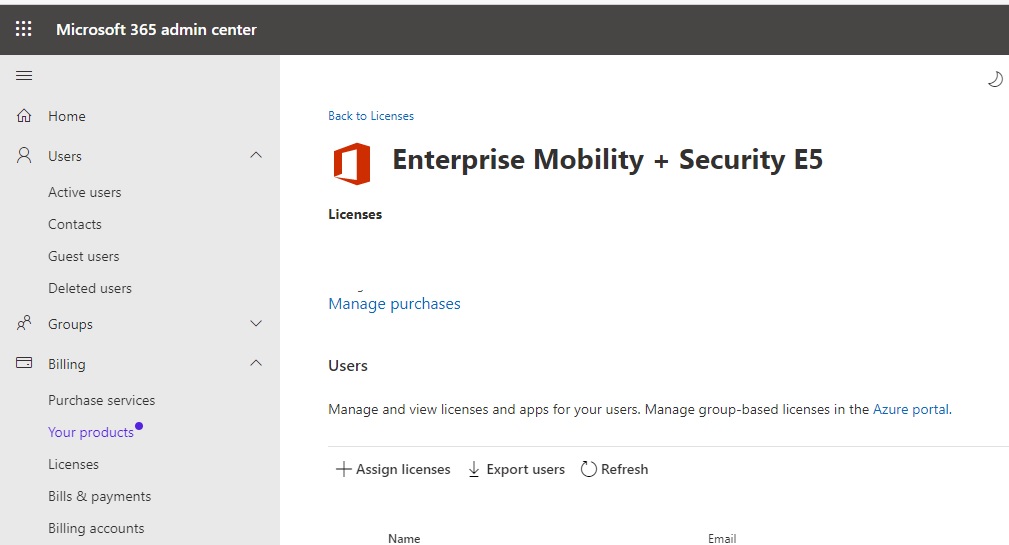
Assigning an Intune Licence
You can assign a licence via the Microsoft 365 admin center. Go to Billing\Your products and select the licence type with the Intune enablement. Click Assign licences and assign accordingly.
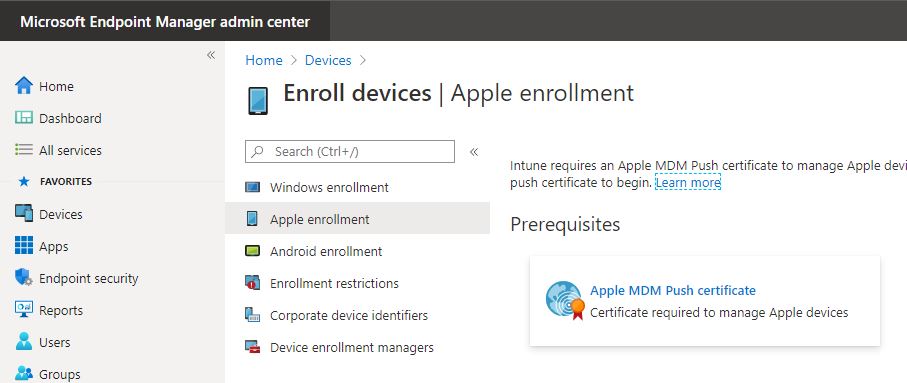
Apple MDM Push Certificate
For the creation of the Apple MDM Push Certificate be aware that you need an Apple ID.
In the MEM Admin, go to Devices\Enroll devices\Apple enrollment and click Apple MDM Push certificate.
Click I agree to grant Microsoft permissions to send both user and device information to Apple.
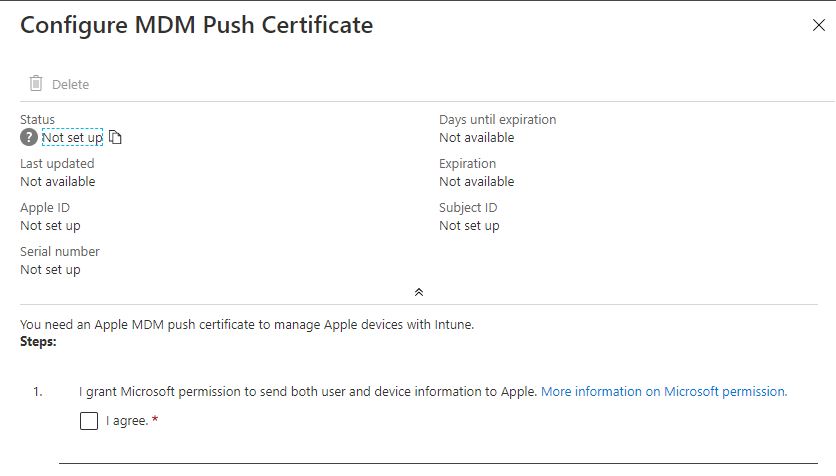
Click the Download your CSR link. This will download a CSR file which you will need for the next step.

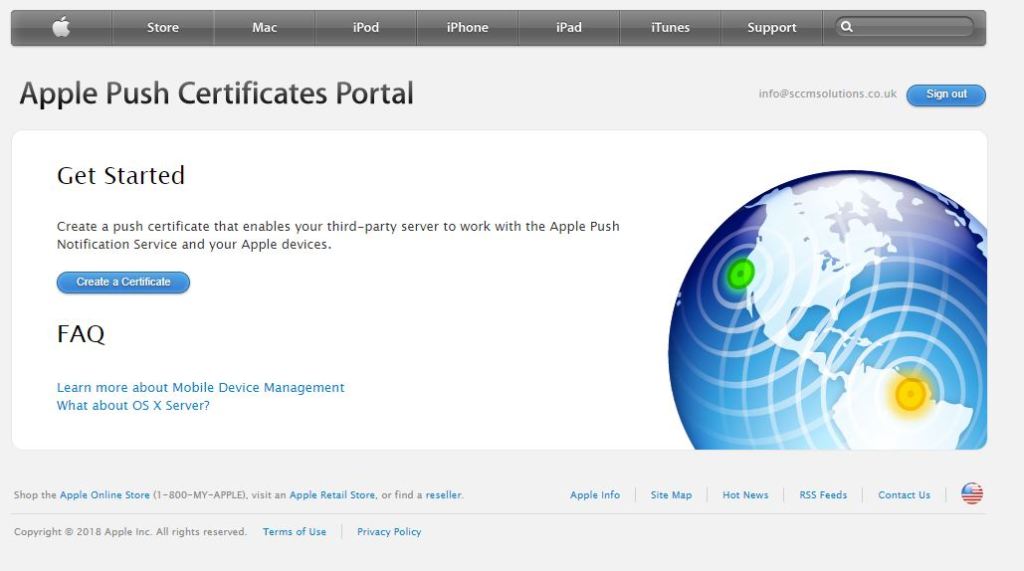
Go to the Apple Push Certificates Portal site and sign in with an Apple ID. Click the Create a Certificate button.
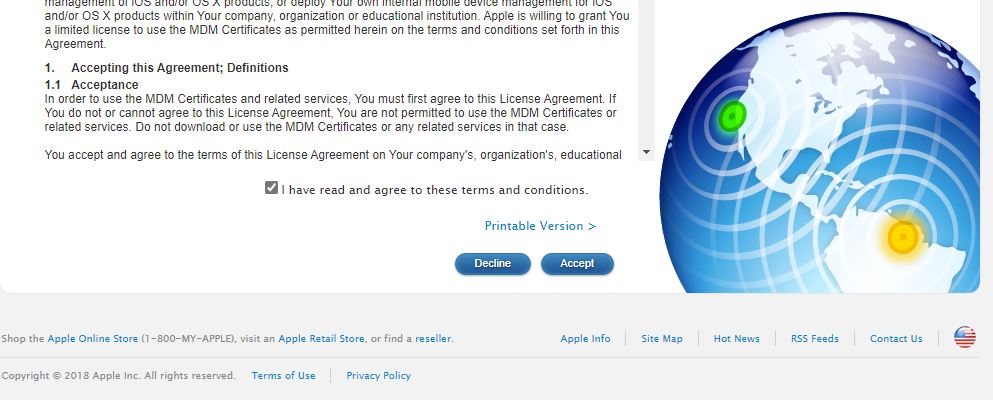
Agree to the Terms of Use
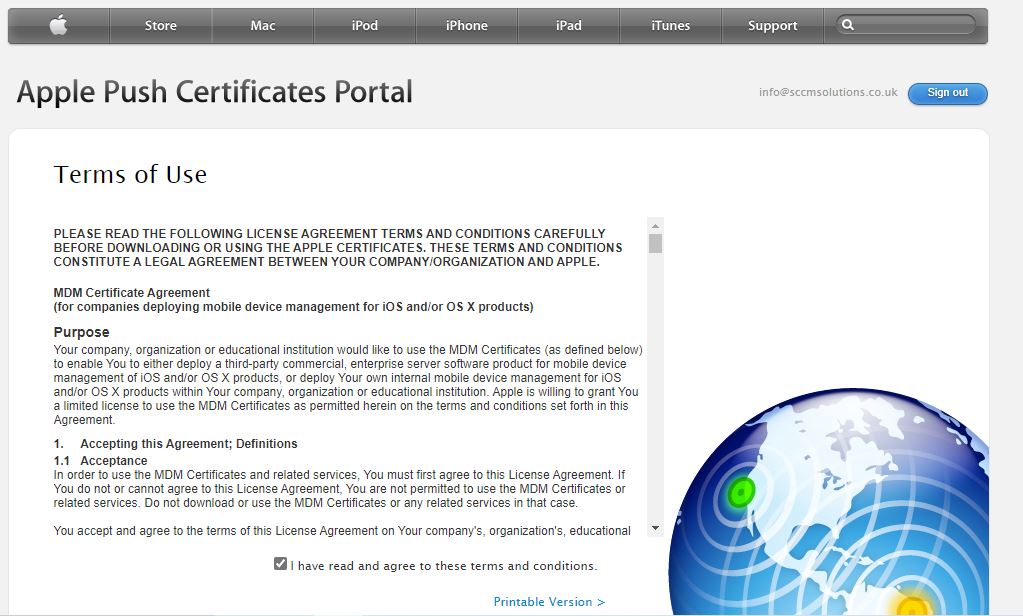
and click the Accept button.
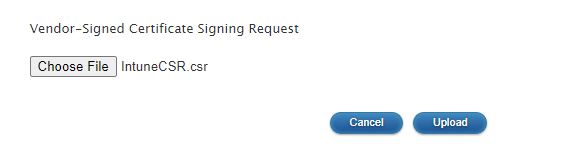
Click Choose File.

The CSR file will be recognised. Click the Upload button.
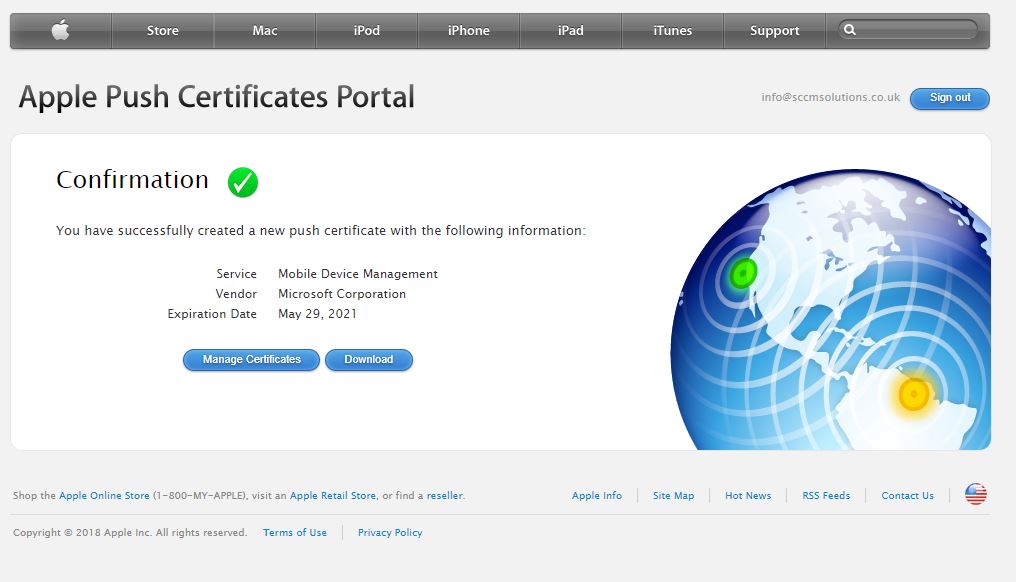
When the CSR is uploaded click the Download button to download the push certificate.
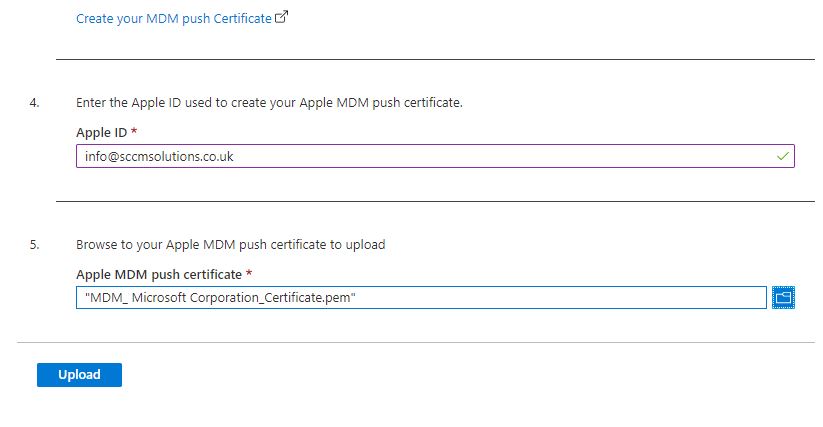
Back in the MEM admin center, enter the Apple ID details of the accoutn used to create the push certificate and then click the folder icon in step 5 and point ito the push cert.
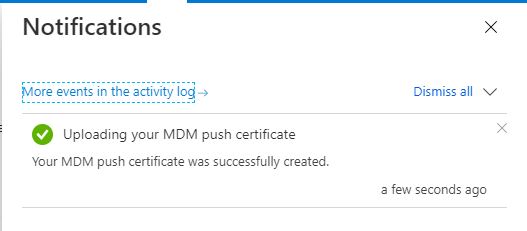
You’ll received a Notification of creation of the push certificate.
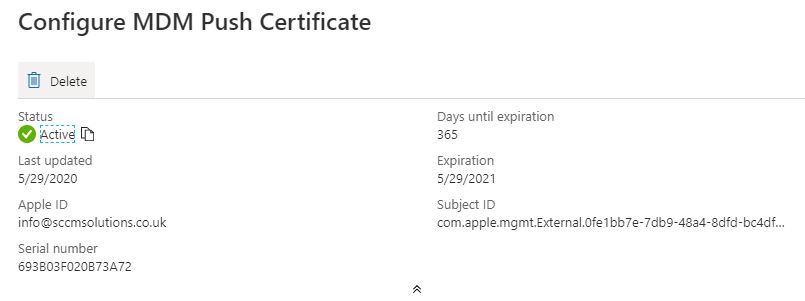
The admin center will show an Active certificate. Make a note of the Expiration date. You will need to renew the certificate before it expires, otherwise all enrolled devices will need to be re-enrolled.
On the endpoints
On the Mac, go to the Apple Store and download the Company Portal app. When installed follow this process.
Click the Sign In button

Clik Begin to start the process.

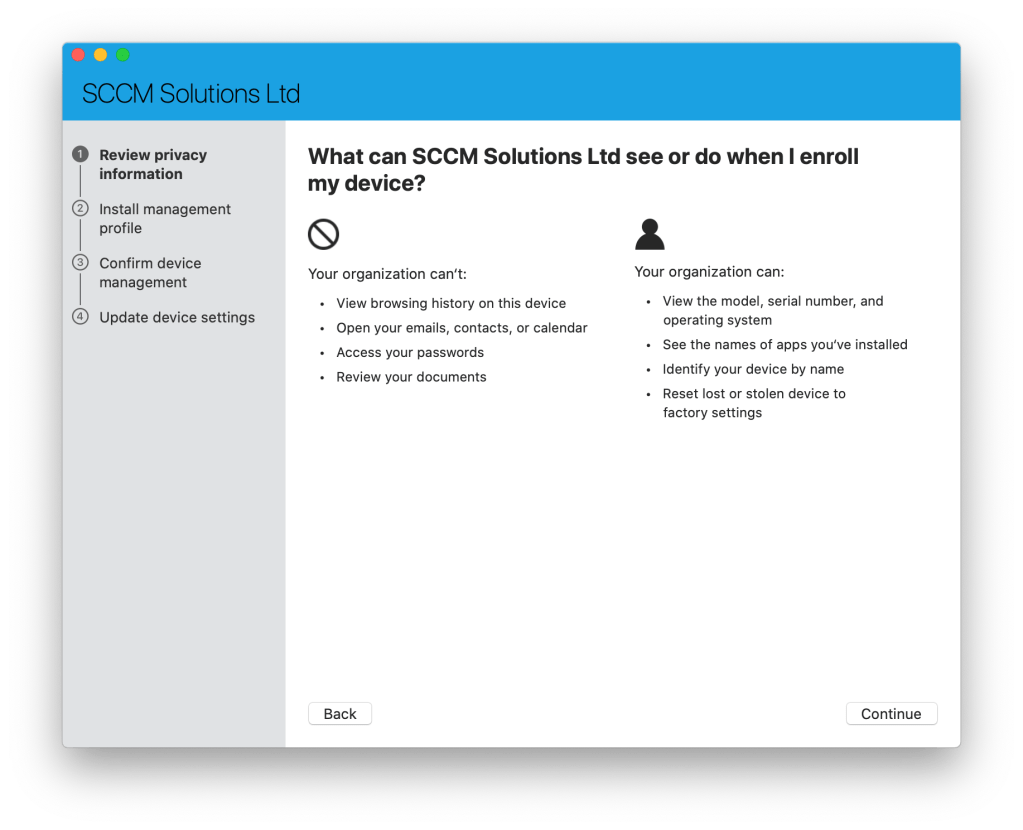
Review the privacy information and click Continue when you are happy to proceed.
Click Continue at the Confirm device management screen.

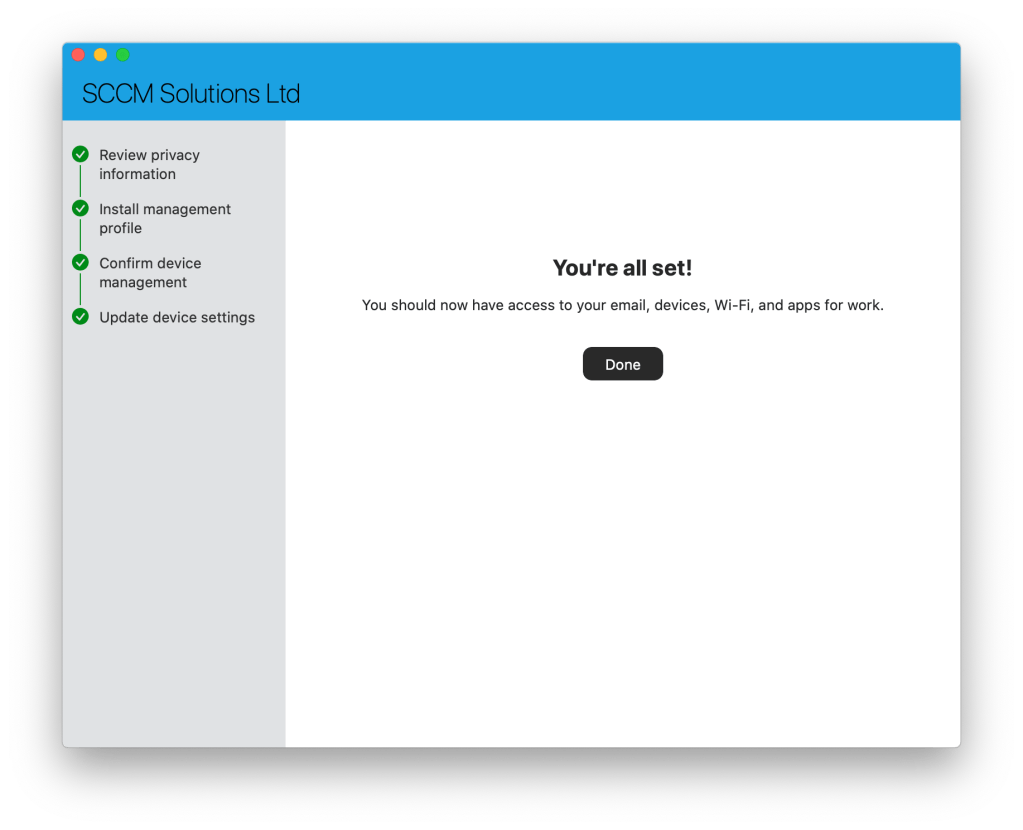
The process will complete. Click Done.
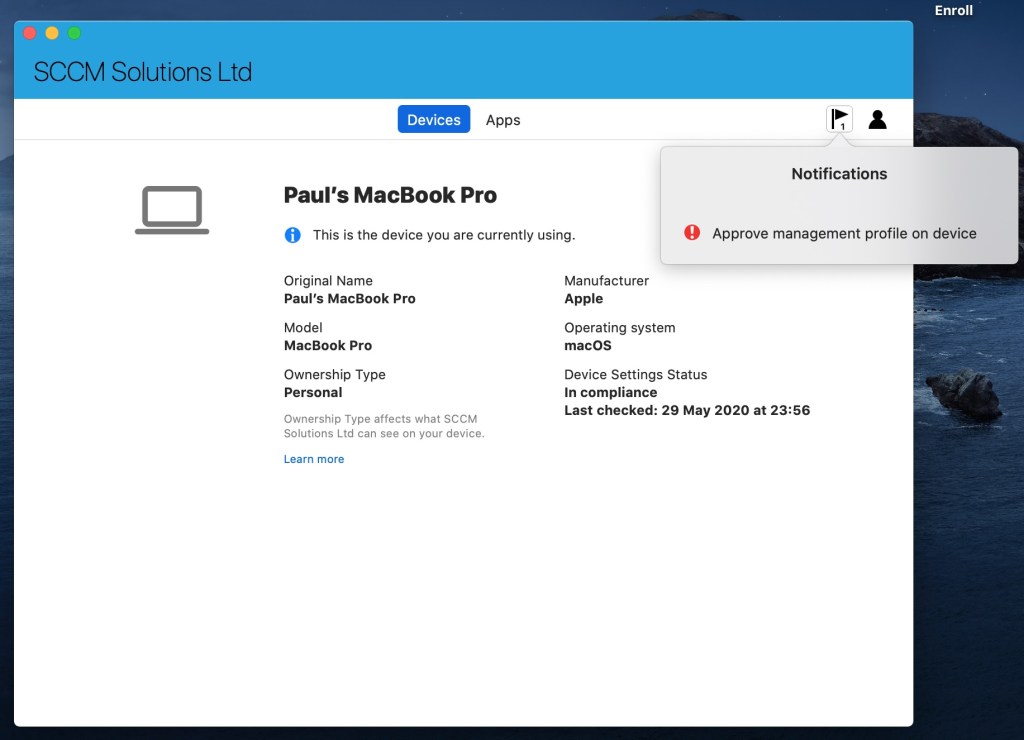
You’ll receive a Notification to Approve the management profile on the device. Click the notification.
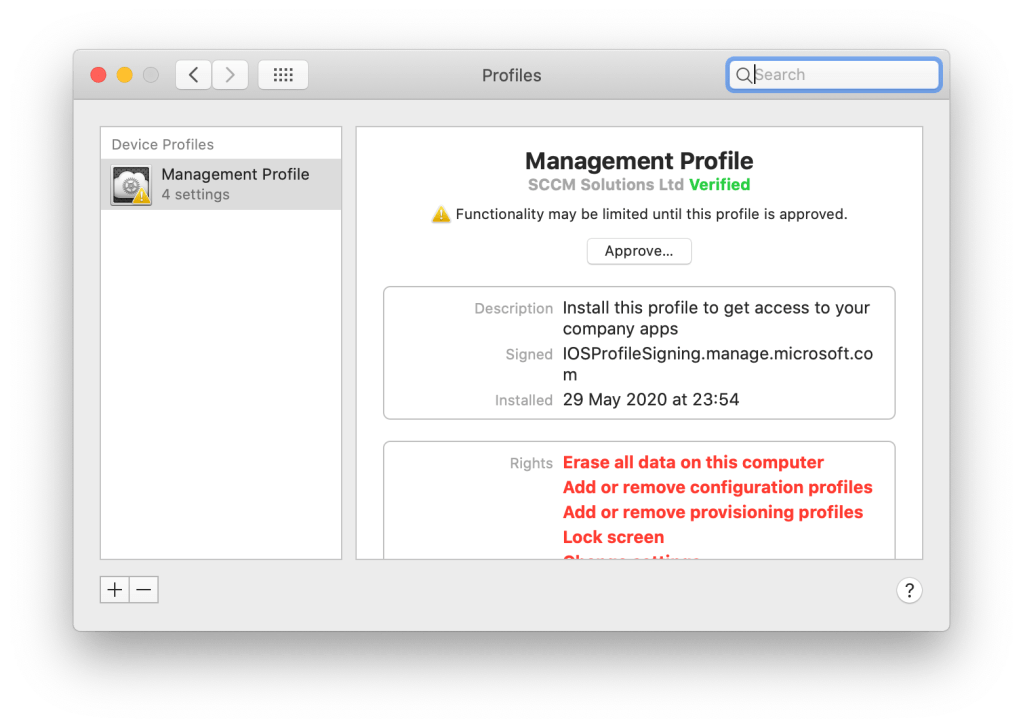
To confirm device management click Check Settings.

Take a note of the description and rights details. When happy click Approve.
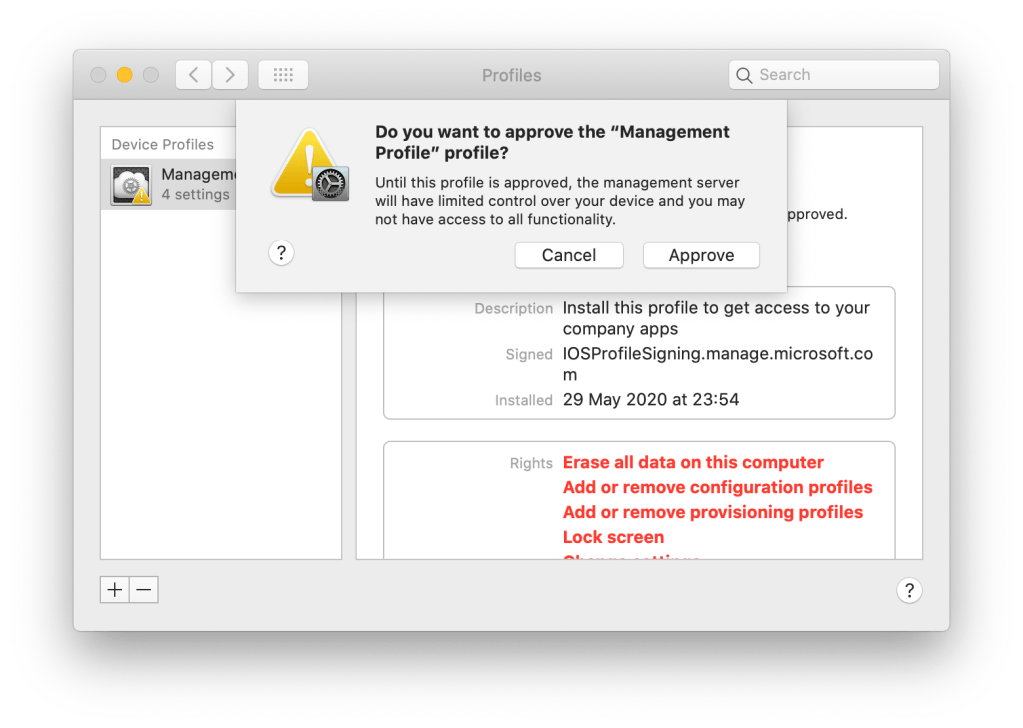
Click Approve again.
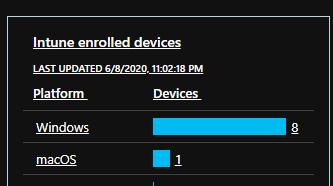
This will complete the process. You’ll now see a macOS device in Intune.

Be sure to take a look at the other blog posts in the series:
- #1 Enable password reset for users
- #2 Push out your customised Start Menu
- #3 Disk Encryption
- #4 Deploying a Win32 app
- #5 Intune session from Charlotte Systems Management User Group
- #6 Configure OneDrive and KFR
- #7 Deploying the Edge Browser
- #8 Introduction to Device Restrictions
- #9 Manually enrolling a Windows 10 device into Intune
- #10 Applying App Protection
- #11 Deploying a PowerShell script
- #12 Deploying Microsoft Edge Stable via the MEM Admin Center
- #13 Uninstalling Microsoft Edge Beta
- #14 Enabling Credential Guard on your endpoints
- #15 Managing Windows Updates
- #16 Intune session from West Michigan Systems Management User Group
- #17 Uninstalling Default Apps using the Store for Business
- 18 Implementing Microsoft Defender Application Control policies
- 19 Your First Conditional Access Rule

The Company portal app is not on the App Store for macOS…