In Part 1 of the Parallels Mac Management for SCCM series I installed the Parallels Configuration Manager Console Extension. I installed this on my site server ‘ConfigMgr’.
Part 2 focused on the installation of the Parallels Proxy which I installed on a remote server called ‘Parallels’ which I intend to use to install the Parallels roles.
Part 3 of the series concluded the ‘role’ installation, namely the NetBoot Server and OS X Software Update Service.
Part 4 of the Parallels series focused on getting the Parallels Mac client onto a Mac OS X device.
In Part 5 of the series I will show you how to deploy an application down to a Mac OS X device, install it via the app portal and remove the application.
Set up the CMAppUtil tool
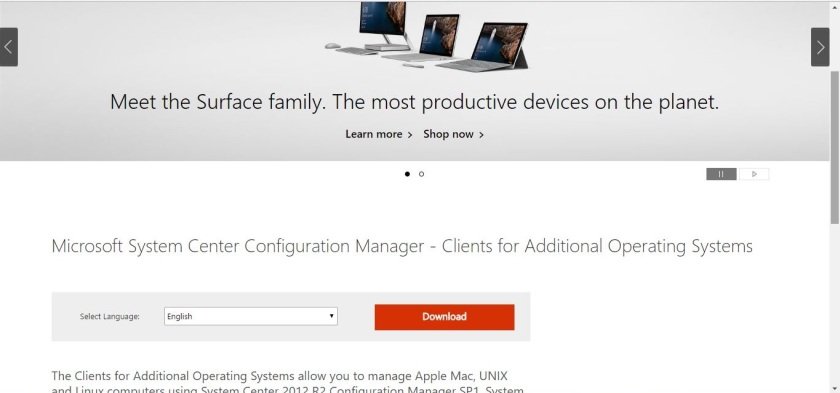
Before we can configure the application in ConfigMgr we need to convert the deployment onto a format that ConfigMgr can consume. To achieve this we need the CMAppUtil tool provided by Microsoft as part of the ConfigmgrMacClient.msi. This can be downloaded from here. Click the Download button.
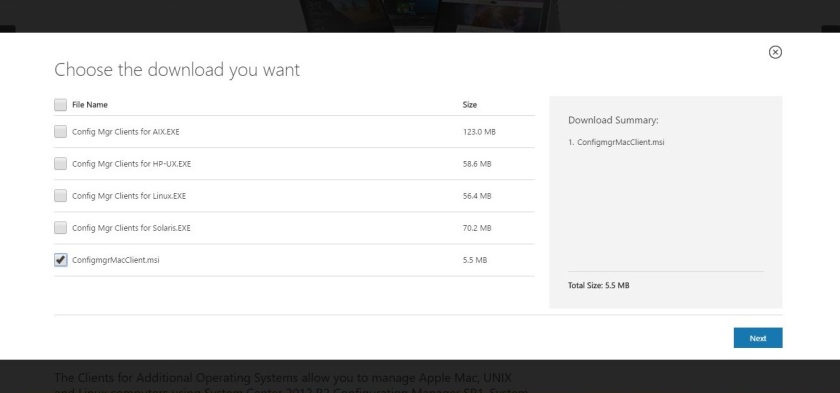
Select the ConfigmgrMacClient.msi and click Next.
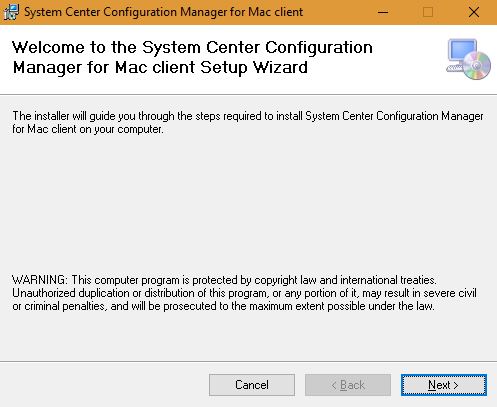
Once downloaded run the MSI on a Windows device to extract the contents of the file into a dmg file that can be used on a Mac device. Click Next.
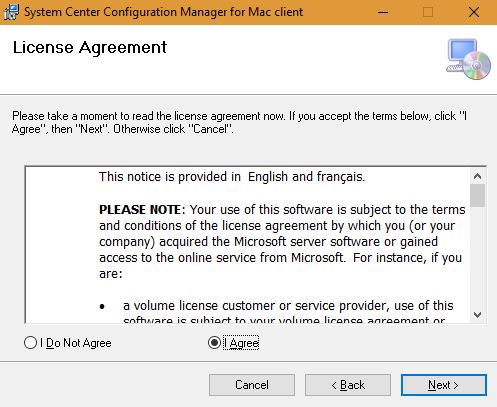
Agree to the licence agreement and click Next.
Make a note of the location the files will extract to and click Next.
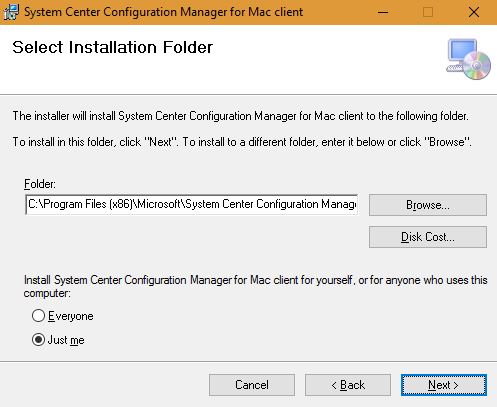
Continue through the wizard to completion. Browse to the location C:\Program Files (x86)\Microsoft\System Center Configuration Manager for Mac client if you have installed into the default location. Copy the macclient.dmg over to a Max OS X machine.

Once the dmg file is on the Mac, double-click the file to see its contents. Extract the Tools folder from the file by dragging and dropping it to a folder on your Mac.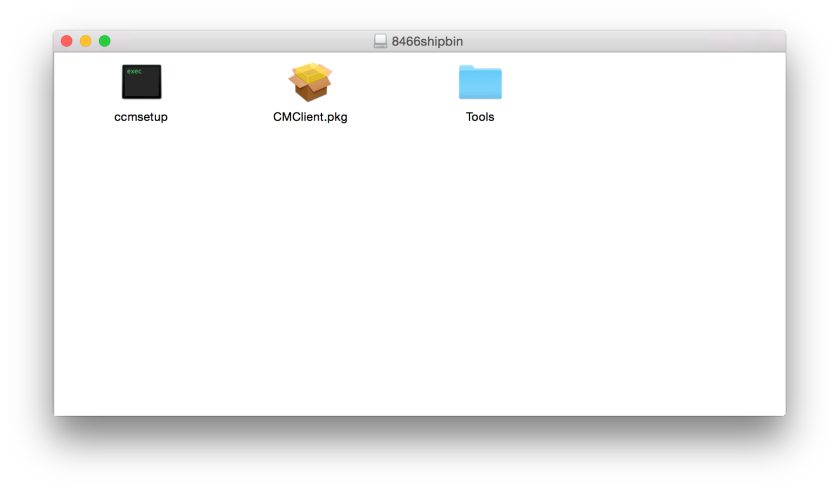
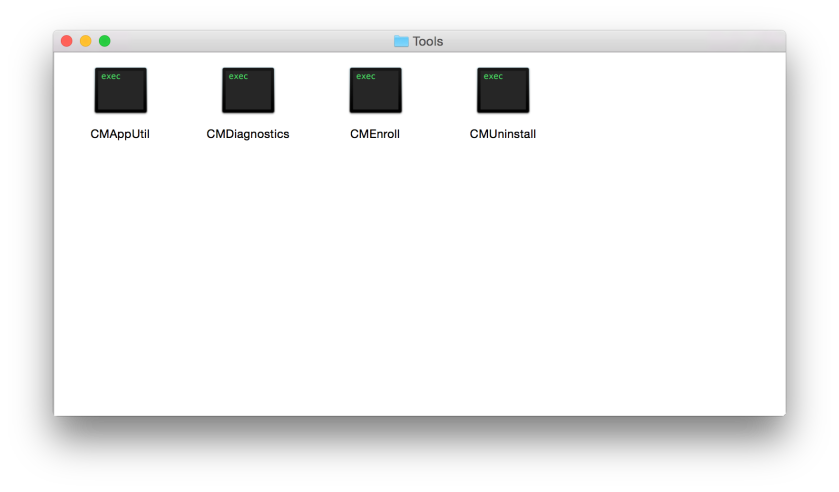
The CMAppUtil is the utility we will use to convert a Mac package into a .cmmac file that ConfigMgr can use. CMAppUtil supports the .dmg, .pkg, .mpkg, .app file formats.
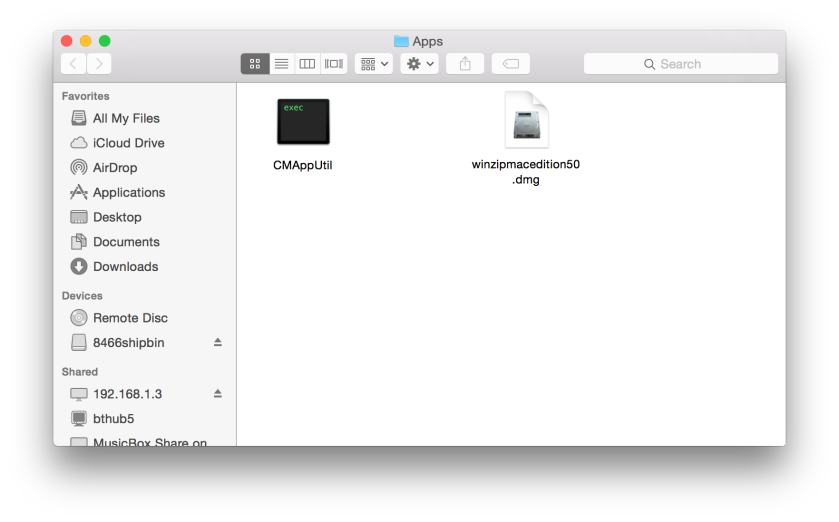
In this example, I have downloaded the WinZip 5 for Mac application and placed the .dmg file for the WinZip install into the same folder as the CMAppUtil file.
Converting to .cmmac
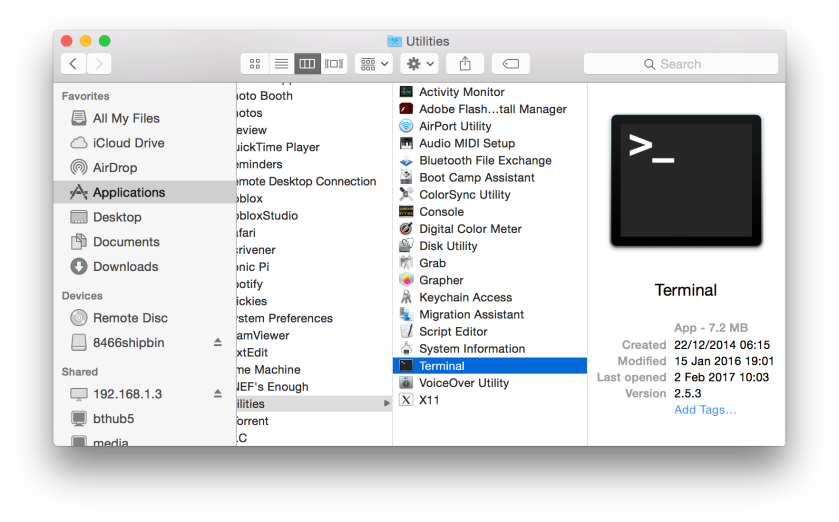
Load up Terminal on the Mac by launching Finder and navigating to Applications>Utilities.
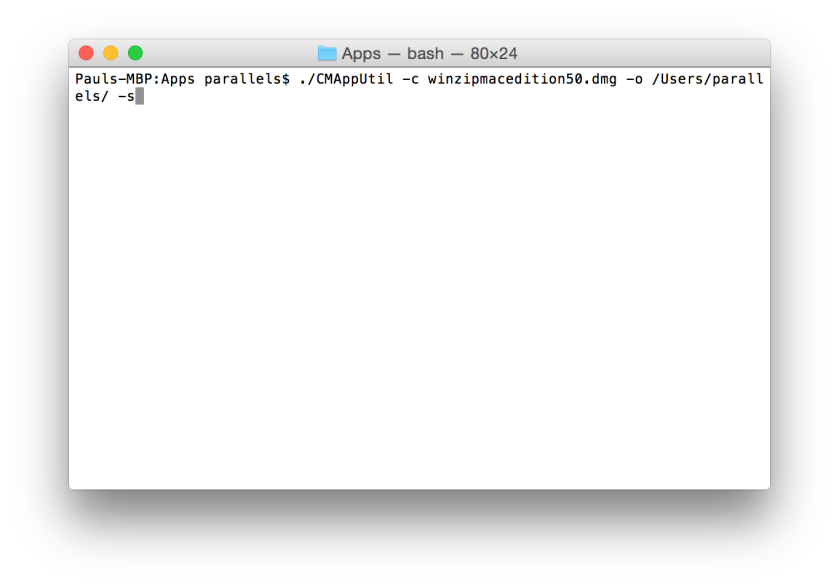
To convert a dmg to the .cmmac format use the following command:
./CMApputil –c <filename>.dmg -o <output path> -s
The -c option specifies the source file being converted. The -o option specifies the output path. The -s is not required but I used it to fix some issues extracting out the content of the .dmg and is worth including.
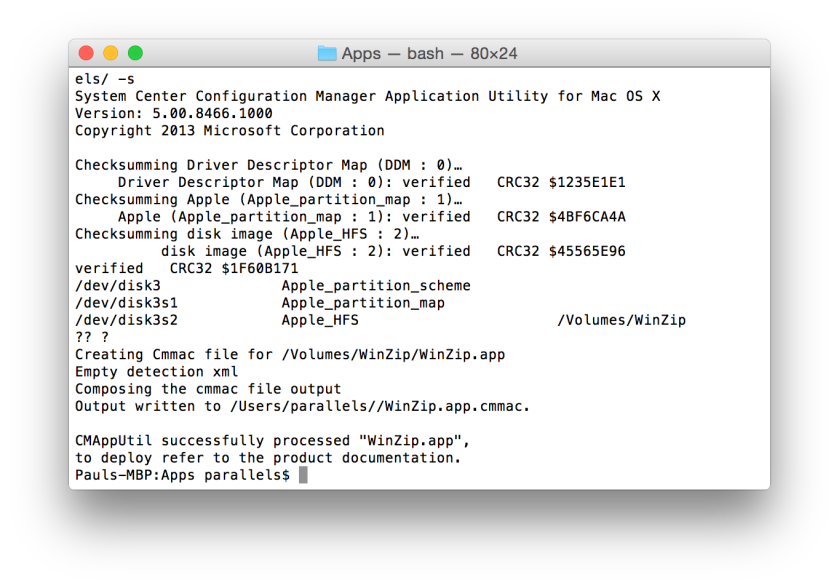
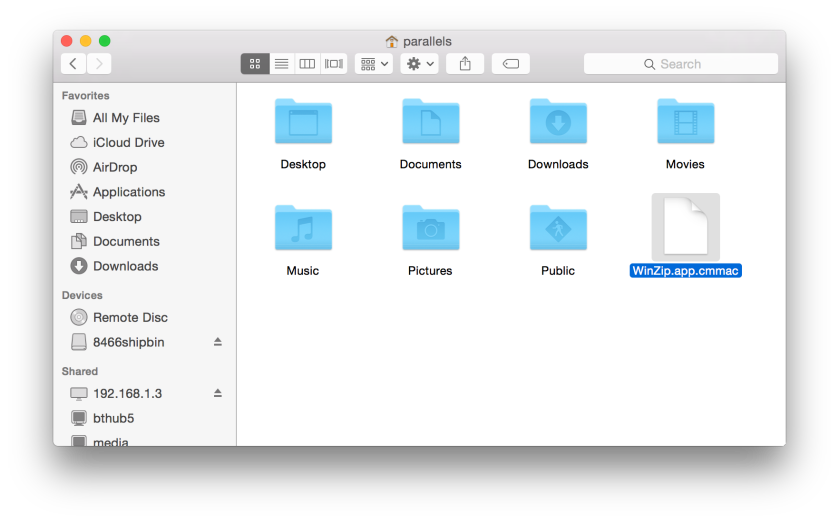
After the process has completed you will have a .cmmac file that can be consumed by ConfigMgr. Copy the .cmmac over your ConfigMgr source content share.
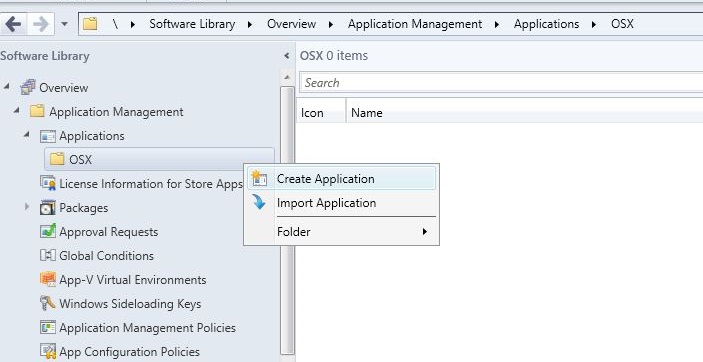
Creating the application
In the ConfigMgr console, go to the usual location where you would create an application, in the Software Library>Overview>Application Management>Applications node. Right click and choose Create Application.
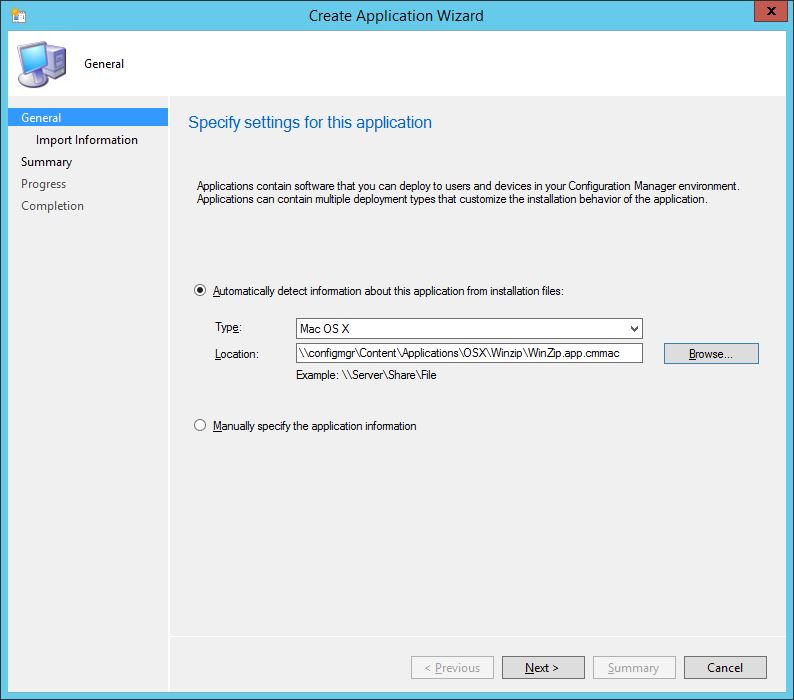
In the Create Application Wizard choose the Automatically detect information about this application from installation files checkbox. From the Type drop down choose Mac OS X and then enter the network location for the .cmmac file. Click Next.
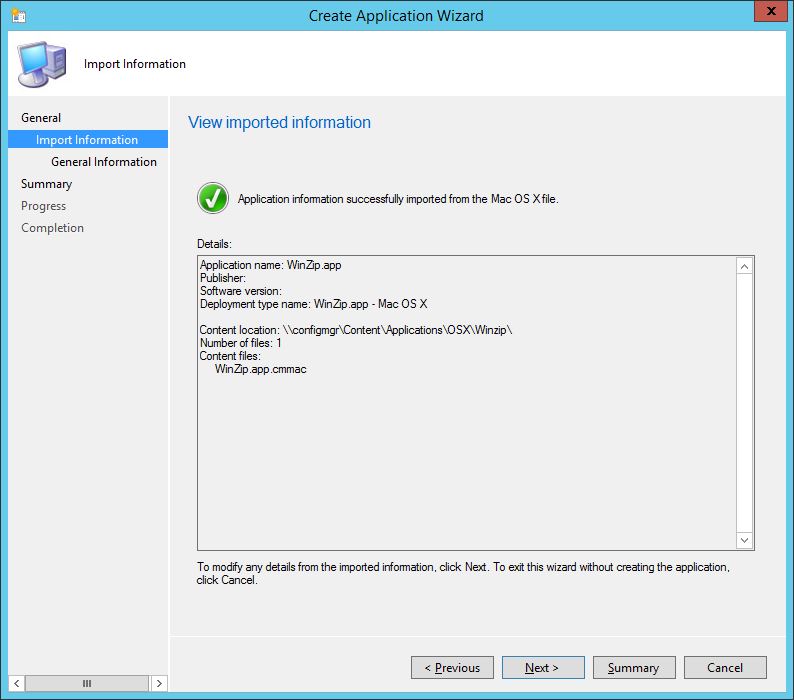
Click Next.
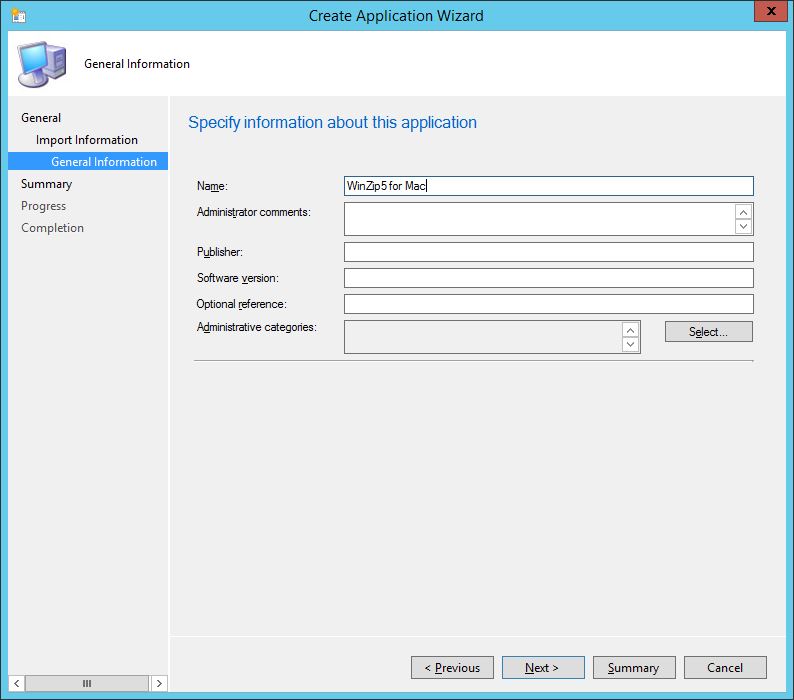
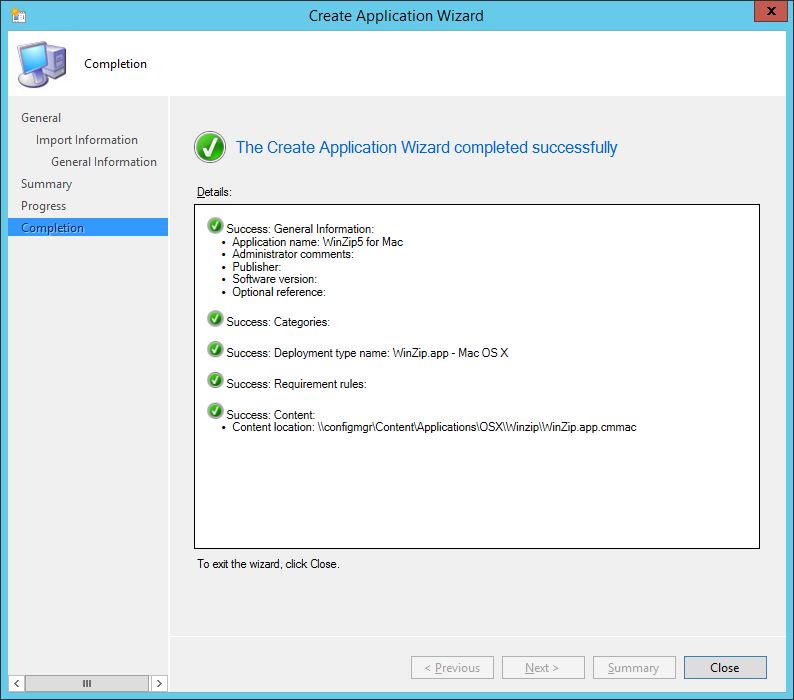
Enter the relevant information about the application and click Next.
Click Close to complete the wizard.
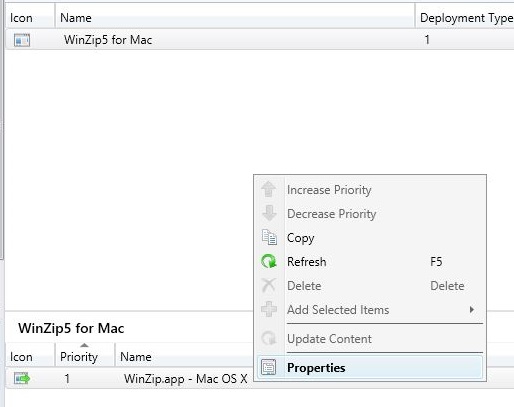
To specify the command that you want to use to install, and optionally uninstall, the application on a Mac, right click the Deployment Type and select Properties.
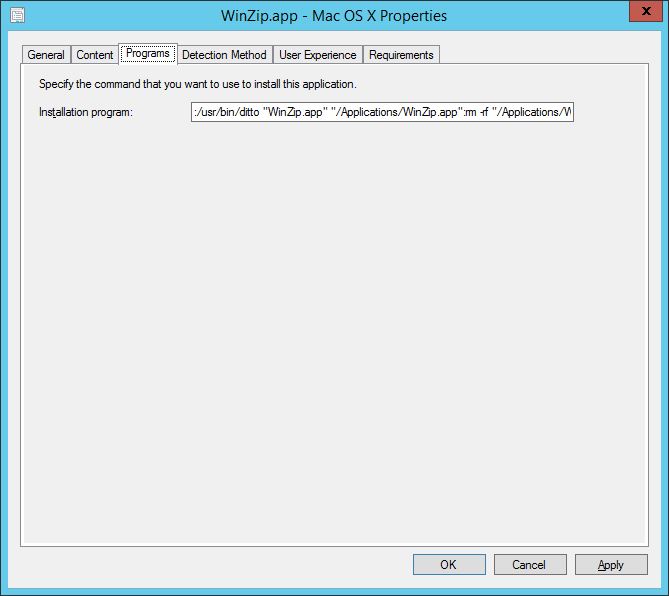
On the Programs tab enter a command to install and remove the application.
Use the following syntax:
:<Installation command>:<Uninstallation command>:
As an example, the following command line contains the installation and uninstallation commands for Firefox (note the colon characters, which are required):
:/usr/bin/ditto “Firefox.app” “/Applications/Firefox.app”:rm -rf “/Applications/Firefox.app”:
The first section :/usr/bin/ditto “Firefox.app” “/Applications/Firefox.app”: installs the Firefox.app into the Applications/ folder.
The second section rm -rf “/Applications/Firefox.app”: removes Firefox from the Mac device.
Therefore, for my installation of WinZip, I have used the command
:/usr/bin/ditto "WinZip.app" "/Applications/WinZip.app":rm -rf "/Applications/WinZip.app":
Distribute the content to a Distribution Point and then right click the newly created application and choose Deploy. Target the deployment at a Mac based collection, here I have chose the All Mac OS X Systems collection.
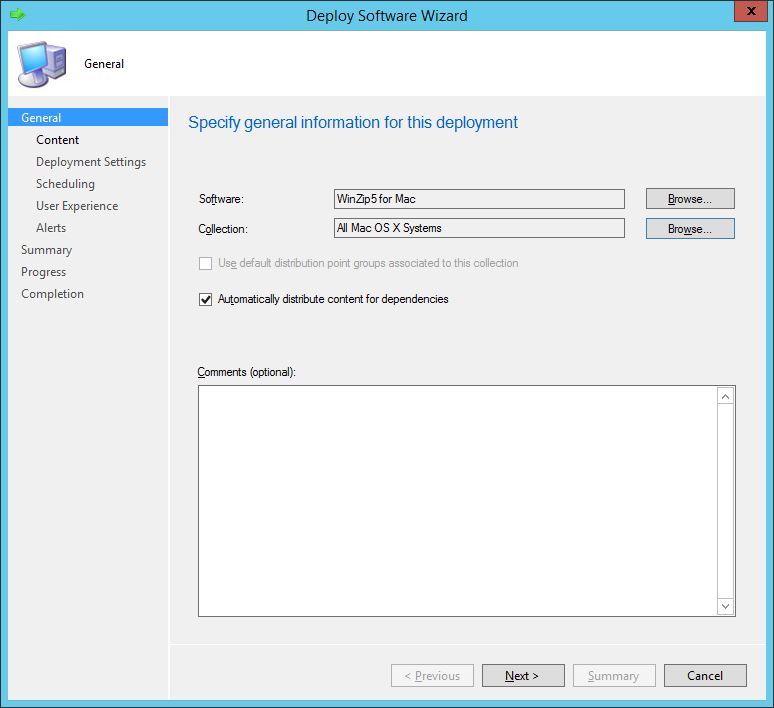
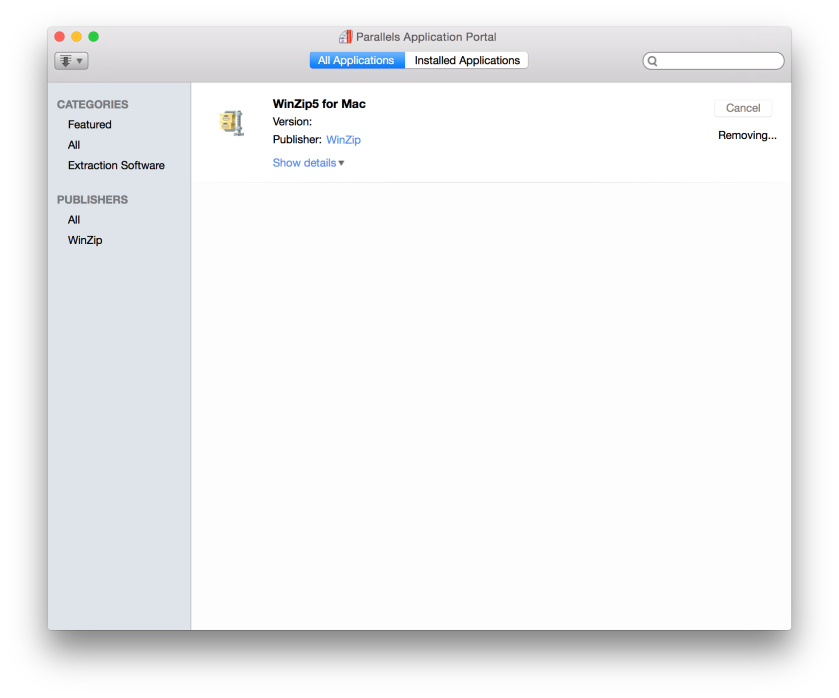
Since I am going to use the Parallels Application Portal, I will make the application available.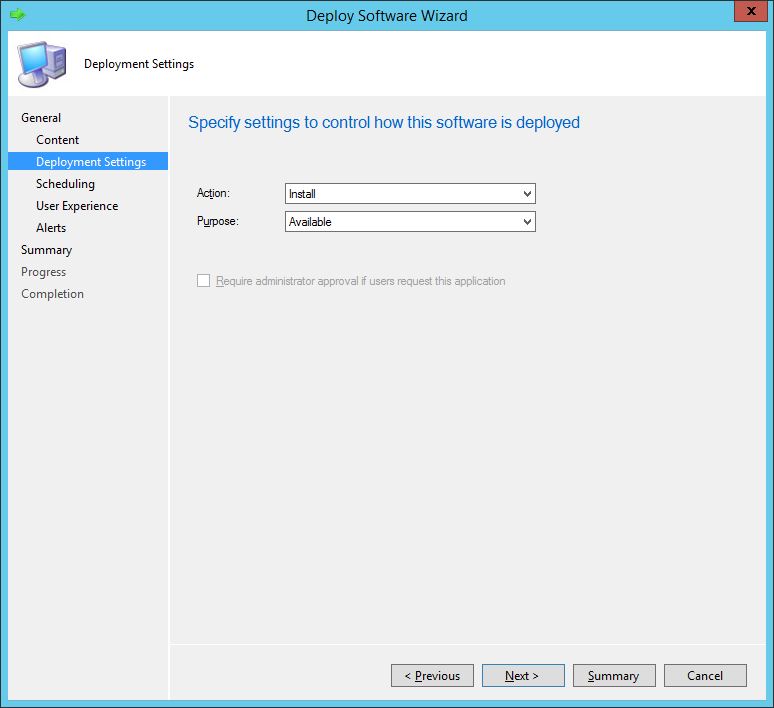
Installing and Removing via the Parallels Application Portal
Once policy has applied to the Mac OS X device, remember this can be forced by clicking Connect in the Parallels Mac client or you can wait the default of 60 minutes for updates to be checked automatically, then head over to the Parallels Application Portal.
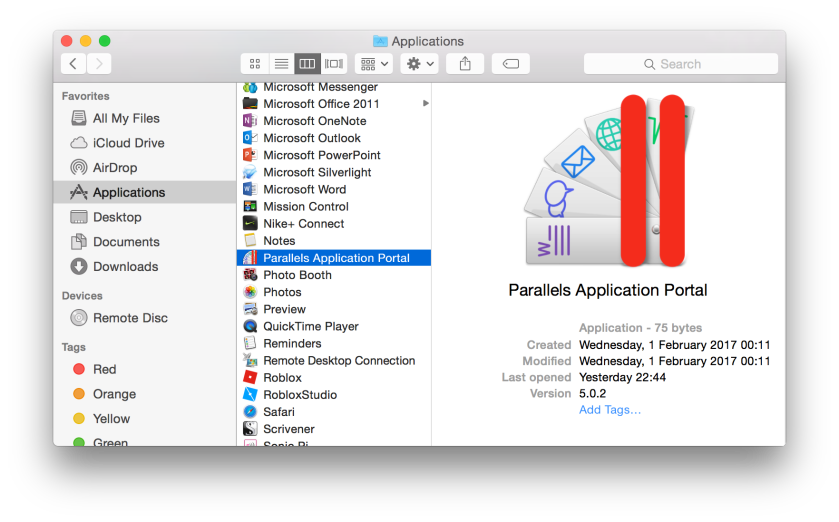
The portal is located in the Applications folder in Finder.
The application will be available to you. Click Install.


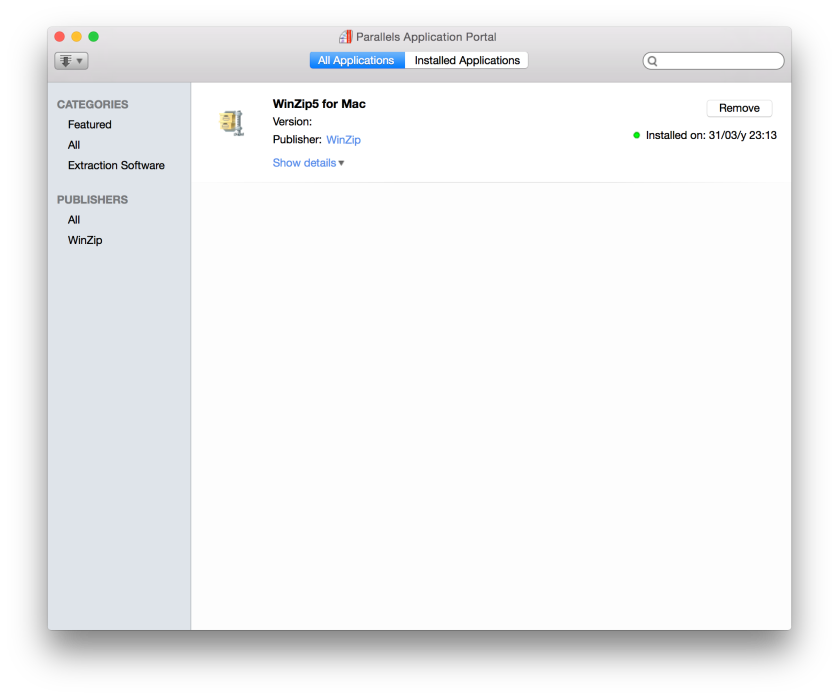
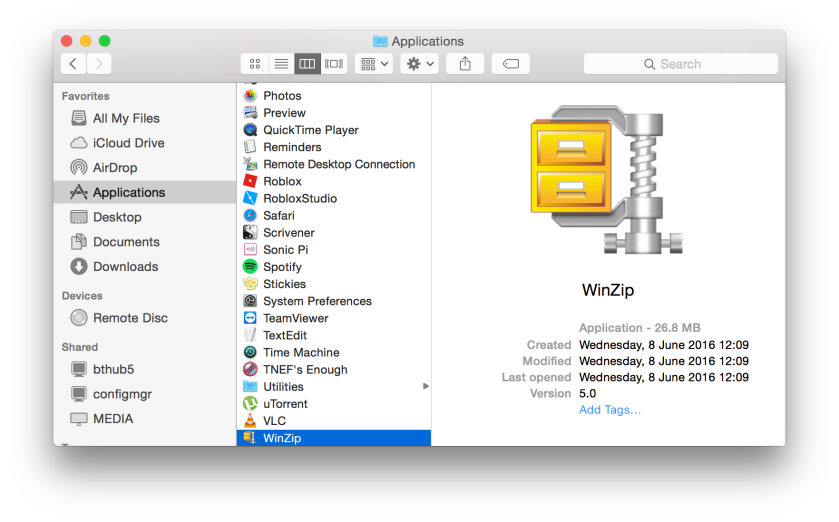
Once installed, the application will be available to you in the location you installed it to.
To uninstall the application, click the Remove button in the portal.

If you receive any failures, or just want to have a nosy in the log files then the pma_agent.log file located in /Library/Logs is the one to check. The log snippet below, for example, showed a problem locating the content on the DP. A quick redistribution of the content to the DP fixed the problem.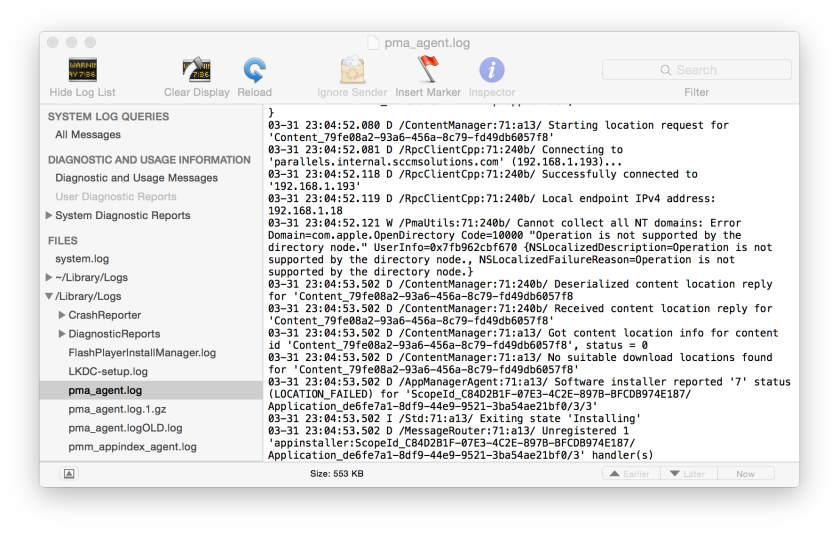
In Part 6 of the series, I take a look at deploying packages via Parallels. Packages can be used in Task Sequence deployment in the Parallels Mac Management product, whereas applications cannot, so it is worth looking both application models.

Look forward to the package post. I hope you will continue adding post on creating Boot Image and OS X image for test deployment.
That’s the plan Ram
Not a lot of Parallels material out there, so great to see you dig into this. Thank you for the posts.
Hi Paul – Just completed the following:
1. Capture Boot Image
2. Capture OSX Image
3. Distributed OSX Image
4. Deployed OSX image to VM
Pending:
1. Parallel Package Creation
2. Software Update
I took screen shot of Boot and OSX Image capture process – Interested parties – check out below links:
https://drive.google.com/file/d/0B__euomSLpQTQWREdFYtaUhpams/view?usp=sharing
https://drive.google.com/file/d/0B__euomSLpQTd3o0NkxxanlTSkk/view?usp=sharing
Ram
Hi Ram,
It is a great tutorial work by making screenshots as commonly seen in In-Guide by Paul. Very much liking!!!
I tried to deploy captured image to the mac machine and when booting the machine from the network (enter the N key), it prompts for login credential before being taken to the task sequence list. I had to enter login info and manually select the task sequence. Is there a configuration step that allow automated deployment, skipping these steps?
If 200 mac machines need to be imaged, manually entering login credential and selecting task sequence for each machine render too much work and appear not be zero-touch OS deployment. HELP!!!!!!!
THANKS FOR THE INPUT HERE!!!!
I’m not aware of a way to do this but i will ask Parallels and find out.
As Paul indicated – it would be better to approach Parallels Support and seek their guidance on how to ZTI task sequence.
I am going to prepare another document on how to deploy as a package (Office 2016). Will soon post at Google Drive.
Ram
Cheers Ram.
Truong – I have asked the question and I’m just awaiting a response on this
The response from Parallels was
‘At the moment it is not possible to change.
It would be a feature request to change.’
Cheers
Paul
Here is another document on how to create a package from .dmg – the steps are same for .iso.
https://drive.google.com/file/d/0B__euomSLpQTV0NqNWxBWWY5X1k/view?usp=sharing
Reblogged this on System Center.